Showing posts with label recipes. Show all posts

Thursday, February 24, 2011

Chocolate Guinness Cake


So this crudely decorated cake actually turned out to be ridiculously delicious.

My friend Chad had a recipe for a chocolate Guinness cake, and since he knows how much I love to bake, he asked me to make it for him (and he bought all the ingredients, so I couldn't say no).

Just trust me on this one. It's got beer in it, so you're probably thinking, this cake is going to be awful. At least, that's what I thought. But surprisingly enough, it turned out to be a really good cake. It was really rich and moist, like the recipe said it would be...  but I did make a couple of changes.

First of all, I didn't have a tube pan, so I baked the cake in two 9" round pans, and decreased the cooking time (I don't remember exactly how long, since I just estimated, but it definitely was not for an hour) until a toothpick stuck in the cake came out "mostly" clean (see step 3 in the recipe).

Second, I iced the entire cake, even though the recipe says to "to capture the essence and simplicity of a pint of Guinness"by only icing the top. But since I made a layer cake, and not a bundt-type cake, I just iced it like a layer cake should be iced. However, this cream cheese icing is not your average decorator's icing, so there was pretty much no way to make this look pretty in the traditional, smooth sense. What I'm saying is, I just slapped the icing on there. It worked though, and even the pros (if I can call myself that) get lazy. And since I was baking in Chad's kitchen, and didn't have any decorator's tools with me anyway, I wrote "THE GAME" on top of the cake with a knife.

The point is, it tasted good. And that frosting I was just complaining about? It had whipped cream and cream cheese in it, which is why the cake was hard to frost, but the combination was light and fluffy and honestly counterbalanced the rich chocolate flavor of the cake very nicely. Next time I'll just have to find myself a 10" angel food pan and make my cake as pretty as the one on Design*Sponge.  :-)

Sunday, November 7, 2010

Banana Chocolate Cake Balls


Hello, everyone! It's your favorite MIA baker, back with some more tasty tidbits!

Just wanted to share my recent cake ball shenanigans... banana chocolate!

Sorry about the crappy pictures...they were taken with my camera phone and/or a webcam. I wasn't prepared with my real camera because I was dog/house sitting with my roomie, and the cake ball thing was sorta spontaneous. I said "hey, doesn't banana cake balls covered in chocolate sound amazing??" and she said "we're going grocery shopping!" We turned on some Christmas music, and it happened just like that.


And I know you're excited to know what my recipe is, so let me share it with you:

A box of banana bread (I used whichever brand didn't have walnuts in it, since roomie is allergic...Pillsbury, according to the picture below), 2 bananas, chocolate almond bark, cream cheese icing, and yellow sprinkles. The sprinkles are the important ingredient, of course.


Just follow the recipe on the box (honestly, homemade banana bread would've been 100000x better, but sometimes you gotta work with what you have) and add 2 sliced up bananas to the batter for a better banana-y flavor. I suppose if you want to add walnuts, you can.

I used a cream cheese frosting to mix it up with, but you really don't need a lot, because banana bread is already really moist.

Finally, dip it in the melted chocolate almond bark. Or get all fancy and use legit tempered chocolate. I really wish I had the knowledge and patience to make tempered chocolate, because the almond bark just isn't cutting it for me. I'm sorry I'm such a chocolate snob, and if you want to continue to use almond bark, by all means do. I probably will be too, until I get my own bakery, and then I'm bringing out the big guns.

Just a picture of me being silly.

Sunday, September 12, 2010

Awesome Cream Cheese Icing Recipe


Remember those fugly peach cupcakes that I made?

And how delicious they tasted?

Well, I guess you remember how I told you they were delicious, since I couldn't actually hand you a cupcake through the computer screen. (Which is a shame, because think of how much money we'd all save on shipping!)

Anyway, part of the deliciousness was attributed to the icing I used on top. It's a combination of whipped topping and cream cheese icing, in the best way possible.

I found the recipe on Allrecipes.com and I think the only thing I did differently was whipping the cream in a blender, since I used my stand mixer to mix the sugar & cream cheese. Also, I used plain ol' regular granulated sugar (extra fine granulated sugar, to be exact!) not confectionary/powdered sugar. I thought the recipe was a little ambiguous about that, since granulated and powdered sugar are both white.

Whipped Cream/Cream Cheese Frosting

Ingredients

  • 5 ounces cream cheese
  • 2/3 cup white sugar
  • 1/8 teaspoon salt
  • 3/4 teaspoon vanilla extract
  • 1 cup heavy whipping cream


Directions

  1. In a small bowl (or blender) beat whipping cream until stiff peaks form; set aside.
  2. In a large bowl combine cream cheese, sugar, salt and vanilla. Beat until smooth, then fold in whipped cream.
When you're using the blender, just make sure you leave the center part of the lid off, so that air can be incorporated into the cream, don't overbeat (just pulse it for a few seconds at a time), and you'll know it's done when there are stiff peaks.

Finally, instead of folding in the whipped cream, I switched out my mixer's beater for the whisk and whisked it all together on a higher speed. The frosting was a terrible consistency if you were piping, but considering that I was just slapping it on with a spatula, it worked out perfectly. Don't forget it needs to be refrigerated!

The icing was an amazing complement for the fruity/cinnamony cupcakes I made, and I'm gonna go out on a limb and say that if you need a light, not-too-sweet-or-overpowering frosting, this is the one to try! :)

Oh, and the recipe made enough for about 2 dozen cupcakes.

Monday, September 6, 2010

Oatmeal Cookies & No Bake Cookies


Yesterday, my roommate and I had oatmeal for breakfast.

When you have oatmeal for breakfast, what does that make you think about?

Making cookies?

Because that's exactly what Joy and I decided!

First up is the oatmeal chocolate chip cookie (as much as I love oatmeal, I can't stand oatmeal raisin cookies. Bleh! But chocolate chip? That's where it's at!)


Ingredients
  • 1 cup butter
  • 3/4 cup packed brown sugar
  • 1/4 cup white sugar
  • 1 teaspoon vanilla extract
  • 1 1/2 cups all-purpose flour
  • 1/2 teaspoon salt
  • 1 teaspoon baking soda
  • 1/4 cup boiling water
  • 2 cups quick cooking oats
  • 1/2 cup raisins (optional)
  • 1 1/2 cups semisweet chocolate chips

Directions
  1. Beat butter or margarine, sugars and vanilla until light and fluffy. Add flour and salt, mix well.
  2. Dissolve baking soda in boiling water and add to mixture. Stir in rolled oats, raisins and chocolate chips.
  3. Drop by teaspoonful onto ungreased cookie sheet. Bake at 350 degrees F (175 degrees C) for 10-12 minutes. Don't over cook. (There are no eggs in this recipe, I didn't forget to type it down).
Ta-Da! I think if I make these again, I'll find a way to use leavening that doesn't involve boiling water, because it's hardly worth it to boil 1/4 cup of water (or 2 tablespoons if you half'd the recipe like I did).

And next up are the no-bake cookies that Joy suggested. The only change we made this time was used dark cocoa powder, since it's all we got.

Ingredients

  • 1 3/4 cups white sugar
  • 1/2 cup milk
  • 1/2 cup butter
  • 4 tablespoons unsweetened cocoa powder
  • 1/2 cup crunchy peanut butter
  • 3 cups quick-cooking oats
  • 1 teaspoon vanilla extract

Directions
In a medium saucepan, combine sugar, milk, butter, and cocoa. Bring to a boil, and cook for 1 1/2 minutes. Remove from heat, and stir in peanut butter, oats, and vanilla. Drop by teaspoonfuls onto wax paper. Let cool until hardened.

Saturday, August 28, 2010

How Do Fortunes Get Inside of Fortune Cookies?

I have no idea, but look what I made this week! ;)

This is me, holding a tray of delicious cookies. Just a Betty Crocker mix, but obviously with homemade icing (recipe at the bottom). And I didn't have any cookie cutters! =(

Sarah got me a triple stacked cooling rack for my birthday. It's amazing. Everything I've ever wanted in a cookie rack and more (yes, I called it a cookie rack. Cookie/cooling, whatever. It all works, right?). Also note my awesome yard-sale knife set on the right. That's come in handy, fo sho.

And this is Joy, holding the wonderful baked goods that she sprinkle-fied.


And here we have a close up. I have a bunch of colored sprinkles and we just had fun making colorful cookies.

For our final picture is the close up on tray #2, with some cake balls peeking out on the left and Joy's awesome nail polish on the right. Oh, and you wanted my icing recipe, didn't you?

Well here it is!

Ingredients

  • 4 cups confectioners' sugar
  • 1/2 cup shortening
  • 5 tablespoons milk
  • 1 teaspoon vanilla extract
  • food coloring

Directions

  1. In a large bowl, cream together the confectioners' sugar and shortening until smooth. Gradually mix in the milk and vanilla with an electric mixer until smooth and stiff, about 5 minutes. Color with food coloring if desired.

Recipe is from Allrecipes.com, thanks to Kathy Brandt. The only problem I had with the icing (and this might be due to user error) is that it didn't harden up enough for me to stack them. I also halved the recipe since I didn't have that many cookies.

Wednesday, August 11, 2010

Recipes and Reviews

From left to right: Cookies & Cream; Mint Chocolate; Cookies & Cream again :)

Just wanted to share the delicious recipes that I made for my birthday cake.

Both recipes came from the blog, How To Eat A Cupcake, which is a pretty adorable blog, who's author (Cassie) is opening a bakery. So her other blog, Flour Child Bakery, is a favorite of mine to read too!

Back to the recipes though. First is the Mint Chocolate Chip. I added waaay more Andes chips (instead of chocolate chips) than Cassie's recipe called for. I used a cup, not 1/2 cup. And I didn't have chocolate milk either, so I used 2%. Whole would've been better, but I was working with what I had. And I only got  16 cupcakes out of the recipe.

I made a mint buttercream icing as well. I sub'd the vanilla & almond extracts in my recipe for peppermint extract. The icing tasted like those buttery after dinner mints, if you know what I'm talking about. Not too minty, but just enough that it was delicious.

For the second recipe, I used this Cookies & Cream, and I pretty much followed the recipe exactly, except that instead of 24 cupcakes, I made 12 cupcakes, and then a 2 layer 6" cake. And instead of reserving some Oreos for the buttercream, I put them all in the batter.

And for the review part, I just want to say that Duff's fondant (or should I say Fondarific?) is amazing. Yeah, it's really expensive, but it smells great, it rolls out nicely, it doesn't tear, and it covers cake beautifully. Oh, and it tastes good too. :) So my only complaint is the price. Go out and buy some.

I got a bunch of awesome baking stuff as gifts, including Duff texture tiles & cake graffiti. I'm sooo looking forward to using them. Reviews of that coming later, but I can already tell they're products I'll love!

Sunday, December 13, 2009

Pumpkin Pie Cupcakes


For Thanksgiving this year, my mom requested pumpkin cupcakes, because when she came down to visit me one weekend, they were serving some in the cafeteria.

And because they were so amazingly delicious, I decided to try my hand at making my own.

But what no one told me is that due to the crazy, abnormal amounts of rain 'round these here parts, pumpkin puree (the, shall I say, most important ingredient) is pretty much impossible to come by.

So Mom bought me some pumpkin pie filling instead.

OK. Well, I guess that can work too. It's like puree, right? Except they already threw in all the other ingredients: sugar, spices, stuff like that.

(It's This versus This, basically.)

Then Grandma told me that sweet potato has the same consistency and color, and no one would know the difference, but my dad hates sweet potatoes, and I couldn't do that to him. After all, he's the one making the turkey so I gotta be nice after all that hard work he put into making dinner.

So we substituted the puree for the pie filling, and decreased the amount of spices in half (because they already put spice in the filling, but I already said that, so anyway) but we kept the amount of sugar the same... mostly because I didn't know how much sugar was already in there, and I didn't want to risk not having enough, and I figure, hey, they're cupcakes, they can be super sweet, right?

But it turns out I worried for nothing, because the cupcakes turned out beautiful and moist. I was so, so happy that my ingredient substitution didn't go awry. The only problem we had was that one batch was slightly burned on the bottom.

Oh, and all I could find for cupcake liners were the July 4th ones and some NASCAR ones I picked up at Big Lots for my mom. But no biggy, they were still awesome and yummy and amazing.

And even though Christmas isn't a huge pumpkiny season, I bet these would taste great at your next party or family gathering as well. And if you don't like pumpkin pie (honestly, I don't), give these little guys a chance... some cream cheese icing and dash of cinnamon sugar on top and you'll find that pumpkin has become one of your very best friends. :)

Saturday, February 28, 2009

Chocolate Chip Cookie Cake Recipe


I got this recipe from recipezaar.com thanks to April J.


Ingredients
  • 1 cup butter
  • 1/2 cup sugar
  • 2/3 cup brown sugar
  • 2 eggs
  • 1 teaspoon vanilla
  • 2 cups flour, plus
  • 4 tablespoons flour
  • 1 teaspoon salt
  • 1 teaspoon cream of tartar
  • 1 teaspoon baking soda
  • 2 cups semi-sweet chocolate chips

Directions
  1. Beat butter and sugars together.
  2. Add eggs and vanilla.
  3. Mix flour, salt, baking soda, and cream of tartar.
  4. Add dry ingredients to the batter and mix until well blended.
  5. Stir in chocolate chips.
  6. Spread dough into a 15 1/2 inch round pan.
  7. Bake for 20 minutes at 350 degrees.
 This is a tried-and-true recipe which literally just came out of the oven.  I'm not sure how it tastes yet, but if it's anything like the cookie dough that I licked off the spatula, then it's delicious!

Some observations that I would like to add, in case you'd like to try this recipe:
  • When I make cookies (or pretty much anything, for that matter), I always bring the refrigerated stuff to room temperature first, unless otherwise noted in the recipe.  In this case, it means that I left the eggs and butter out on the counter for a while to warm up a bit.
  • I used a 9x13" cake pan, and the cookie cake turned out really thick-- much thicker than what you normally see at the supermarket.  This is just a practice cake for something I'm making next week, but I think I'll use my jelly roll pan, or use less dough.  I don't have the exact dimentions for the jelly roll pan, but it's bigger than the pan I used this time.
  • I sprayed the pan with Pam for Baking (which smells really good, by the way) before I put the dough in it.
  • The dough is really sticky, so I just greased up my hands (clean, washed hands, of course) and used my hands to spread the dough into the pan before I baked it.  It doesn't have to be completely flat either, just try to get it as level as possible.  No need for perfectionism :)
  • When baking, the dough did rise up a little along the edges more so than in the middle.  Just thought I'd make that observation, although it was just a little thing; no big deal.
  • I baked for 25 minutes, instead of 20, because I like my cookies to be golden brown.  I think they could've gone for another few minutes, but keep an eye out so that they don't burn if you choose to go this route.
  • After taking the cake out of the oven, I let it cool for 10 minutes, ran a knife around the pan's edges, and flipped the cake out onto a cooling rack covered with wax paper.
Personally, I love cookie cake, and I hope that I can recreate that cookie goodness that comes from Publix or Kroger and make an equally (or more) delicious home-made version.  I'll let you know how the rest of the cookie cake testing goes, and until then, maybe you can try your hand at this yummy recipe. :)

(That's a big cookie!)

Saturday, December 27, 2008

Gingerbread Recipe

I've still got some leftover dough from making the Gingerbread Castle, and I plan to put it to good use by making some cute little gingerbread men and women.  Sure, Christmas is technically over, but that won't stop me from still getting into the spirit!

While I'm at work baking and decorating, I thought I'd share my gingerbread recipe, which has served me well for the past three years.  I got it from the Food Network's website:

Ingredients

  • 1/2 cup (1 stick) butter, at room temperature
  • 1/2 cup dark brown sugar
  • 1/4 cup light molasses or dark corn syrup
  • 1 tablespoon cinnamon
  • 1 tablespoon ground ginger
  • 1 1/2 teaspoons ground cloves
  • 1 teaspoon baking soda
  • 2 cups all-purpose flour
  • 2 tablespoons water

For assemblage and decoration:

  • Melted white chocolate or Royal Icing (recipe follows)
  • Gumdrops, licorice and peppermint, as desired

Directions

Gingerbread House:
In a large mixing bowl, cream the butter, brown sugar, molasses, cinnamon, ginger, cloves and baking soda together until the mixture is smooth. Blend in the flour and water to make a stiff dough. Chill at least 30 minutes or until firm.
Preheat oven to 375 degrees F.
Cut paper patterns for the gingerbread house:
Two rectangles (figs. A and B), 3 by 5 inches, to make the front and back of the house. Two rectangles (figs. C and D), 3 by 5 1/2 inches for the roof. Two pieces for the ends of the house (figs. E and F), 3 inches wide at the base, 3 inches to the roof line, and slanted to a peak 5 1/2 inches from the bottom. Four smaller rectangles (figs. G, H, I, and J), 1 1/2 by 1 inch for the roof and sides of the entryway. And one piece (fig. K), 2 inches wide at the base, 1 1/2 inches to the roof line, and slanted to a peak 2 1/2 inches from the bottom for the front of the entryway.
Roll gingerbread dough out to edges on a large, rimless cookie sheet. Place paper patterns onto the rolled out dough. With a sharp, straight edged knife, cut around each of the pieces, but leave pieces in place.
Bake at 375 degrees F for about 15 minutes until dough feels firm.
Place patterns on top of the gingerbread again and trim shapes, cutting edges with a straight-edged sharp knife. Leave to cool on baking sheet.
Place royal icing into pastry bag with a writing tip and press out to decorate individual parts of house, piping on decorations, windows, door, etc., as desired. Let dry until hardened.
Glue sides, front and back of house together at corners using royal icing. Place an object against the pieces to prop up until icing is dry (it only takes a few minutes).
Glue the two roof pieces to the pitched roofline of the house. Then, similarly, glue the sides and roof of the entryway together with icing. Attach the entryway to the front of the house.
Continue decorating the house, glueing on gumdrops, licorice and peppermint, as desired.

Royal Icing:

  • 1 pound (3-3/4 cups) powdered sugar, sifted if lumpy
  • 1 to 2 large egg whites, or substitute 4 teaspoons packaged egg whites and 1/4 cup water
  • 1 teaspoon almond extract, vanilla or lemon juice
Mix all of the ingredients together using an electric hand mixer, until the icing is smooth and thin enough to be pressed through a pastry bag with a writing tip. Add more lemon juice, if necessary.
(**I use Wilton's egg white powder and their royal icing recipe, but this gives you an alternative**)

Wednesday, December 24, 2008

Pineapple C{upside-down} Cakes

These cupcakes are so deliciously chocolately, moist, and tropical.  It's like the classic pineapple upside down cake, but better because a) there's chocolate and b) it's a cupcake.  Perfection!

The recipe is really easy too:
  • Melt a 1/3 cup of butter and mix with 2/3 cup packed brown sugar.  Spoon evenly into 24 greased (I love the Pam with flour) muffin tins.
  • Put in a tablespoon of crushed, drained pineapple (20 oz can will be enough) in each muffin tin.
  • Spoon over with the cake batter.  And it's so easy, because you can just use your favorite, yummy cake box (like I used the Betty Crocker Triple Fudge Chocolate).  And, for more pineapple-ness, use the juice that you drained out of the crushed pineapple can in the cake batter.
  • After baking at 350 degrees for 20-25 minutes (depending on your oven), run a knife around each cupcake (just in case so they don't stick) and flip them upside down on wire racks to cool.  Or you could just eat them hot, because they really are that yummy.
  • You could also put a cherry on top, but we don't have any cherries because my youngest brother eats them all.  But it would be a nice touch if you have any cherries around. :-)
If you didn't remember, I mentioned earlier that this is my entry into the Iron Cupcake: Earth challenge for December.  The awesome prizes for this year include both sweet Etsy artists and some awesome corporate prizes as well:
If you're entering this awesome challenge, don't forget to have your cupcakes submitted by today!  Good luck to everyone!

Also, as today is Christmas Eve, I would like to wish everyone a very merry, happy Christmas and I hope you all have a wonderful day!

Tuesday, September 23, 2008

Basil is Better, Chocolate is Best

I now present to you my entry into the Iron Cupcake: Earth September 2008 Competition (secret ingredient: basil)!

First, let me preface the cupcakes with some background.  Earlier in the summer, I planted a plethora of fresh herbs:  spearmint, peppermint, Italian parsley, sweet basil, oregano, and banana peppers (yes, I am aware that banana peppers aren't herbs).  However, the mints never grew. :(  Everything else did, and aside from some wimpy parsley, everything flourished.  As the season went on, I occasionally used my herbs for certain Italian dishes such as lasagna.  But I never really had a reason to eat them.  Then, alas, the weather began to get cool again and I feared that I would have no true purpose for the herbs and they would wither away and die when the frost came.  Was all my hard work for naught?  Should I have just let them die that one week when I completely forgot to water them?

No!

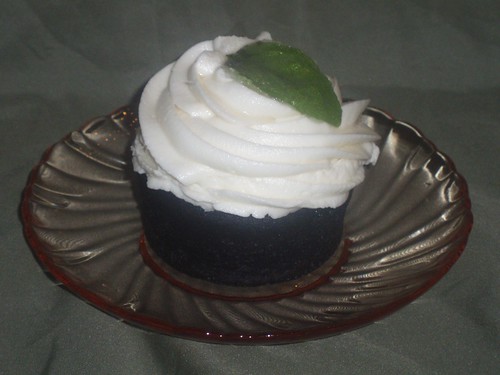
Thanks to Iron Cupcake:  Earth, my herbs have a reason to live again.  At least, the basil does.  So now I finally present to you Kelsie's Chocolate Basil Cupcakes with Cream Cheese Icing:

From Flickr: "Basil is a delicious herb but until this challenge, I never thought of putting it in dessert. When it comes to dessert, though, I'm 100% on the chocolate bandwagon. And so this cupcake was born.

The chocolate-basil cupcake is filled with dark chocolate ganache and topped with cream cheese icing and a sugared basil leave plucked fresh from my garden."

The Cupcake

Ingredients:
3/4 cup dark chocolate cocoa powder (regular is OK too but not as tasty)
1 1/2 cup boiling water
1 1/2 stick unsalted butter
1 1/2 cup granulated sugar
1 1/2 cup fresh sweet basil leaves, packed
1 tbsp pure vanilla extract
2 cup AP flour (all purpose)
1 tbsp baking powder (make sure it's not expired!)
3/4 tsp salt

Preheat oven to 375 F.  Boil the water.  While that's boiling, add sugar and basil to food processor and processor until nice and green, set aside.

When the water is boiling hot, stir together the water and cocoa powder until smooth, set aside. 

Cream together the butter and sugar/basil until light and fluffy.
Add egg and vanilla and beat until smooth.


Add flour, salt, and baking powder and beat until incorporated.

 
Finally, add cooled cocoa mixture and stir until smooth.  
Fill muffin cups (with or without liners) 1/2 full and bake 17-20 minutes (I baked for 20).  

After the cupcakes have finished baking, set aside to cool and continue...

The Ganache

Ingredients:
8 oz whipping cream
1 tbsp butter
1 oz sugar
12 oz chocolate (high quality; I prefer dark)

Heat the cream, sugar, and butter to boiling over the stove.  Pour over chocolate in a stainless steel bowl.  Let stand for 5 minutes.  Stir out from the center until smooth and ganache-like.  Let the ganache cool in the fridge until it is of piping consistency, then pipe ganache into cupcakes.


The Icing

Ingredients:
1 stick room-temperature unsalted butter
1/2 cup Crisco
8 oz softened, room-temperature cream cheese (not the low fat kind)
1 tbsp vanilla
2 lb powdered sugar
1/2 tsp salt.


Cream together the butter, Crisco, and cream cheese.  Gradually add the vanilla, powdered sugar, and salt.  This is a thick recipe so you might have to cut back on the sugar (I did).  This is a very sweet cream cheese icing.  About half the people in my family thought it was too sweet while the other half loved it.  (Funny thing, my mom was one of the ones who loved it, even though she hates sweet icings and desserts.)

I piped the icing on the cupcakes with a 1M (2110) tip and I piped a lot, but then, I like a lot of icing.  So pipe at your discretion.  However, watch out for the ganache, which might be poking back out of the cupcake!

The Sugared Basil Leaves


You need as many basil leaves as you have cupcakes, a food-quality paintbrush, granulated sugar, and corn syrup.  Clean the basil leaves and paint them with the corn syrup (you could dip them in the syrup but then you have a lot of excess) and then dip the leaves into a bowl of sugar.  Gently set the leaf on top of your cupcake, and you're done!
---------------
More About Iron Cupcake: Earth

If you've ever seen Iron Chef on the Food Network, then you know what this competition is about:  a bunch of cupcake fanatics compete to win the Challenge by baking, you guessed it, a cupcake with the secret ingredient.  This month's ingredient was Basil (of course)!

Anyone can enter the competitions, just go to the Iron Cupcake blog to sign up.  Oh, and anyone can vote, too!  Voting will begin on Sunday, September 28th at No One Puts Cupcake in a Corner.  So please be sure to cast your vote for your favorite Basil Cupcake.  Hopefully, my cupcake will be your favorite, but the competition is tough!

Before I forget, too, there are some awesome prizes provided by the following awesome people and companies:
Etsy artist Metal Sugar
Head Chefs by Fiesta Products
Karen Tack and Alan Richardson, authors of Hello Cupcake
Cupcake Courier
Jessie Steele Aprons
Taste of Home

So that wraps up my very long post about my Iron Cupcake: Earth cupcakes.  If you have adventurous taste buds, I encourage you to try these unique and earthy but tasty cupcakes, and don't forget to share the cupcake love by voting on your favorite!

Monday, August 25, 2008

Fun Food

Technically speaking, none of the following has anything to do with cake baking/decorating and what have you.  But it is fun, therefore, I shall post.  Enjoy the pics and recipes!

Fun Food #1:  Deviled Eggs


My little sister loves deviled eggs.  And what's not to love?  It's like egg salad, but not as messy (unless you're the one making them...).  And they're fun to decorate, too.  I didn't have a recipe for these, but it's pretty basic:
  • Hard-boil the eggs.
  • Let the eggs cool down (I use ice water)
  • Peel off the shell and cut the eggs in half
  • Scoop out all of the yolks and put them into a bowl
  • Add mustard and mayo to taste and mix it all up.
  • Use a piping bag with star tip (or one of these fancy things) and pip the mix into the eggs.
  • Sprinkles with paprika and top with parsley (I used it fresh from my herb garden)
  • Ta-Da!
Fun Food #2:  Cream Cheese Penguins

Admit it.  These guys are adorable.  Not to mention tasty.  I made them for our Jonas Brothers CD Listening Party/Olympic Synchronized Swimming Party.   Here's the recipe from allrecipes.com:

INGREDIENTS 
  • 18 jumbo black olives, pitted
  • 1 (8 ounce) package cream cheese, softened
  • 18 small black olives
  • 1 carrot
DIRECTIONS 
  1. Cut a slit from top to bottom, lengthwise, into the side of each jumbo olive. Carefully insert about 1 teaspoon of cream cheese into each olive. Slice the carrot into eighteen 1/4 inch thick rounds; cut a small notch out of each carrot slice to form feet. Save the cut out piece and press into center of small olive to form the beak. If necessary cut a small slit into each olive before inserting the beak.
  2. Set a big olive, large hole side down, onto a carrot slice. Then, set a small olive onto the large olive, adjusting so that the beak, cream cheese chest and notch in the carrot slice line up. Secure with a toothpick.
We have a lot of cream cheese at our house since they have Bagel Fridays every week at my Dad's work, and he brings home leftovers.  Unfortunately, we ran out of jumbo olives before we ran out of cream cheese; so if you've got lots of C.C., then buy a couple cans of jumbo olives.  Also, Wal-Mart had "medium" olives, not small.


Fun Food #3:  Cake Balls

Something semi-cake related.  I made these with the ruined cake from Kayte's birthday.  I think I had too much icing/not enough cake, or something.  Because they are kinda droopy and the texture was off (gooey).  My little sisters and brothers loved them, but I wasn't a fan.  I will try again, though.  (The Bakerella blog/flickr slideshow inspired me!)

Here are some good recipes (unlike whatever it was that I attempted!):
It is also probably important to note that the cake should cool completely before adding the icing.  I believe 16oz is the norm.  I hope that everyone who tries these has better luck than I do! ;)

Sunday, August 17, 2008

How to make Chocolate Marshmallow Fondant

  1. Follow Peggy W.'s Instructions.
  2. After you melt the marshmallows, melt 4 oz. baking chocolate according to the box, and add to the marshmallow mixture before adding the sugar.
  3. Continue following Peggy W.'s Instructions.
I'm not sure if it's because of the added chocolate, or because I'm incompetent, or what, but my fondant was really dry. So take it easy on the powdered sugar just in case.

Here are two other (different) recipes (And they are actual, real recipes, not "Kelsie just decided to throw some chocolate in there and see what happens"):
On an only slightly unrelated note, this recipe looks super yummy! Homemade Chocolate Marshmallows @ Cake on the Brain
(Which is, by the way, a really cool blog. The Ariel Castle Cake was gorgeous!)

P.S. This is a pretty basic recipe. I just added my own spin to another recipe found on the web. Have you made this recipe before? What did you like about it? What didn't you like about it? I'm looking to perfect the fondant because when I made it last, it had little streaks of chocolate. Can't wait to hear your suggestions!
xoxo
Kelsie

Sunday, July 27, 2008

Pony In My Pocket Martha Stewart Strawberry Birthday Cupcakes


I promised my brother that I would make horsey-type cupcakes...because he and his wife Mary own and love horses...that promise just happened to coincide with the birthday of one of Cupcake Queen's friend's daughter, who is six years old today! She also loves horses!


These little ponies are called Pony in My Pocket Charm Fashions...because one can wear them on a bracelet or a necklace.


The cupcakes are Martha Stewart's Strawberry Cupcake recipe (see below). They are very moist and delicious!


The first part of the frosting is Martha's chocolate frosting (recipe below.) After I frosted the cupcakes, I melted a jar of Marshmallow Fluff and then dipped the frosted cupcake into the fluff for a few seconds!


Then I decorated the cupcakes with all kinds of colored sugars! This was pretty much fun and was so easy. I knew I needed a white surface for the sugars...and I still wanted the chocolate frosting!


Layla really wants that Pony in Her Pocket cupcake!


While Nigel could have cared less...he only cares about chipmunks!

Here are the recipes:

Martha Stewart's Strawberry Cupcakes

Ingredients

Makes 2 dozen

* 3 cups cake flour (not self-rising)
* 2 teaspoons baking powder
* 1 teaspoon salt
* 1 1/2 cups (3 sticks) unsalted butter, room temperature
* 2 1/4 cups sugar
* 1/2 teaspoon pure vanilla extract
* 1 cup milk
* 8 large egg whites
* Strawberry Meringue Buttercream
* 24 small fresh strawberries, washed (hulls intact), for garnish

Directions

1. Preheat oven to 350 degrees. Line two standard 12-cup muffin pans with paper liners; set aside.
2. In a medium bowl, sift together flour, baking powder, and salt; set aside.
3. In the bowl of an electric mixer fitted with the paddle attachment, beat butter and 2 cups sugar until light and fluffy, 3 to 4 minutes, scraping down sides of the bowl as needed. Beat in vanilla. With mixer on low speed, add flour mixture in three parts, alternating with the milk and beginning and ending with the flour; beat until just combined. Transfer mixture to a large bowl; set aside.
4. In the clean bowl of an electric mixer fitted with the whisk attachment, beat egg whites on low speed until foamy. With mixer running, gradually add remaining 1/4 cup sugar; beat on high speed until stiff, glossy peaks form, about 4 minutes. Do not overbeat. Gently fold 1/3 of the egg-white mixture into the butter-flour mixture until combined. Gently fold in remaining egg-white mixture.
5. Divide batter evenly among the muffin cups, filling each with a heaping 1/4 cup batter. Bake, rotating pans halfway through, until the cupcakes are golden brown and a cake tester inserted in the center of a cupcake comes out clean, 20 to 25 minutes. Transfer pans to a wire rack. Invert cupcakes onto rack; then reinvert and let cool completely, top sides up.

Martha Stewart's Chocolate Frosting

Ingredients

Makes 1 1/2 cups

* 3 ounces good-quality semisweet chocolate, coarsely chopped
* 3/4 cup confectioners' sugar
* 1 tablespoon plus 1 teaspoon unsweetened Dutch-process cocoa powder
* 1 pinch of salt
* 2 ounces cream cheese, room temperature
* 6 tablespoons unsalted butter, softened
* 1/4 cup sour cream

Directions

1. Melt chocolate in heatproof bowl set over pan of simmering water, stirring occasionally. Let cool slightly.
2. Sift sugar, cocoa, and salt into a large bowl. Put cream cheese and butter into mixer bowl; mix on medium until fluffy. Reduce speed to low. Add sugar mixture; mix until combined. Mix in melted chocolate and sour cream. Use immediately, or refrigerate airtight up to 2 days; bring to room temperature, and stir before using.

Marshmallow Fluff Topping

1 jar of Marshmallow Fluff

Heat in a tall, small pan until the fluff is easy to stir. Dip the frosted cupcakes one at a time into the fluff. Let the cupcakes sit for a few moments and then pour the colored sugar over the fluff.

Remember...this should not be stressful...just have fun and see what happens.

Hope you have a great week!

CQ

Pony In My Pocket Martha Stewart Strawberry Birthday Cupcakes


I promised my brother that I would make horsey-type cupcakes...because he and his wife Mary own and love horses...that promise just happened to coincide with the birthday of one of Cupcake Queen's friend's daughter, who is six years old today! She also loves horses!


These little ponies are called Pony in My Pocket Charm Fashions...because one can wear them on a bracelet or a necklace.


The cupcakes are Martha Stewart's Strawberry Cupcake recipe (see below). They are very moist and delicious!


The first part of the frosting is Martha's chocolate frosting (recipe below.) After I frosted the cupcakes, I melted a jar of Marshmallow Fluff and then dipped the frosted cupcake into the fluff for a few seconds!


Then I decorated the cupcakes with all kinds of colored sugars! This was pretty much fun and was so easy. I knew I needed a white surface for the sugars...and I still wanted the chocolate frosting!


Layla really wants that Pony in Her Pocket cupcake!


While Nigel could have cared less...he only cares about chipmunks!

Here are the recipes:

Martha Stewart's Strawberry Cupcakes

Ingredients

Makes 2 dozen

* 3 cups cake flour (not self-rising)
* 2 teaspoons baking powder
* 1 teaspoon salt
* 1 1/2 cups (3 sticks) unsalted butter, room temperature
* 2 1/4 cups sugar
* 1/2 teaspoon pure vanilla extract
* 1 cup milk
* 8 large egg whites
* Strawberry Meringue Buttercream
* 24 small fresh strawberries, washed (hulls intact), for garnish

Directions

1. Preheat oven to 350 degrees. Line two standard 12-cup muffin pans with paper liners; set aside.
2. In a medium bowl, sift together flour, baking powder, and salt; set aside.
3. In the bowl of an electric mixer fitted with the paddle attachment, beat butter and 2 cups sugar until light and fluffy, 3 to 4 minutes, scraping down sides of the bowl as needed. Beat in vanilla. With mixer on low speed, add flour mixture in three parts, alternating with the milk and beginning and ending with the flour; beat until just combined. Transfer mixture to a large bowl; set aside.
4. In the clean bowl of an electric mixer fitted with the whisk attachment, beat egg whites on low speed until foamy. With mixer running, gradually add remaining 1/4 cup sugar; beat on high speed until stiff, glossy peaks form, about 4 minutes. Do not overbeat. Gently fold 1/3 of the egg-white mixture into the butter-flour mixture until combined. Gently fold in remaining egg-white mixture.
5. Divide batter evenly among the muffin cups, filling each with a heaping 1/4 cup batter. Bake, rotating pans halfway through, until the cupcakes are golden brown and a cake tester inserted in the center of a cupcake comes out clean, 20 to 25 minutes. Transfer pans to a wire rack. Invert cupcakes onto rack; then reinvert and let cool completely, top sides up.

Martha Stewart's Chocolate Frosting

Ingredients

Makes 1 1/2 cups

* 3 ounces good-quality semisweet chocolate, coarsely chopped
* 3/4 cup confectioners' sugar
* 1 tablespoon plus 1 teaspoon unsweetened Dutch-process cocoa powder
* 1 pinch of salt
* 2 ounces cream cheese, room temperature
* 6 tablespoons unsalted butter, softened
* 1/4 cup sour cream

Directions

1. Melt chocolate in heatproof bowl set over pan of simmering water, stirring occasionally. Let cool slightly.
2. Sift sugar, cocoa, and salt into a large bowl. Put cream cheese and butter into mixer bowl; mix on medium until fluffy. Reduce speed to low. Add sugar mixture; mix until combined. Mix in melted chocolate and sour cream. Use immediately, or refrigerate airtight up to 2 days; bring to room temperature, and stir before using.

Marshmallow Fluff Topping

1 jar of Marshmallow Fluff

Heat in a tall, small pan until the fluff is easy to stir. Dip the frosted cupcakes one at a time into the fluff. Let the cupcakes sit for a few moments and then pour the colored sugar over the fluff.

Remember...this should not be stressful...just have fun and see what happens.

Hope you have a great week!

CQ