Showing posts with label friends. Show all posts
Thursday, February 24, 2011
Chocolate Guinness Cake
So this crudely decorated cake actually turned out to be ridiculously delicious.
My friend Chad had a recipe for a chocolate Guinness cake, and since he knows how much I love to bake, he asked me to make it for him (and he bought all the ingredients, so I couldn't say no).
Just trust me on this one. It's got beer in it, so you're probably thinking, this cake is going to be awful. At least, that's what I thought. But surprisingly enough, it turned out to be a really good cake. It was really rich and moist, like the recipe said it would be... but I did make a couple of changes.
First of all, I didn't have a tube pan, so I baked the cake in two 9" round pans, and decreased the cooking time (I don't remember exactly how long, since I just estimated, but it definitely was not for an hour) until a toothpick stuck in the cake came out "mostly" clean (see step 3 in the recipe).
Second, I iced the entire cake, even though the recipe says to "to capture the essence and simplicity of a pint of Guinness"by only icing the top. But since I made a layer cake, and not a bundt-type cake, I just iced it like a layer cake should be iced. However, this cream cheese icing is not your average decorator's icing, so there was pretty much no way to make this look pretty in the traditional, smooth sense. What I'm saying is, I just slapped the icing on there. It worked though, and even the pros (if I can call myself that) get lazy. And since I was baking in Chad's kitchen, and didn't have any decorator's tools with me anyway, I wrote "THE GAME" on top of the cake with a knife.
The point is, it tasted good. And that frosting I was just complaining about? It had whipped cream and cream cheese in it, which is why the cake was hard to frost, but the combination was light and fluffy and honestly counterbalanced the rich chocolate flavor of the cake very nicely. Next time I'll just have to find myself a 10" angel food pan and make my cake as pretty as the one on Design*Sponge. :-)
Sunday, February 20, 2011
Valentine's Day Preview
OK, guys, I know Valentine's Day was a week ago, but I haven't been able to get my cookie pictures (except this one; thank you Courtney!) on to my computer yet. Just know that I made some super cute cookies. :-) I've also got an awesome cake recipe that I need to share with you, so you've got something to look forward to.
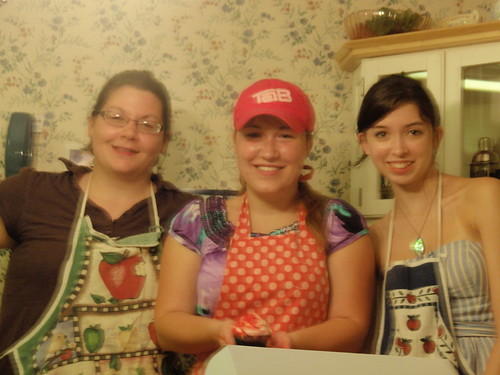
Sorry I've been MIA lately, but I guess school's just been getting in the way, with midterms and all that. I'll try to get back on track with all my blog posts this week, but make sure to check my Facebook page for updates too!
XOXO
Saturday, January 29, 2011
The Game.
OK, so 10 nerd points to whomever recognizes this cake design.
Anyone?
Well, if you still haven't figured it out, here is my inspiration:
![]() |
| Ta-Da! |
I realize that not everyone play Portal (for example: me) but feel free to check out the Wikipedia page if you'd like to brush up on your nerd culture references. Or just read this little Urban Dictionary explanation about the phrase "the cake is a lie:"
Roughly translates to "your promised reward is merely a fictitious motivator". Popularized by the game "Portal" (found on Half-Life 2's "Orange Box" game release for PC, X-Box 360, and PS3). During the game, an electronic voice encourages you to solve intricate puzzles using cake as a motivating perk. When you have "broken out" of the game's initial testing phase (from threat of death), you find scrawls on walls of the innards of the testing center warning you that "the cake is a lie".
So now you know. But my theory is that the cake (at least, my cake) is not a lie, but you can tell people that it is, in order not to share your delicious dessert.
In case you were wondering, the "cherries" on top of the cake are actually cherry-flavored candies I found at Publix. Basically, they are like Blow Pops, but without the stick. Joy and Haley and I wandered all over 2 groceries stores before we found them. (We could've used real cherries, but the juice would've gotten all over the cake and it was just very messy.)
And just so you know, the chocolate shavings on the outside of the cake? They are a labor of love. But I found out if you melt your Hershey's bars (just a little bit; don't over-melt) and then freeze them all together in a big lump, everything suddenly becomes a lot easier. Otherwise, the candy bar (which is really thin) just sorta falls apart in your hands and that makes a huge mess. Also, wrap the chocolate in wax paper because your hands will melt it otherwise. If you're interested in learning how to shave your own chocolate, here's an article. (I used 6 Hershey bars, the kind you can get in the checkout lane, for this cake.)
The cake itself was that ultra awesome amazing pound cake that I made for Maggie's birthday. It's still super awesome the second time around. :)
Finally, I made a variation of Wilton's chocolate buttercream. First of all, I doubled the recipe, because I had a lot of cake to cover. Secondly, I heated up the cocoa powder & melt over the stove, which means that I basically doubled the amount of milk the recipe called for, because otherwise there wasn't enough liquid to mix the powder with. Of course, adding more liquid did make the icing thinner, but because I was just using it to ice the cake, and not do any crazy piping, it worked out. The reason that I heated up the cocoa was because I read somewhere that it makes the flavor intensify, which I seriously believe to be true. There is one thing that I would do differently next time, is to let the cocoa/milk cool down before adding to the Crisco/butter, because it ended up all melted in my mixer, and you can't have fluffy icing if all your fat is melted. My solution? Just stick it in the freezer until it hardens back up, then keep mixing until everything is beautiful and incorporated! :)
So that's it for this week's baking adventures! Stay tuned next week for more! :-)
Friday, December 17, 2010
New York Cupcakes
This past week, my roommate and I had the amazing opportunity to visit New York City. And no vacation is complete without eating some delicious cupcakes!
In this case, we checked out the bakery Crumbs, which is so popular, that they have multiple locations, including the Newark airport, and are even expanding to DC. Joy and I happened to go to the store by the New York Public Library (which was also amazing, but I'm also a book nerd, not just a cupcake nerd!)
It was difficult to decide which cupcake to buy, because they all looked amazing (and huge!!) but we picked Gingerbread because it was festive and not minty (*somebody* doesn't like mint. Weird).
Let me tell you. That gingerbread cupcake was fabulous. It was so rich and decedent with the fluffiest icing, which was sweet but not too sweet. And the cake part? Oh. My. God. So moist. So flavorful. So spicy and gingerbread-y. The only problem was that there was no way I'd be able to eat a whole cupcake all by myself. So it's good that Joy and I split it. They're really messy and crumby too, which is kinda funny, considering the name of the bakery is Crumbs and all! :-)
And Joy's cousin Beth also bought us gingerbread cupcakes from Bella's Bakery in NJ, which were more reasonably sized and had cream cheese icing (Mmm mm!) The cool thing about Bella's, though, is that they have nut-free cupcakes for kids with allergies and also make gluten free, vegan, and organic treats as well. I love the idea. The bakery was started because the owner's daughter is allergic to nuts and couldn't eat the cupcakes that the other kids would bring to class.
Anyway, if you're in New York or New Jersey, I would gladly recommend both Crumbs and Bella's to you if you're in a cupcake-y mood. As far as any of the other bakeries that are around, I have no doubt that they're delicious, but I just haven't tried them yet. Guess that means I have to go back!
P.S. Please don't forget to vote for me! <3
Friday, December 10, 2010
Christmas Cookies
As you can tell, I made a lot of cookies this year for Christmas. Joy and I estimate that we baked over 300. And by we baked, I mean, I baked. Although, don't get me wrong, she totally helped. She just didn't actually put anything in the oven. =P
We make all these cookies (and cake balls) solely to give away to people as Christmas gifts. I think it's a brilliant idea because 1) I love baking and 2) I love giving gifts. I love how excited and happy people are when they receive a tin of homemade goodies. Delivering them is seriously the best part (and eating the extras is pretty awesome too).
We ran out of room to put them all, too. Our apartment has been a little crowded (messy) lately, because we've all been stressed and busy with exams...some things (like doing laundry), get pushed to the side. Oh, the life of college students.
Nifty trick: the sugar cookies are just dipped in canned icing. I melted it in the microwave so it would get runny and added regular ol' food coloring (all my awesome gel pastes are at home) to make it redish and greenish. After you let them sit for a couple of hours (or over night), they get hard enough to package, but the icing is still soft when you bit into it. So simple, so brilliant. :)
The cake balls are strawberry/chocolate and carrot cake/white chocolate. I LOVE the strawberry. Once again, I went with the convenience of box mixes and canned icing. But with all the hard work that went into them, I'm sure nobody minded.
All in all, it was about a 3 day process. Joy and I did this last year too, and I love that we make a yearly tradition out of it (although she's been doing this for years before she even met me). One of our friends said our apartment looked like a bakery and our roommates and everyone who came by loved that we had extra cookies sitting around to snack on. Merry Christmas everyone!
(Just a quick reminder to let you know that you can vote every 24 hours for the "Show Your Duff" contest, so if you voted yesterday, don't forget to do it again today! I noticed that my entry is on the 2nd page-- there are 10 pages right now-- of cakes with the most votes, so let's see if we can move on up to page #1! And to everyone who's already voted: Thank you! You have no idea how much this means to me! I wish I could give a Christmas tin full of cookies to every one of you, for voting, for telling your friends to vote, for liking me on Facebook, for reading my blog, for encouraging me to go after my dreams. I love you all! <3)
Wednesday, November 24, 2010
Disaster!
I think the biggest disaster is that I always spell it "diaster."
Nah, not really. I think a volcano being attacked by a shark, giant octopus, wolf, The Cold, and an encroaching ocean is pretty disastrous. Oh! Don't forget the meteor and wrecked helicopter.
See, this is a cake that I was planning for Hillary's 19th birthday, and now it's 2 months past her 20th birthday, so to say this is belated is quite an understatement. Anyway, we love watching cheesy corny disaster movies together ("The Day After Tomorrow," "Absolute Zero," "Mega Shark vs. Giant Octopus," "2012" for example) so this cake takes its inspiration from all of those movies and more.
The cake turned out a little more cartoonish--maybe it was the fondant octopus or the light blue icy lava-- than I was originally picturing in my head, but it turned out really great. The "lava" and ocean are made out of royal icing, which made cutting into the cake a little more difficult than originally planned, and the meteor, octopus, and shark fin are all made of out Wilton fondant (why Wilton? Because it's cheap and no one was going to eat the pieces anyway). The volcano is chocolate buttercream, and the cake is coffee flavored.
Shout out to Sarah! For telling me how to make coffee cake, and to pass it on, I'll tell you now! (Because have you ever tried to google "coffee flavored cake recipe?" It doesn't work, I tell you!) OK, so you take your cake recipe (or box mix) and instead of putting water or whatever liquid, use double-brewed coffee instead. And my dad says there's some secret "thing" about double brewed coffee, like it will break the coffee maker or something...so I just asked him to brew the coffee for me.
So there you have it! The Disaster Cake. While not as epic as the end of the world, this cake was pretty grand, and according to Chris, the best tasting cake I've ever made!
Tuesday, November 23, 2010
Cake Balls: The Pictures
So here's the pictorial evidence of the candy corn cake balls that I made!
First, the candy corn:
Here we have a picture of the newly chocolated cake balls. (of course "chocolate" is a verb!) You might be able to see that some of the candy corn melted and leaked out of their shiny, tempered chocolate shell. Also note the beautiful sprinkles that Haley & I decorated with:
And finally, the close up:
These were oddly and surprisingly delicious.
Sunday, October 17, 2010
Riley's Cake
Riley is seriously the cutest little two-year-old I've ever met. He calls me Peaches (that's my nickname down in Florida... Since I'm from Georgia, y'all!) and he's got the sweetest little smile.
His birthday was also this past Wednesday (just like Joy) but his party was today. So since he's part of Joy's family, I made his birthday cake too!
The theme was Jeeps and I used this cake as an inspiration. Of course, it didn't matter how inspiring the picture is, if you can't find any toy Jeeps to put on top! I think we spent 10 minutes looking through the Hotwheel and Matchbox cars before we found the right cars.
As far as the decorations go, it really wasn't that hard. I made a 9x13" cake, and 9" and 6" rounds, then I just sorta cut up the round cakes and strategically placed them on the sheet cake so it looked like hills and valleys. And it didn't really matter that the cake crumbs (marbled yellow & chocolate) got in the icing, because it looked more like dirt.
The mud hole is just chocolate icing and piping gel mixed together to look all dirty, with some Oreo crumbs sprinkled in. And the trail? Graham cracker and Oreo crumbs.
The river is white icing with blue-tinted piping gel smoothed on top so it looks all watery and such. Joy and I ran the little Matchbox cars all over the cake to give it "tire tracks" (although to be honest you really can't tell) but when Joy put cocoa powder on their tires, it looked awesome.
My favorite part, though? The candy rocks:
We got them at Wal-Mart. How amazing is that?! And they tasted delicious too, in addition to looking perfect.
So that was Riley's cake. I wasn't able to go deliver it with Joy, but she told me it arrived safely and everyone at the party (including the birthday boy) loved it.
Wednesday, October 13, 2010
The Five Hour Cake
Today is my roommate's birthday. She is, if you couldn't tell, 20 years old. And since I'm a baker (and I had no other gift ideas) I decided to surprise her with a cake.
Which is a lot harder than you might think, because I didn't know her favorite flavor (my guess was red velvet or strawberry) or what colors or design to make it. So I just sorta winged it (wung it?) and came up with this idea on the spot.
It helped that Joy had plans last night so I was able to go out to the store, buy ingredients, have time to bake the cake, make a gumpaste bow and frosting, cool the cake, and ice and decorate it, all while she was out.
The bow is my first attempt ever, and Joy and Sophie thought it looked really good, but (you know what a perfectionist I am) the unevenness and powdered sugar splots really bothered me. Plus, I think using a gumpaste/fondant mix might help instead of straight up gumpaste, because when I put the little bows on the cake, some of them cracked. So I'm definitely going to practice this skill a little more.
And speaking of practicing, this is the website where I got the tutorial, so if you need some gumpaste bow practicing tips as well, here you go!
I still can't believe that I started baking at 7pm and by midnight, it was done. I know if I had more time, I could've fixed thought little tiny imperfections that bothered me, like the bow, and smoothed out the buttercream a little more. (I probably would've used a from-scratch recipe instead of a doctored box mix too.)
If you live in an apartment, or even a house, with a small number of inhabitants, say two or three, and you don't go through a gallon of milk as fast as a household of seven would, then it might because a good idea to check the expiration date of aforementioned milk, just in case it's two weeks past the date, and before you start dumping the milk into recipes. Just a thought.
And my final word of advice for anyone looking for cake decorating tips and tricks: don't burn your thumb on the lighter when lighting birthday candles. Actually, you probably shouldn't use a lighter at all when you're blood sugar is low and you're exhausted at 12am. But aside from the charred mark on my nail (what the heck?!), I survived that incident too.
Happy Birthday, Joy!
Monday, September 6, 2010
Oatmeal Cookies & No Bake Cookies
Yesterday, my roommate and I had oatmeal for breakfast.
When you have oatmeal for breakfast, what does that make you think about?
Making cookies?
Because that's exactly what Joy and I decided!
First up is the oatmeal chocolate chip cookie (as much as I love oatmeal, I can't stand oatmeal raisin cookies. Bleh! But chocolate chip? That's where it's at!)
Ingredients
- 1 cup butter
- 3/4 cup packed brown sugar
- 1/4 cup white sugar
- 1 teaspoon vanilla extract
- 1 1/2 cups all-purpose flour
- 1/2 teaspoon salt
- 1 teaspoon baking soda
- 1/4 cup boiling water
- 2 cups quick cooking oats
- 1/2 cup raisins (optional)
- 1 1/2 cups semisweet chocolate chips
Directions
- Beat butter or margarine, sugars and vanilla until light and fluffy. Add flour and salt, mix well.
- Dissolve baking soda in boiling water and add to mixture. Stir in rolled oats, raisins and chocolate chips.
- Drop by teaspoonful onto ungreased cookie sheet. Bake at 350 degrees F (175 degrees C) for 10-12 minutes. Don't over cook. (There are no eggs in this recipe, I didn't forget to type it down).
And next up are the no-bake cookies that Joy suggested. The only change we made this time was used dark cocoa powder, since it's all we got.
Ingredients- 1 3/4 cups white sugar
- 1/2 cup milk
- 1/2 cup butter
- 4 tablespoons unsweetened cocoa powder
- 1/2 cup crunchy peanut butter
- 3 cups quick-cooking oats
- 1 teaspoon vanilla extract
Directions
In a medium saucepan, combine sugar, milk, butter, and cocoa. Bring to a boil, and cook for 1 1/2 minutes. Remove from heat, and stir in peanut butter, oats, and vanilla. Drop by teaspoonfuls onto wax paper. Let cool until hardened.
Friday, July 16, 2010
Peanut Butter and Ladies
I could tell you that I'm going to stop quoting Will Ferrell movies, but let's be honest, I'll probably never stop. I can't help it; his movies are so funny.
The other day, my best friend (you know, she had the Jeopardy cake, and told me to make the Hogwarts castle and I'm making her a disaster cake...soon) suggested that we make peanut butter cupcakes. So we did! Best. Idea. Ever.
| Nobody ever called me a good food photographer. But look at that chocolate filling! |
My family was pretty excited that they actually got some cupcakes of their own this time, because the last cupcakes I made were for a party and therefore off-limits. My mom in particular loooooved them. Except for the part where we cooked them a little too long and the bottoms burned. =( Because, seriously, other than that, they were PERFECT.
Monday, July 12, 2010
Gorgeous Cupcake Liners
Now we all know that with that advent of trendy cupcakes, comes trendy cupcake liners. And most of the cupcake liners I've seen are either of the paper variety, or the wrapper variety. I think the wrappers are really cute and creative (I've worked with them at Bliss before), but they are an extra step in the process.
The problem with paper wrappers is that sometimes (especially with a dark cake, like chocolate) you can't see the pattern very well...
Problem solved!
My friend Melanie also made cupcakes for Vannida's party on Saturday. She made some amazing red velvet in the cutest cupcake liners (see above picture). They're lined with foil so that they "stay vibrant when baked" (I'm quoting Reynolds here). Even though I had never even heard of Reynolds StayBrite fashion-inspired cupcake liners before Melanie used them, I now think they are the coolest thing ever.
So thank you, Melanie, for opening my eyes to a cool and fashionable cupcake accessory! :)
Oh, and you can buy them here if you can't find them at the local supermarket.
Saturday, July 10, 2010
In Which We Have A Sleepover And Bake Cupcakes
Yesterday was my favorite day of the week. And I don't mean because Friday starts the weekend (for me, my weekends are whenever I get 2 days off from work, like last Tuesday & Wednesday). It was Bliss day!
A good, crazy, hectic time was held by all. I modeled some gumpaste and ate some cookies and was surrounded by the delicious smell of baked goods and buttercream. C'mon, what's not to love?!
Yesterday I worked on a spiral notebook cake with Meagan, another intern. We also iced cupcakes and made cookies and chocolate covered Oreos. Last week, we worked on the tractor trailer cake, and the week before that was the Post-It note retirement cake (check out Bliss' website for the pictures!)
| Adam doesn't know how to use a flash! |
The cupcakes were chocolate with red & white buttercream-- swirled of course. And for some reason, it is still ridiculously difficult for me to put two different colored icings in the same pastry bag. But I'm working on.
And the gold stars at a nice touch, don't you think?
| Icing Mustache! |
Wednesday, May 19, 2010
Science Rules!
It may appear from my lack of blogging over the past few weeks that I have not been baking, but that's not true at all. Just two days after the Wizarding Independence Day party, I broke out my cupcake pans in order to celebrate Katie's confirmation. My friends and I made two cake mixes worth of cake balls (and realized that white chocolate candy melts/confectionary coating/bark chocolate is an awful substitute for the milk chocolate stuff. Never again...) and for my brother's kindergarten teacher's birthday, I made some awesome and delicious confetti cupcakes and confirmed my theory on the secret of amazing buttercream. I also ate lunch with Adam at school and personally experienced how adorable kindergarteners really are. But I'm getting off topic; we're talking about baking.
Aside from the informal cake balls and cupcakes, my ventures into the kitchen have been limited since the exciting and exhausting Hogwarts cake. In the meantime though, I have fallen in love..
...With science. I know. I know. Go ahead and say it: I am the world's biggest nerd. But I got a huge stack of books from the library (all baking or decorating related) and two of my favorites are Understanding Baking and BakeWise.
The way the respective authors explain the how's and why's of baking is simply amazing. I could go on and on about the eye-opening and mind-blowing things that I've learned, but I'm afraid I might bore you, despite my huge doses of enthusiasm. However, if you are as nerdy as I am, I highly recommend that you read these books. I never knew how much I wanted to know the information they contained until I started reading them (yes, I am reading them both at the same time) and I can't wait to tweak some of my favorite recipes and-- dare I say it?-- create some of my own.
But I'm getting ahead of myself. I should finish reading first, no matter how much I want to jump head first into a bag of flour (cake flour, of course) and become the Bill Nye of the kitchen.
Oh, and my secret to awesome buttercream? Beat it. A lot, and for a long time. The texture is amazing. And use real (unsalted, room temperature) butter. But you already knew that.
Aside from the informal cake balls and cupcakes, my ventures into the kitchen have been limited since the exciting and exhausting Hogwarts cake. In the meantime though, I have fallen in love.....With science. I know. I know. Go ahead and say it: I am the world's biggest nerd. But I got a huge stack of books from the library (all baking or decorating related) and two of my favorites are Understanding Baking and BakeWise.
Oh, and my secret to awesome buttercream? Beat it. A lot, and for a long time. The texture is amazing. And use real (unsalted, room temperature) butter. But you already knew that.
Monday, May 10, 2010
Hogwarts!
Well my friends, I pulled it off! The Hogwarts cake which I've been dreaming of making for years now, and which Hillary forced me to make, is finally completed. Although now it's just half of a 10" cake and a box of castle turrets sitting in my kitchen, because that's all that's left after we ate it.
The party that we had on Saturday was a belated celebration of Wizarding Independence Day, normally celebrated on May 2nd (not to be confused with May 4th, which is Star Wars Day). As Hillary tells it,
Now, more about the cake, because I'm sure that's why y'all are here in the first place. I made two cakes, a 6" and a 10" out of two batches of Martha Stewart's pumpkin pie cupcakes recipe. If you remember, the last time I made this recipe, I used pumpkin pie filling instead of just plain ol' pumpkin puree, and it turned out to be a success. This time however, Dad bought pumpkin, and guess what? It still tasted really good!
The cake is covered in marshmallow fondant, which is not vegetarian friendly, if you did not know. Also, if you didn't know, working with marshmallow fondant gets easier every time. And I realized that heating it up in the microwave for a few seconds before rolling it out makes it waaaay easier to cover the cake.
I got the cobblestone texture by rolling it out on an impression mat that I bought at Bliss and then painstakingly painted with icing paste color and lemon extract (vodka works too, but I don't know where my parents keep that). Just make sure you don't get it on the floor:
The towers were also covered in fondant and painted, and the door is fondant too. The cake took a whole two days to work on, and only a few minutes to demolish-- I mean eat. :) But it was sooo tasty and definitely worth all the work. The cake didn't exactly survive the trip to Hillary's house, and when I got there, I had to "glue" the top three towers back on with white candy melts. Still worth it!
Long live the Boy Who Lived!
The party that we had on Saturday was a belated celebration of Wizarding Independence Day, normally celebrated on May 2nd (not to be confused with May 4th, which is Star Wars Day). As Hillary tells it,
I just successfully had a party because I wanted a pumpkin pie cake shaped like Hogwarts. And it was doubly awesome, because I got to see all of my friends.Sounds like a good party to me!
The cake is covered in marshmallow fondant, which is not vegetarian friendly, if you did not know. Also, if you didn't know, working with marshmallow fondant gets easier every time. And I realized that heating it up in the microwave for a few seconds before rolling it out makes it waaaay easier to cover the cake.
I got the cobblestone texture by rolling it out on an impression mat that I bought at Bliss and then painstakingly painted with icing paste color and lemon extract (vodka works too, but I don't know where my parents keep that). Just make sure you don't get it on the floor:
The towers were also covered in fondant and painted, and the door is fondant too. The cake took a whole two days to work on, and only a few minutes to demolish-- I mean eat. :) But it was sooo tasty and definitely worth all the work. The cake didn't exactly survive the trip to Hillary's house, and when I got there, I had to "glue" the top three towers back on with white candy melts. Still worth it!
Long live the Boy Who Lived!
Monday, February 1, 2010
The World is Right Again
Everything hurts:
My back is sore from leaning over.
My legs and feet ache from standing up all day.
My arms tire from kneading.
My clothes and face and new apron are covered in sugar.
But I couldn't be happier.
I got to bake. And I believe, without a doubt, that baking is the surest way to cure stress. For me at least. There's just something so relaxing about going through the motions of rolling out dough, and thinking on your feet when you can't find an ingredient, solving problems like too-hot ovens, and finding the best creative way to decorate. I can just let go of all of my problems (and let me tell you, last week was problematic for me) and focus on that task in front of me.
So thankfully my very good friend Joy took me home to bake with her and Megan and her awesome parents bought cookie mix and let me have run of the kitchen :)
It may not have been the weekend I was hoping for, but I have a fresh outlook on life. Especially since there is a tupperware of a couple dozen sugar cookies (decorated with marshmallow fondant... I actually did a pretty stellar job this time! I don't think anybody ever tells you what a sticky, gross mess it makes at first and how long it takes to knead, but by God, I did it right!) and a popcorn cake in my dorm.Life is good.
Saturday, January 9, 2010
Brownie Cupcakes
Ta-Da! Here are the finished cupcakes that I alluded to yesterday, and they are all in their entirety (unlike yesterday, when I started eating the gingerbread man before I took a picture).
Oh, wait. That guy in front looks a little crippled. Well, to be fair, they are irresistibly yummy.
Be warned, though, that the brownies stuck to the cupcake liners. Maybe it was the caramel? Or maybe I should've sprayed Pam on them first? I'm really not sure about that odd phenomenon, but if you have any ideas, let me know so I can improve next time.
Then, since I had this really cute idea in my head about snowflake sprinkles and tiny gingerbread men, I wanted to decorate them...
You can't really tell, but that's a 2-foot piping bag I've got in my hands. When I decided I needed a bigger bag to ice cupcakes with, I figured I'd just go with the biggest size available. Well... maybe an 18" bag would've done the job just as nicely, but without being quite so intimidating.
Then came the sprinkles...
And finally, the finished product! And many thanks to Sarah, who helped me out and decorated some of these cute little guys with me!
I must warn you, though, that these are really sweet and rich. I think a normal chocolate cupcake would fare better with all the decorations, and leave the brownie cupcakes to stand on their own merit, with maybe a small swirl of fudge icing for garnish.
Subscribe to:
Posts (Atom)


