Showing posts with label peanut butter. Show all posts

Tuesday, January 25, 2011

Peanut Butter Crunch Truffles


Born of the Midwest, I have a penchant for kitschy recipes. Give me a casserole made with cream of mushroom soup and topped with potato chips, and I could pass out from the hilarious joy of it all. There's just something so great about recipes that are simple and sinfully delicious and contain ingredients that can never be found in nature. Take Haystacks, for example. Melted butterscotch chips, peanut butter and chow mein noodles, for Pete's sake. Wad the mixture up in little mounds, put it in your face, AMAZING.

Now say you take something already perfect like Haystacks, up the fabulous by adding butter and a nice hit of salt, and then dip it in bittersweet chocolate. Hubba, hubba. Not that you need any help (did I tell you that you look terrific today?), but I'd say we're gonna get you a whole bunch of pining Valentines with this one.


When it comes to the ultimate in flavor and textural dreams, these little babies will just about blow your mind. I mean, you've got a chocolate shell, so, awesome already, obviously. But inside that chocolate casing, you've got a creamy, buttery, peanutty filling, studded with two kinds of crunch--a sturdy one from peanuts, and a more delicate, crispy crunch from those crazy chow mein noodles. I-yi-yi.


And the best part? These are so insanely easy, guys. You'll have instant Valentine's Day gifts that will make you an absolute hero. And plenty of leftovers so you can be your own Valentine and savor them slowly while watching trashy reality programming. Perfection!


Peanut Butter Crunch Truffles

Normally, you want commercial peanut butters for baking, but here, the texture and huge peanutty flavor of unsweetened natural peanut butter is the best choice.

Melt the butterscotch chips slowly and gently--they can have a tendency to burn and seize up. 50% power for 30 second increments, stirring well after each interval works well. You can also use a double boiler.

Chow mein noodles can be found in cans or cellophane bags in the Asian foods aisle of your supermarket.

Makes about 30

1 cup well-stirred crunchy natural peanut butter
5 tablespoons unsalted butter, at room temperature
2 ounces butterscotch chips, melted
2 tablespoons sugar
1 teaspoon kosher salt (or about 1/2 teaspoon table salt)
1 1/2 cups chow mein noodles (see note)
8 ounces bittersweet chocolate, chopped

In the bowl of an electric mixer, combine the peanut butter and butter. Beat on medium speed until smooth and creamy. Beat in the melted butterscotch chips, sugar and salt. Reduce the speed to low and stir in the chow mein noodles, until the mixture is well-blended and the noodles have broken up a bit, about 30 seconds or so.

Line a sheet pan with parchment paper, waxed paper or a silicone baking mat. Using a small ice cream scoop or two spoons, scoop out portions of the mixture, about 2 teaspoonsful for each truffle. Roll each portion into a rough ball using your hands. Work quickly when you roll the balls--the mixture will melt a bit with the warmth of your hands and get a bit messy, but no worries, perfection isn't the goal here. Place the truffle centers back on the baking sheet and freeze until very firm--at least 30 minutes.

When you're ready to dip the truffles, place half the chopped chocolate in a double boiler (a glass or heatproof bowl set over a pan of simmering water). Melt the chocolate until it is smooth and fluid. Remove the bowl from the pan and add the second half of the chocolate, stirring again until smooth (this is a quick tempering method that helps to ensure you'll get a nice, shiny chocolate coating). Place the bowl back on the pot of hot water to help keep it warm while you coat the truffles.

Dip each truffle quickly in the chocolate using a fork or a candy dipping tool. Place the dipped truffles back on the lined baking sheet. When all the truffles are dipped, chill in the refrigerator to set the chocolate. Finished truffles can be stored in the refrigerator in an airtight container for up to a week.

Sunday, July 18, 2010

Ride - {Heaven and Hell Cake}

Exhausted and nauseous, I wobble on weak ankles as D, C and I walk along the stables to D's car. The paved surface below my feet is a refreshing change from that of the rest of the fairgrounds. The smoothness is, admittedly, a little disorienting; after being thrown and flipped for the better part of the day, I can't help but anticipate some hazard looming on the horizon. So, I'm anxious.

Thursday, May 20, 2010

On Peanut Butter Pound Cake and Oven Rack Placement


I love the idea of taking something awesome and making it�awesomer. Like a good old-fashioned pound cake, for example. When done right�golden, buttery, a slight crust with a tender crumb�it doesn�t get much better. Unless you add peanut butter. And wee chocolate chips, because it's a natural thing to do. All aboard! The awesomer train is leaving. Am I right? Well, you just hang on there a second.


Okay, so. Because we�re friends, I�ll start by saying that I really sort of messed up this recipe. The finished product didn�t really reach its full potential and I totally take responsibility for that. It all started with so much promise�lots of creamy peanut butter swirled into a billowy, silky batter? I mean, come on�but then, then!, I committed one of the Cardinal Sins of Baking. I didn�t read all the instructions carefully enough before I started. Was it due to a tiny person suddenly overturning something heavy onto herself in the other room? Did I suddenly realize I�d forgotten to put on deodorant AGAIN? I�ll never tell. Either way, it was a very straight-C student thing of me to do, glossing over the instructions like that. Thinks of high school, covers face, runs away.


I�d prepped my (properly-sized) pan with cooking spray and parchment, started with room temperature ingredients, and preheated my oven to the right temperature with my trusty oven thermometer inside to make sure the heat was on point. But! I was a crazy fool and didn�t place my oven rack to the right position within that perfectly heated oven. Wuh-wuuhhhh. So I�ll take one for the team here and be the example of why being a nitpicker about oven rack placement really does matter. I love you guys that much.


So you might be saying, �Really, Shauna? Does oven rack placement make THAT big of a difference, or are you just being all Type A on us again?� . Well. The answer is oh, yes (on both accounts, really), and it separates the just okay results from the stellar ones. Most baking recipes will indicate where you should place the oven rack, and most often this will be in the center of the oven, where the heat will hit both the top and bottom of the baking pans with the same intensity and give even browning and baking. I�ve found that in most recipes where oven rack placement isn�t indicated, it�s safe to assume that the center position will give good results (or for things like cookies when you can bake more than one sheet at a time, go for the upper and lower thirds of the oven).


But other recipes, like those for thick, dense cakes like Bundts, loaf cakes, and ahem, peanut butter pound cakes, call for the oven rack to be placed in the lower part of the oven. With more heat hitting the cake from the bottom of the oven, the center will bake thoroughly without the top getting overly browned or burnt during the long bake (usually an hour or more) that these sort of cakes require.


So if you�ve got a perfectly browned peanut butter pound cake that�s still crazy raw in the middle after an hour, making your total baking time ridiculously longer than what the recipes suggests (and rendering the finished product edible, but undeniably overbaked) then you, too, might be a victim of Oven Rack Placement Issues. Just like me. Sitting here, eating a hunk of peanut butter pound cake with so much potential and great flavor, but an overbrowned crust and �meh� texture due to overbaking. Thinking about how I�ve got to add Oven Rack Placement Issues to all my other issues. I-yi-yi.

And now that I�ve broadcast the error of my ways, I�m still going to pass this recipe on to you with great faith that you�ll do it the right way. And then report back with your success in the comments section to rub it in. Please and thank you.


Peanut Butter Pound Cake

Adapted from Flo Braker�s recipe in The San Francisco Chronicle Cookbook

Now, the original recipe didn�t include chocolate chips, but I literally could not hold myself back from adding them. It was a moral issue of sorts. You do what you like.

Room temperature ingredients are one of the pillars of great baking, but are seriously important here. With no leavening, all the lift in this cake with come from air incorporated into the batter�you�ll get the most air into the mix with truly room temperature butter and eggs.


Serves 8-10

1 cup (2 sticks) unsalted butter, at room temperature
1 1/2 cups sugar
1/2 cup creamy peanut butter (the commercial stuff, not natural)
5 large eggs, at room temperature
2 cups unsifted all-purpose flour
2/3 mini semisweet chocolate chips

Place an oven rack IN THE LOWER THIRD OF THE OVEN and preheat it to 350 degrees. Lightly spray a 9x5-inch loaf pan with cooking spray and line it with a a strip of parchment paper to create a sling with a bit of overhang on the long sides of the pan.

In the bowl of an electric mixer on medium speed, cream together the butter and sugar until very light and fluffy, about two minutes. Add the peanut butter and beat until well-combined. Scrape down the bottom and sides of the bowl. Beat in the eggs one at a time, beating well after each addition. Reduce the speed to low and blend in the flour in two additions. When just a few streaks of flour remain, pull the bowl from the mixer and fold in the chocolate chips by hand.

Spread the batter into the prepared pan and bake until a toothpick inserted in the center comes out clean, about 60-70 minutes. Let cool in the pan before slicing and serving.

Tuesday, December 29, 2009

In For It


The Piece of Cake Kitchen Presents: Moments in Life During Which You Might Think to Yourself, "Oh, man, I am IN FOR IT."

1. You suddenly realize you are drunk in front of your future in-laws.

2. The doctor says, "I think we need to try forceps."

3. You are mid-recipe for these completely insane Chocolate-Peanut Butter Crumble Bars.


If the name alone doesn't get you into all sorts of trouble, then maybe a rundown of what we're dealing with here will: a chewy, nutty, oatmeal cookie-like base, a salty-sweet streusel topping studded with chocolate bits, and to hold it all together, a layer of what basically translates to peanut butter caramel hovering in between. Oh, I said it. Like a young lady who drinks her face off in front of her future in-laws, I said it.


Now, I know you may be thinking to yourself, "Sweet Lord, Shauna, you're throwing something with chocolate and and peanut butter and sweetened condensed milk at us four days after Christmas?!" Just hear me out, okay? Yes, these bars are crazy, I know that. But! They came out of a need to clear out the few last bits of goodies that were acquired from weeks of holiday baking and entertaining--some half-consumed bags and bars of chocolate, leftover nuts from cocktail noshing, that sort of thing. So these bars are resourceful! These bars are green, people! They are also chockful of health! Heart-healthy nuts and oats, guys!

Also, there's only a couple days left to ride that cushy denial train until we arrive at the New Year and skinny jean-fitting reality comes crashing down on us. Won't you join me? All aboard!


Chocolate-Peanut Butter Crumble Bars

You truly can make this recipe all your own. I've listed some suggestions, but go with whatever varieties of chocolate and nuts you happen to have on hand--milk, dark, semi-sweet chips, bits of stocking-stuffer candy bar, salted or unsalted nuts, whatever you've got. If the nuts are raw instead of roasted, a quick toasting while the oven's preheating adds a nice touch of flavor.

Makes 16

5 ounces semi-sweet chocolate, chips or chopped
1 1/4 cups all-purpose flour
1/2 teaspoon baking powder
1/4 teaspoon kosher salt
1/2 cup (1 stick) unsalted butter, cut into 1/2 inch cubes, soft but still cool
3/4 cup dark brown sugar, lightly packed
1 cup old-fashioned oats (not instant or quick-cooking)
1/2 cup chopped mixed nuts (I used half pecans, half roasted, salted almonds)
1 egg, at room temperature
7 ounces (about half a can) sweetened condensed milk
1/4 cup creamy peanut butter (crunchy is ok, don't use natural peanut butter)


Position an oven rack to the center position and preheat the oven to 350 degrees. Line an 8x8-inch baking pan with a strip of parchment paper or aluminum foil that will fit along the bottom and up two opposite sides of the pan with a bit of overhang to create "handles" to easily remove the bars later.

Sift the flour, baking powder and salt together into a large bowl. Using your fingertips, rub the butter into the dry ingredients until the mixture resembles large breadcrumbs. Stir in the brown sugar, oats and nuts. Put about a quarter of this mixture (roughtly 1 1/2 cups) into a small and stir in the chocolate bits. Set aside.

Into the remaining three-quarters of the crumb mixture, stir in the egg until it comes together into an evenly moistened mass, sort of like a loose cookie dough. Pat the dough into the bottom of the prepared pan and pre-bake for 15 minutes.

Meanwhile, stir together the sweetened condensed milk and peanut butter until well-blended. When the bottom layer of the bars is finished pre-baking, spread the peanut butter mixture evenly over the warm layer. Sprinkle the reserved chocolate-crumble mixture evenly over everything and press down lightly.

Return the pan to the oven and bake for 20 more minutes, until golden brown. The bars will feel very soft and not done in the center, but they will set as they cool. Let the bars cool in the pan for 10 minutes before running a thin knife along the edges and removing the slab to a cooling rack to cool completely. Cut into 16 squares. Store any leftover in an airtight container at room temperature for up to 4 days.

Sunday, December 20, 2009

A Tale of Two Cakes - {Black Forest Cake and Peanut Butter Cake}

It was the best of cakes, it was the worst of cakes.Sitting side by side on my bed and typing awkwardly on a laptop balanced between our laps, P and I conversed through MS Word. In the bizarre, urgent and secretive exchange, he and I discussed what we would bake that evening while keeping our intentions completely private.From across the room, K raised an eyebrow at our behavior as she gently

Sunday, November 8, 2009

Surprise - {Maple Cake}

I stood, feet comfortably planted at the bakery, watching a glistening thread of real maple syrup weave slowly into a measuring glass. This one cup of liquid gold destined for what was sure to be a delicious - and very fitting - cake.A slick smile spread across my lips.Perusing the shelves, I located the standard dry goods along with brown sugar and cinnamon - two very traditional components for

Thursday, October 22, 2009

Dark Chocolate Peanut Butter Cup Cupcakes


Ingredients:
for the cupcakes
12 miniature dark chocolate peanut butter cups
1 cup flour
1 cup light brown sugar
1 cup milk
1/2 cup cocoa
6 tablespoons butter, at room temperature
2 teaspoons baking powder
1 teaspoon vanilla
1 teaspoon instant espresso powder
1/4 teaspoon salt
2 eggs, at room temperature


for the frosting
1 cup confectioners' sugar
1/2 cup peanut butter
4 oz cream cheese

6 miniature peanut butter cups, halved


Directions:
Preheat oven to 350. Line or grease and flour 12 wells in a cupcake pan. In a large bowl, cream the butter and sugar. Add the egg and vanilla, mix thoroughly. Meanwhile, mix together the cocoa powder, espresso powder and milk in a small bowl or measuring cup and set aside. Add flour, baking powder and salt to the butter mixture. Add the milk mixture to the rest of the batter and beat until well combined. Fill each well 1/3 of the way full.


Place the peanut butter cup in the center and cover with batter. Bake 15 minutes or until a toothpick inserted the center of a cupcake comes out clean or with just one or two dry crumbs. Cool briefly in the pan, then remove cupcakes to wire racks to cool completely before icing.

for the frosting
Beat all ingredients until fully incorporated. Spread on cooled cupcakes or cake. Top each with 1/2 of a miniature peanut butter cup.

My thoughts:
Years ago when Reese's first came out with limited edition dark chocolate peanut butter cup miniatures not being a fan of milk chocolate, I hoarded them. I am not much of a candy person (save our holiday boxes of Rheb's, the occasional candy bar or Haribo binge) but the miniatures were cheap, tasty and had a good chocolate to peanut butter ratio. I had hoped they would make them a permanent addition to their line up and it looks like they finally must have because I am seeing them everywhere, not just at Chocolate World or in limited edition bags. Anyway, my husband also loves the dark chocolate cups and may or may not have decimated nearly an entire bag all to himself. Luckily I was able to save a few and make these cupcakes.

The recipe is easy, the trick to the chocolate-y taste in the cupcakes without having to melt chocolate is to rehydrate the cocoa powder in a bit of milk and add a bit of espresso powder to deepen the flavor. They also pack quite a peanuty punch. Perfect for any chocolate-peanut butter lover!


Saturday, August 29, 2009

Reeses Revamped - {Chocolate and Peanut Butter Macarons}

I found myself growing quite upset as I stood outside my house early yesterday morning. Even though I'd just returned home from a great night with friends, I couldn't shake the frustration taking root in my core as I cooed patiently to my dog. My lips parted for a quick, "good pup," but what followed the innocent action shocked me; a short breath escaped - and I saw it.I've been combating these

Saturday, June 20, 2009

Martha Stewart's Peanut Butter Cupcakes with Peanut Butter Frosting and Jelly


Layla is very interested in these peanut butter cupakes...but no, she got a doggie treat instead!


Just bought Martha Stewart's book called Cupcakes....and was inspired to make her Peanut Butter Cupcakes with Peanut Butter Frosting and Jelly for my brother, Jim,...symbolically really, because he is in the hospital right now in Spokane, WA, with bacterial pneumonia.


This is how they looked when they came out of the oven....pretty gorgeous, huh? They smelled great, too.


It was fun frosting them and putting the strawberry jelly on top...so far everyone's loved them!


I found these cool plastic containers online and I love them. I ordered both the 1/2-doz and dozen containers. They work great!

This is how they looked on the way out the door!

This is the recipe:

Peanut Butter Cupcakes

Ingredients

Makes 18
1 3/4 cups all-purpose flour
3/4 tablespoon baking powder
1/2 teaspoon salt
1/4 teaspoon baking soda
6 ounces (1 1/2 sticks) unsalted butter, softened
1 1/3 cups sugar
2/3 cup natural, creamy peanut butter
3 large eggs
1/2 cup sour cream
1/2 teaspoon pure vanilla extract
Peanut Butter Frosting
Strawberry jam, for topping

Directions

Preheat oven to 350 degrees. Line standard muffin tins with paper liners.

Whisk dry ingredients in a large bowl. Cream butter and sugar with a mixer until light and fluffy. Add peanut butter. Add eggs, 1 at a time, beating after each addition. Mix sour cream and vanilla.

Add dry ingredients to mixture. Scrape sides of bowl.

Divide batter among muffin cups, filling each 2/3 full.

Bake cupcakes until testers inserted into centers come out clean, about 20 minutes. Let cool in tins on wire racks.

Once cupcakes are cool, frost tops with peanut butter frosting. Place a dollop of jam in center of frosting. Decorated cupcakes will keep, covered and refrigerated, for up to 2 days.

Peanut Butter Frosting and Jelly

Ingredients

Makes about 3 cups
6 ounces cream cheese
1/3 cup confectioners' sugar
1/2 teaspoon salt
1 cup creamy peanut butter (not natural)
1/2 teaspoon pure vanilla extract
1/2 cup heavy cream

Directions

Beat cream cheese and confectioners' sugar with a mixer on medium speed. Add salt, then peanut butter, then vanilla. Whisk cream until soft peaks form, and then fold into peanut butter mixture. Use immediately, or cover and refrigerate for up to 2 days. (Bring to room temperature, and beat on low speed until smooth before using.)

Hope you like them and...have a great week!

CQ

Martha Stewart's Peanut Butter Cupcakes with Peanut Butter Frosting and Jelly


Layla is very interested in these peanut butter cupakes...but no, she got a doggie treat instead!


Just bought Martha Stewart's book called Cupcakes....and was inspired to make her Peanut Butter Cupcakes with Peanut Butter Frosting and Jelly for my brother, Jim,...symbolically really, because he is in the hospital right now in Spokane, WA, with bacterial pneumonia.


This is how they looked when they came out of the oven....pretty gorgeous, huh? They smelled great, too.


It was fun frosting them and putting the strawberry jelly on top...so far everyone's loved them!


I found these cool plastic containers online and I love them. I ordered both the 1/2-doz and dozen containers. They work great!

This is how they looked on the way out the door!

This is the recipe:

Peanut Butter Cupcakes

Ingredients

Makes 18
1 3/4 cups all-purpose flour
3/4 tablespoon baking powder
1/2 teaspoon salt
1/4 teaspoon baking soda
6 ounces (1 1/2 sticks) unsalted butter, softened
1 1/3 cups sugar
2/3 cup natural, creamy peanut butter
3 large eggs
1/2 cup sour cream
1/2 teaspoon pure vanilla extract
Peanut Butter Frosting
Strawberry jam, for topping

Directions

Preheat oven to 350 degrees. Line standard muffin tins with paper liners.

Whisk dry ingredients in a large bowl. Cream butter and sugar with a mixer until light and fluffy. Add peanut butter. Add eggs, 1 at a time, beating after each addition. Mix sour cream and vanilla.

Add dry ingredients to mixture. Scrape sides of bowl.

Divide batter among muffin cups, filling each 2/3 full.

Bake cupcakes until testers inserted into centers come out clean, about 20 minutes. Let cool in tins on wire racks.

Once cupcakes are cool, frost tops with peanut butter frosting. Place a dollop of jam in center of frosting. Decorated cupcakes will keep, covered and refrigerated, for up to 2 days.

Peanut Butter Frosting and Jelly

Ingredients

Makes about 3 cups
6 ounces cream cheese
1/3 cup confectioners' sugar
1/2 teaspoon salt
1 cup creamy peanut butter (not natural)
1/2 teaspoon pure vanilla extract
1/2 cup heavy cream

Directions

Beat cream cheese and confectioners' sugar with a mixer on medium speed. Add salt, then peanut butter, then vanilla. Whisk cream until soft peaks form, and then fold into peanut butter mixture. Use immediately, or cover and refrigerate for up to 2 days. (Bring to room temperature, and beat on low speed until smooth before using.)

Hope you like them and...have a great week!

CQ

Monday, May 11, 2009

Don't Forget Your Toothbrush


So if buttermilk pie is the star of the dessert buffet at a small town's ladies luncheon, then Scotch-a-Roos are the treat that said ladies make for their daughters' slumber parties. And how can I make such an assumption? Well, the first time I had these diabetic coma-inducing gems was with my dear friend Erin at her parents' house (a house with a small field for a front yard, mind you) in the can't-get-more-Midwestern-if-you-tried town of Hartford, Wisconsin.
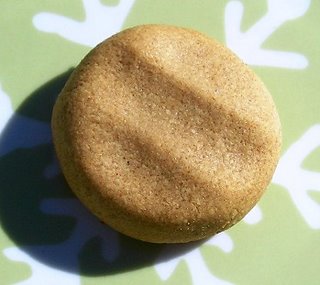
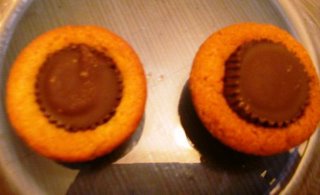

We were probably a little old for a slumber party at the time, but it was the cap-off to Erin's bachelorette party that involved a few bars on Hartford's main drag outfitted with neon signs, dark wood paneling and jukeboxes blasting John Mellencamp, Foreigner and Boston. I vaguely remember bachelorette party essentials like cupcakes in questionable anatomical shapes and there may have been some karaoke as well, but the one thing I'm sure of is that there were Scotch-a-Roos at the afterparty.

At first glance, the Scotch-a-Roo looks somewhat familiar--a golden-hued Rice Krispy treat dressed up with a slick of chocolate over the top. But the first bite reveals something else altogether--an unexpected punch of peanut butter and butterscotch taking the whole thing to the next awesome, chewy level. But I should warn you: if you've never had them, it's probably better to just try one and fall in love with them before you ask how they're made. Because any recipe that starts with a cup of corn syrup and a cup of sugar makes your molars hurt just hearing about it. But if you think about it, that's pretty much what marshmallows are minus their incorporated air plus! there is a cup of peanut butter involved as well, so hello, protein! Nevertheless, I usually halve the recipe to curb the extent of their damage--this way my Scotch-a-roo benders can only be a couple days long because my supply runs out faster.

And once you figure out other ways to justify eating half a pan of them in a weekend, you will be oh-so-pleased to learn how delightfully simple they are to create and how quickly they come together. Just bang a few ingredients (ahem, sugar and more sugar) together in a saucepan until bubbly, stir in the PB, toss with the cereal to coat, and while you're waiting for the sugar to bubble, throw the topping chips into the micro to melt. And then chain yourself to a large piece of furniture in the other room while you wait for the bars to set up in the fridge for a few minutes.

Risking a few cavities never tasted so good. Enjoy!


Scotch-a-Roos

Makes 16 bars

Lining the pan with two perpendicular strips of parchment paper (sprayed with a bit more cooking spray) will allow for easy removal of the Scotch-a-Roo slab and make for neat, even cutting of the bars. This recipe doubles easily--just use a 9x13 inch pan instead.

2 1/2 cups crispy rice cereal
1/2 cup light corn syrup
1/2 cup sugar
1/2 cup creamy peanut butter (not a time for natural peanut butter, people)
1/2 cup semi-sweet chocolate chips
1/2 cup butterscotch chips

Spray an 8x8 inch baking pan with nonstick cooking spray. Line the pan with parchment paper if desired (see recipe note).

Pour the cereal into a large mixing bowl.

In a medium saucepan over medium heat, dissolve the sugar into the corn syrup and bring to a bubble, stirring often.

Meanwhile, place the chocolate and butterscotch chips into a microwave-safe dish and microwave on high for 1-2 minutes, stopping to stir every 30 seconds or so, until the chips are melted and smooth. Set aside.

When the sugar has started to bubble, remove the pan from the heat and stir in the peanut butter until melted. Pour the syrup over the cereal and stir until evently coated. Press the mixture into the prepared pan. Spread the melted chocolate in an even layer over the bars. Refrigerate until cool and the chocolate is set, about 20 minutes, before cutting into bars. Store in an airtight container at room temperature.

Friday, December 19, 2008

Dark Chocolate Peanut Butter Cups


Ingredients:
5 oz 70% dark chocolate
1/3 cup confectioners' sugar
1/4 cup smooth peanut butter
1/2 tablespoon butter
12 roasted peanuts

Directions:
Line 12 wells of a mini muffin pan. Using an electric mixer, thoroughly combine the sugar and peanut butter. Set aside. In a small pan, melt the butter and chocolate together over low heat, stirring occasionally. Remove from heat and allow to cool slightly. Place about a teaspoon of chocolate in each lined well and use a small spatula to coat the sides and bottom of each liner. Add about 1/2 tablespoon of the peanut butter mixture to each well. Cover each with remaining chocolate. Top each with a peanut. Refrigerate or place in a cool location until firm. Store uneaten chocolate cups in a cool, dry place.

Yield: 12 cups


My thoughts:
I am a big dark chocolate fan and rue the day that Hershey stopped making their dark chocolate Reese's Cup miniatures, they had a great chocolate to peanut butter ratio and weren't nearly as sweet as the milk chocolate ones. Luckily it is pretty quick and easy to make a homemade version. I like to use super dark chocolate but you could use something a little closer to semi-sweet if you'd prefer.

Thursday, February 21, 2008

No Bake Peanut Butter Oatmeal Cookies


Ingredients:
2 cups granulated sugar
1/4 cup butter
1/2 cup milk
3 cups old fashioned oatmeal
3/4 cup smooth peanut butter*
1 teaspoon vanilla

Directions:
Bring sugar, butter, and milk to a full boil, remove from heat, add oatmeal. Stir. Then add vanilla and peanut butter. Stir. Drop by teaspoonfuls on to waxed paper. When cool, pack in single layer in Tupperware or other air-tight container to store.


*I used Peanut Butter & Co Smooth Operator.


My thoughts:
These are not the most attractive cookies I've ever made but they are tasty. They are my favorite kind of peanut butter cookie and actually one of the very few forms I actually consume peanut butter in. My Aunt A used to make these when I was little, and since she was my great aunt I bet she made them for my mom when she was a child as well. Since they have zero baking time they come together really quickly. They are a great "first cookie" for kids to make as the dough is barely warm when you scoop them on the the waxed paper.

Wednesday, November 14, 2007

Afternoon Delight

Darling Reader, if we have never met, there are a few questions that can help me understand if we'll really get along. One is: do you appreciate the great works of Journey, Fleetwood Mac and Hall and Oates (it's sort of okay if a drink or two helps you to do so)? Another is: do you often take pause at furry animals and smiling babies, if only for a moment to think of how great it is that they exist? And lastly, and possibly most importantly (don't tell Steve Perry): do you believe in the power of the Afternoon Cookie?

Few things define "simple pleasure" as much as a detour in one's busy day to chow down on a very necessary cookie at 4:00 p.m. . No matter what all those lady health and fitness magazines tell you, a handful of nuts and dried fruit or an apple and a piece of string cheese are clearly only for the 10 a.m. munchies when you are still feeling virtuous and may very well be oblivious to how the rest of your day will unfold. Call me six hours later, when your lunch has started losing its satiating abilities, life has gotten REAL and you Just. Need. A. Cookie. And don't feel bad about it. Because I will totally be on board and bring you a really great peanut butter cookie like this one. Especially if you answered "yes" to the first two questions in the above paragraph.


I love the humble peanut butter cookie. It's an American classic, and its ideal, to me, is delightfully different from the fat, chewy Oatmeal Raisin and Chocolate Chip and the elegantly crisp Butter and Sugar. I think a great peanut butter cookie does have a tiny bit of chew, but only when you get towards the very center. Otherwise, a sandy texture is what I'm after with a crunch that comes not just from chopped peanuts, but from the sugars basking in a long baking time. And no peanut butter cookie worth its weight in Jif would dream of entering the oven without dressing up in a kicky crosshatch pattern provided by a dinner fork. Its ingredients are all staples in the traditional American home, making it one of the few recipes that doesn't require a special trip to the store. It's simple, earthy and undemanding, just the thing for the part of the day when things can start to get a little hairy.


Afternoon Peanut Butter Cookies

Makes about 4 dozen

2 sticks butter
1 cup brown sugar
1 cup granulated sugar
2 eggs
1 1/2 cups peanut butter
2 1/2 cups flour
1 tsp baking soda
1 tsp vanilla extract

Preheat the oven to 350�F and set an oven rack to the middle position.

In a bowl of a mixer fitted with a paddle attachment, beat the butter, sugar and peanut butter together until light and fluffy. Add the eggs and vanilla, beating to combine. Mix in the flour and baking soda. Roll generous spoonfuls of the dough into golf-ball size balls and place onto the prepared cookie sheets. Use a fork to flatten and create a crosshatch pattern on the top of each cookie. Bake for about 20 minutes until the cookies are just begin to brown at the edges. Cool on the cookie sheet for two minutes, then transfer them onto a wire rack to cool completely.

Sunday, November 11, 2007

Awesomely Quick Treat Flash 2


No secret I can get serious about my baking projects. I channel Martha, giddy at the sight of mise resting at the ready in the most perfect Type-A way, in matching bowls from my 10-piece set. I find it a fabulous challenge to constantly improve my technique, and marvel at how small tweaks in the process can drastically change the efficiency and outcome of a recipe. It's really no different than the husband's golf obsession. Baking as sport, if you will. But sometimes, after a dinner that took some doing, a girl needs her sweets in a way that requires nothing more than scooping, stirring, and a little heat. Something that she can practically throw together with her eyes closed. For such moments when the sweet tooth rules and the KitchenAid looks just so involved, I love to break out the kinds of kitschy recipes that are usually found in Xeroxed, plastic-spiral-bound church bake sale cookbooks or on the packaging of some baking ingredient.


Few things in life offer more instant gratification than the decades-old "no-bake treats" from the label of the Hershey's Cocoa can. All of the ingredients are probably in your cupboards right this second. You are moments away from having your house smell amazing and your belly sing with the sugary, chocolately goodness that only a Cold War era treat can bring. Trade your paddle attachment for a wooden spoon and enjoy this Awesomely Quick Treat Flash. Hooray!


Hershey's Cocoa No-Bake Treats

Makes 2-3 dozen

2 cups granulated sugar
1/2 cup (1 stick) unsalted butter
1/2 cup milk
1/3 cup cocoa powder
1/4 teaspoon salt
1/3 cup crunchy peanut butter
3 cups quick-cooking rolled oats
1/2 cup chopped peanuts (optional)
2 teaspoons vanilla extract

Place a sheet of parchment or foil on a cookie sheet.

Combine sugar, butter, milk and cocoa and salt in medium saucepan. Cook over medium heat, stirring constantly, until the mixture comes to a steady, rolling boil, like chocolately lava. Remove the pan from the heat and set aside to cool for 1 minute.

Stir in the peanut butter until well-blended. Add the oats, peanuts (if using) and vanilla extract, mixing thoroughly. Quickly drop the mixture by heaping tablespoons onto wax paper or foil. Makes about 2-3 dozen, depending on how generous your spoonfuls are, of course.

Monday, August 6, 2007

Peanut Butter Fritters

Oh, no. You heard right.

I first found this recipe in the June/July 2007 issue of Everyday with Rachael Ray while on a flight to Denver. I know I can't be the only one who is suddenly starving as soon as an airplane reaches cruising altitude, trapped at 30,000 feet with nothing but microscopic bags of generic "snack mix" and mushy, ten-dollar Chicken Caesar Somethings to choose from; it kind of reminds me of the intense hunger that would immediately follow childhood fluoride treatments at the dentist when one couldn't eat for what was undoubtedly the longest 30 minutes in history. Anyway, I saw this recipe during one of those kind of starving moments, and wondered if I would still be as interested in it once I touched the ground.

Well, nearly two months later I still have the magazine, and I think I must have thought of making these about 200 times in that time period. And I finally made it happen. And, oh my, did it happen. These were really great, and one of my first forays into the world of fritter/doughnut making. Unless you count my graduating from Hush Puppies University for Yankees.

Peanut Butter Fritters

From Everyday with Rachael Ray, June/July 2007

Makes 20 to 25

3/4 cup flour
1/3 cup packed brown sugar
1/4 teaspoon baking powder
1/4 teaspoon salt
1/8 teaspoon baking soda
1/4 cup buttermilk
3 tablespoons creamy peanut butter
1 large egg
1 teaspoon pure vanilla extract
Peanut oil, for frying
Whipped cream and raspberry jam, for serving

1. Preheat the oven to 200�. Combine the flour, brown sugar, baking powder, salt and baking soda in a medium bowl. In a separate bowl, whisk together the buttermilk, peanut butter, egg and vanilla. Lightly mix the wet ingredients into the dry ingredients; the batter will be fairly thick.

2. Pour enough oil into a small, deep saucepan to reach a depth of 1 1/2 inches and heat over medium-high heat until the oil registers 310� on a deep-fry or candy thermometer.

3. Working in 3 or 4 batches, drop the batter by rounded teaspoons into the hot oil and cook, turning once, until lightly browned, about 1 1/2 minutes per side.

4. Using a slotted spoon, transfer the fritters to paper towels to drain. Keep the fritters in the oven as you continue frying. Serve hot with the whipped cream and jam.

I was really pleased this recipe. I opted to halve it and the results were still great. They were light, fluffy, and full of earthy peanut flavor, with a tender, deep golden exterior. I may add a bit more brown sugar next time, as I usually only have all-natural peanut butter on hand and used it in these--I would have liked them a bit sweeter on their own. But a dusting of powdered sugar and some of my homemade strawberry jam made up for it. Also, the peanut butter I had around was chunky, and it didn't effect the finished product one bit. The additional crunchy texture was welcome. And not like these need any more embellishment, but I may try dipping them in some melted dark chocolate next time.

Oh yes, I went there.

Monday, October 30, 2006

Peanut Butter Sandies


Ingredients:
1 3/4 cup smooth peanut butter
1 cup flour
1 cup light brown sugar

Directions:
Preheat oven to 350. In a large bowl, beat together sugar and peanut butter. Slowly add flour and mix until thoroughly combined. Using your hands, roll about a tablespoons of dough together into a ball. Place on an ungreased cookie sheet and press slightly to flatten. Bake 8 minutes or until the bottoms are lightly golden. Allow to cool on the sheet for about 5 minutes then carefully remove to wire racks to continue to cool. It is best to allow them to cool completely before eating, they "set" while they cool.
My thoughts:
These are super easy (and vegan) cookies. They have a crumbly, some what sandy texture. I don't generally eat much peanut butter but these cookies are tasty!

Sunday, December 25, 2005

Peanut Butter Cup Cookies

Peanut Butter Cup Cookies


Ingredients:

1 cup butter
1 cup peanut butter
1 cup sugar
1 cup brown sugar
2 eggs
2 1/2 cups of flour
1 1/2 tsp. of baking soda
18 oz miniature Reese's cups, unwrapped (I used the dark chocolate variety but they can be difficult to find)

Directions:

In a large bowl, cream together both sugars, the peanut butter, eggs and butter. Add the flour and baking soda and mix throughly. Shape in to one inch balls and drop into a ungreased mini-muffin pan, one to a section. Bake at 375 degrees for 8 minutes. Remove pans from oven and immediately press one miniature into each warm cookie. The candy should be fairly level with the top of the cookie. Cool in the pan for 15 minutes then remove to a wire rack.

Yeild: approxitily 5 dozen cookies.

Note: cookies can be frozen for up to 6 months.


My thoughts:
These are some of my favorite cookies. I had made them with the traditional milk chocolate Reese's minatures years ago and always thought that they would be even better with dark chocolate. When my mom spotted the dark chocolate variety she snatched them up and made me these cookies again. Yum!

Monday, June 28, 2004

Peanut Butter Fudge

Ingredients:

1 cup unsalted butter, plus more for greasing pan

1 cup peanut butter (use Peter Pan, it gets the best results in baking)

1 teaspoon vanilla

1 pound powdered sugar


Directions:

Microwave butter and peanut butter for 2 minutes. Stir and microwave for 2 more minutes. Add vanilla and powdered sugar to peanut butter mixture and stir to combine. Pour into a buttered 8 by 8-inch pan lined with waxed paper. Place a second piece of waxed paper on the surface of the fudge and refrigerate until cool. Cut into 1-inch squares and store in an airtight container.