Showing posts with label cakes. Show all posts

Wednesday, February 2, 2011

Sunday, October 17, 2010

Dorie's Double Apple Bundt Cake


Truth be told, this post was supposed to be about an entirely different recipe. Perfectly delicious, mini dutch apple pies, in fact, using jazzed up store-bought pie crust. But then this lovely Double Apple Bundt Cake happened, and well, pie, schmie. Also, it makes for a wonderful segway into bragging talking about how I've gotten to chat with the ever-inspiring Dorie Greenspan twice in the past week, in person. And I died a little from the wonder of it all both times.


For those of you unfamiliar with Dorie Greenspan, I will resist the urge to shake and judge you and just say this: she is a fantastically talented food, cookbook and recipe writer, and her baking recipes in particular are some of the most phenomenal and fool-proof around. Add to that her homes in Paris and New York City, an unbelievably sweet and warm demeanor, smartly cropped hair and wee spectacles, and you've got yourself the sort of woman that you can only dream of growing up to be. She, and her books, are really something.


I first spazzily introduced myself to Dorie nice and early on the first day of BlogHer Food, a forecast of the many inspiring folks to whom I'd have the pleasure of spazzily introducing myself over the course of the weekend. I won't go into elaborate details about the conference itself, because there are so many fabulous bloggers who have already shared their experiences and told of the general events of the weekend. But because we're friends, I'll be honest with you: I sort had mixed feelings about the whole thing. I know! I know. Hear me out.


Here's the thing: for starters, the upsides were huge, such as the aforementioned face-to-face meeting of other bloggers who constantly inspire me, meeting new friends and the mad knowledge that was dropped at several of the sessions I attended. But the awkward teenage introvert in me quickly discovered a downside--excitedly chatting with so many people I'd never met while crammed body-to-body with hundreds of other excitedly chatting people and somewhat aggressive, product-pushing sponsors was, in a word, crazymaking. Halfway through the first day, I needed a padded room, a nap, a cake and a fork. Come to think of it, this Double Apple Bundt Cake of Dorie's would've knocked out my throbbing social anxiety quite nicely.


After a week of recovery from BlogHer Food, I got a double dose of Dorie at her San Francisco book signing (for her latest treasure Around My French Table--please love yourself a little more by getting a copy ASAP, thank you very much). I spazzily greeted her all over again, and she was every bit as adorable and welcoming as she was in our first meeting as she signed my well-loved copy of Baking: From My Home to Yours. Flipping through it back at home after the signing, I realized that the time was right--nay, perfect--for her Double Apple Bundt Cake.

If you can think of anything more suitably October in feeling than baking a softly spiced, apple-studded, big mama Bundt cake, then I'd really like to know what that is. Because while the cake alone would've been enough to make anyone burst with Fall Joy, I also prepared a huge pot of shortribs and vegetables braised in red wine, and the whole thing was just so magically autumnal I could've cried right there on the spot. I think Dorie would be proud.


Double Apple Bundt Cake
Adapted from Dorie Greenspan's Baking: From My Home to Yours

You can really use any kind of apples for this recipe, but the more firm they are, the easier they'll be to grate. Also, if you opt for a store-bought apple butter, try to find the least sweet of the ones that are available (or, hey, make your own!). My cake came out a little sweeter than I might have liked due to an apple butter that was creeping near cloying, though nobody (but, um, me) complained about the sweetness of the finished cake.

If you've got the time (and the willpower), this Bundt is the sort of fabulous cake that tastes when better when left to stand overnight, wrapped well in plastic wrap, before serving.

Makes 12 servings

2 cups all-purpose flour
2 teaspoons baking powder
1/2 teaspoon baking soda
1/2 teaspoon ground cinnamon
1/4 teaspoon freshly grated nutmeg
1/4 teaspoon ground ginger
1/4 teaspoon salt
10 tablespoons (1 1/4 sticks) unsalted butter, at room temperature
1 1/2 cups sugar
2 large eggs
1 cup store-bought (or homemade) apple butter, spiced or plain
2 medium apples, peeled, cored and grated
1 cup pecans or walnuts, chopped
1/2 cup plump, moist raisins (dark or golden)

Optional glaze:

1/3 cup confectioners' sugar
about 2 tablespoons lemon juice, orange juice, (or milk or water, whatever you've got)


Position a rack to the center of the oven and preheat it oven to 350 degrees. Butter a 12-cup nonstick Bundt pan, or if yours is not nonstick, butter and flour it, too.

Whisk together the flour, baking powder, baking soda, spices and salt. Set aside.

In the bowl of an electric mixer, cream together the butter and sugar on medium speed until light, fluffy and pale in color, about 3 minutes. Scrape down the bowl. Beat in the eggs one at a time. Scrape down the bowl again. Reduce the speed to low and mix in the apple butter--don't worry if the batter looks curdled at this point. Mix in the grated apples. With the mixer still running on low speed, stir in the dry ingredients gradually. When just a few streaks of flour remain, stir in the nuts and raisins. Stop the mixer and give the batter a few folds by hand just to make sure everything's incorporated.

Scrape the batter into the prepared pan, and bake until a toothpick comes out clean inserted deeply into the center of the cake comes out clean, about 50 to 55 minutes. Let cool on a wire rack for about 10-15 minutes before unmolding it onto the rack to cool completely.

If you want to glaze the cake, stir together the confectioners' sugar and your liquid of choice, a tiny bit at a time, until the glaze falls easily off the end of a spoon. Place the cake on a serving plate. Drizzle the cake generously with the glaze, letting it drip down the sides of the cake. Alternatively, you can dust the cake with confectioners' sugar just before serving. This cake keeps beautifully at room temperature for up to 4 days, or up to 2 months in the freezer.

Tuesday, October 12, 2010

Sunday, September 12, 2010

Cherry Shortbread Cake Squares


Phew.
After a crazy two-week blitz of various familial houseguests, I'm happy to say that we are glowing from the enjoyment of lots of great meals (up yours, Calories!), sunny tourist-y outings (Dear San Francisco Weather: thank you for cooperating for once), and hours of laughing so hard that no sound comes out (wine + Taboo + people you've known your entire life = OMGAWESOME). Being surrounded by family for so many days is a rare and wonderful thing for us--we are all feeling so loved around here right now, not to mention that Little C finds me especially boring in the aftermath. But with that sort of flurry of activity comes exhaustion of the eye-crossing variety, and the need for insanely simple, but totally comforting and satisfying recipes. I give you Cherry Shortbread Cake Squares. With pie filling from a can. Don't hate--participate!


I know I've told you before about my mom being more of a great creative cook than a baker, but this recipe is one of the few sweet gems she would whip up from time to time. Like her awesome cheesecake that involves Bisquick, this recipe with its canned cherry pie filling may make some upper echelon food people raise an eyebrow. But to them I say, don't be a jerk. These are amazing.

And unto those food snobs I also say this: If you must, swap out the cherry pie filling for something fresh and seasonal. Like maybe a few slices of the cute little Italian prune plums that are so fleeting and perfect right now. Or gently cook some apple slices with a touch of cider and cinnamon to soften them a bit and use those. But I have to say, when I was tucking these sweet canned cherries and their vibrant, inexplicably satisfying goo into the batter in cheery little threesomes, it made me so flippin' happy. So I urge you to try that first, before you get all elitist on me. It's just that good.


However, it sort of doesn't matter what fruit you use here, because it's really the tender, buttery cake that's the star. Dusted with powdered sugar, it's like a confection meets cake. It makes me die a little just thinking about it. I also die a little when I think about how much walking, drinking and Little C nap-skipping we've done in the past two weeks, but that's neither here nor there.


Cherry Shortbread Cake Squares

I love adding a good dose of lemon extract (or zest) to the batter--the lemon lift goes so fabulously with the cherries. But if you try this recipe with fall or winter fruits, consider omitting the lemon extract and just use a tablespoon of lemon juice to add a bit of dimension without such a forward lemon flavor.

Because I rarely have two weeks worth of houseguests, I tend to halve this recipe and use a quarter-sheet pan (12x9-ish inches) instead of a half-sheet pan and it works beautifully (although you will have leftover pie filling). If you're making them ahead, dust them with powdered sugar just before serving. These are even better the next day.

Makes 2 dozen 3-inch squares

1 cup (2 sticks) unsalted butter, at room temperature
1 1/2 cups sugar
1/2 teaspoon lemon extract (or 1 tablespoon lemon juice--see note)
1 teaspoon pure vanilla extract
1/2 teaspoon salt
4 eggs
2 cups all-purpose flour
1 (21 ounce) can cherry pie filling
Confectioners' sugar, for dusting

Position a rack to the center of the oven and preheat it to 350 degrees. Grease and flour a half-sheet pan (about 12x17 inches) with a 1-inch rim, or spray it with cooking spray, line it with parchment paper, and lightly spray the parchment, too.

In the bowl of an electric mixer, beat together the butter and sugar until very light and fluffy, about 2 minutes. Beat in the lemon extract, vanilla and salt. Beat in the eggs one at a time. Scrape down the bowl. On the lowest speed, stir in the flour. To avoid overbeating, stop mixing when there's a few streaks of flour left, and finish stirring the batter by hand.

Scrape the batter onto the sheet pan and smooth it into an even layer. Score the batter into 24 squares with a toothpick (don't worry about perfectly even squares as the lines will disappear during baking; it's just to make placing the cherries easier). Place 3 cherries in the center of every square.

Bake until a toothpick comes out clean, about 30 minutes. Cool completely in the pan on a wire rack. Just before serving, cut into 24 squares and dust with powdered sugar. Store any leftovers in an airtight container with layers of waxed paper or parchment for up to 3 days.

Monday, August 16, 2010

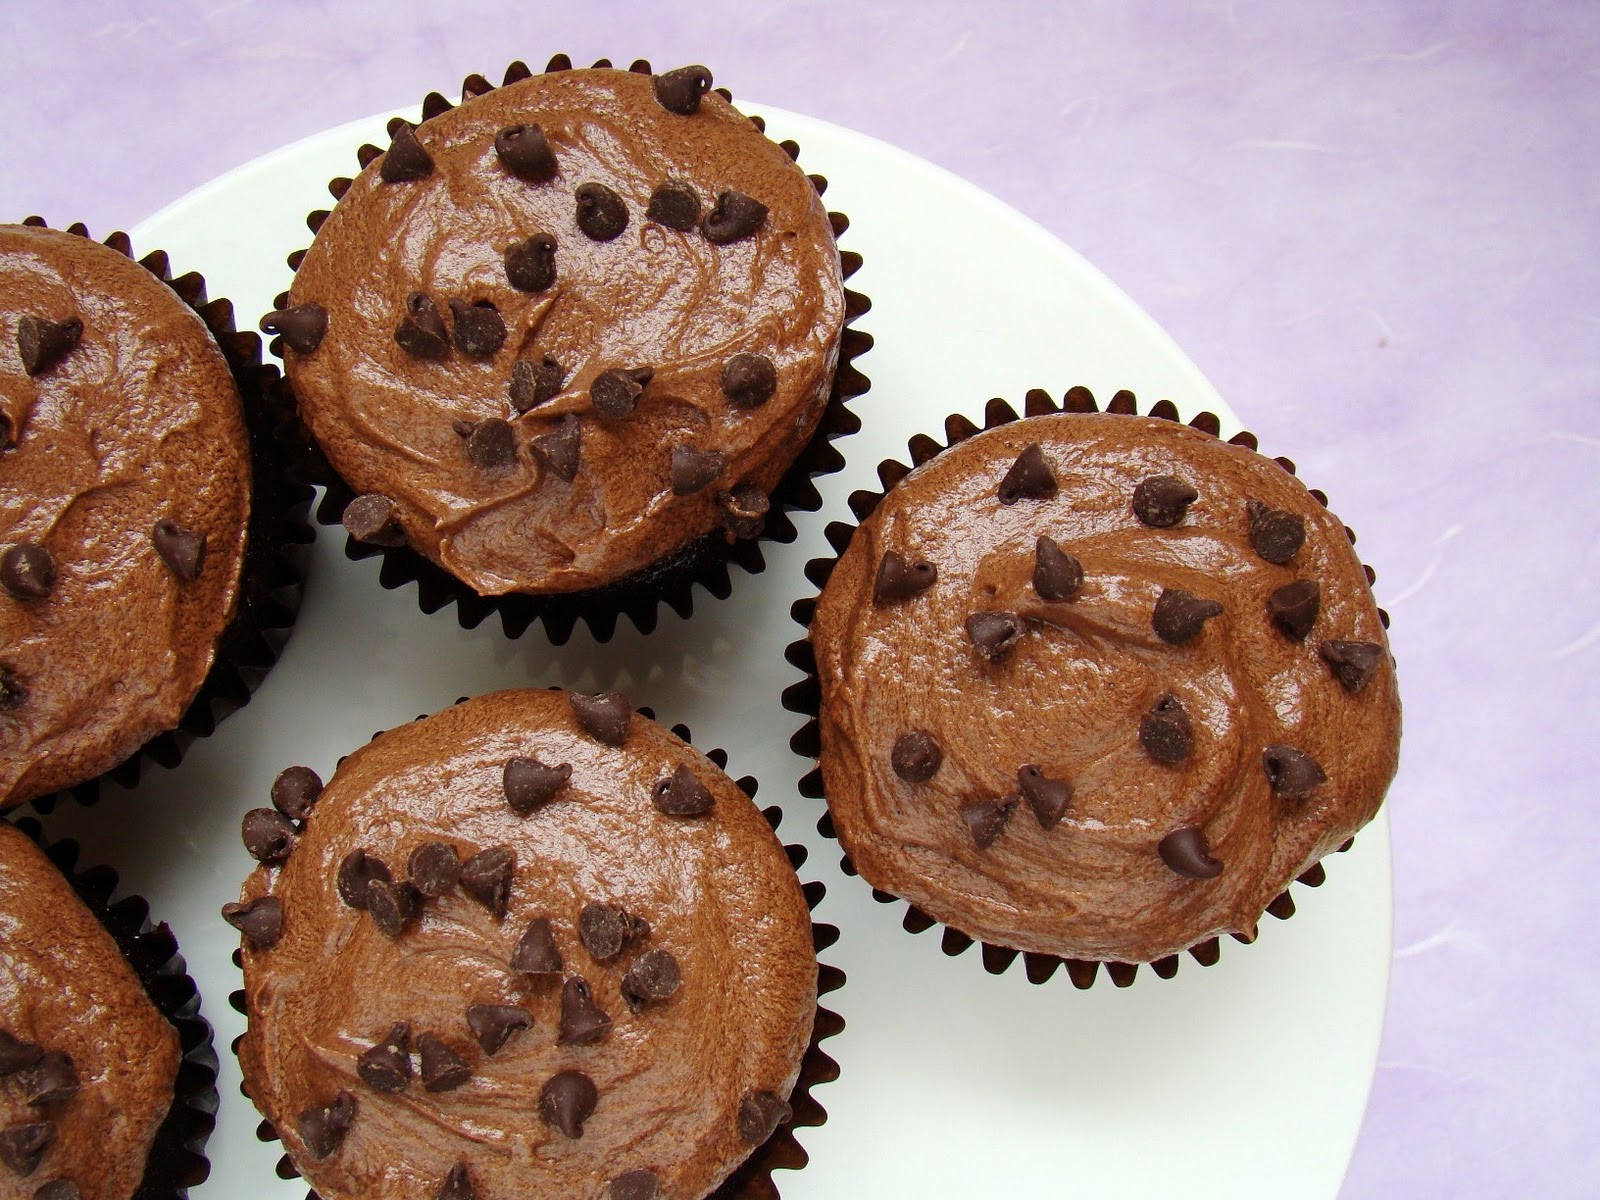
My Ultimate Chocolate Cupcake


I know this confession is a risky one, but I think our relationship can withstand such brutal honesty: Despite the chocolate-on-chocolate celebration of my latest posts, I can sort of take or leave chocolate. True story. I mean, I like chocolate, really I do--love working with it and putting it in my face on occasion. Because really, when a chocolate craving hits at certain, ahem, personal times, nothing but chocolate will do (holler if you hear me, ladies). However, I'd never be called a "chocoholic" or be gifted a mug that says something like "Ack! Don't talk to me before I've had my morning chocolate!", or whatever.

But even so, this here chocolate cupcake was so smack-the-counter good that they've become a Real Problem. Which is to say that my typical day of three meals and one dessert has basically inverted for the lifespan of these cupcakes. You can't say I didn't warn you.


I've shared the recipe for the chocolate cake with you before--it truly is my go-to recipe that I've tweaked and amped up a bit from Martha's original recipe over the years. Love, love, love it. But the frosting is a new thing entirely, a result of my newfound love and fascination with flour frostings. I needed a chocolate version of this frosting, and I needed it to be a very specific frosting situation. For this part-time chocolate lover, it basically needed to blow my mind with chocolaty perfection, but not be cloyingly rich or overtly decadent like so many other chocolate frostings.


I wanted a cloud of chocolate atop the rich cake and some deranged combination between the flavor of melted chocolate ice cream, chocolate mousse and the center of a 3 Musketeers bar. It took a few attempts to get there. But judging by the ferocity and stealth with which I hid the leftovers of this frosting in the depths of my refrigerator, I'd say it was a total success. And the marriage of the cake and the frosting--mmm, mmm! I'd consider converting to Chocoholism for a cupcake like this.


Ultimate Chocolate Cupcakes

I get about 18 cupcakes out of this recipe, but you can stretch it to a full 2 dozen if need be. It also makes two great 9-inch cake layers. Using brewed coffee instead of just water makes the chocolate taste more...chocolatey. You can dissolve 1 teaspoon instant espresso in 3/4 cup hot water instead. Mini chocolate chips melt into the cake to make it extra rich and decadent.

Makes 18-24 cupcakes

For the cake:

3/4 cup unsweetened cocoa powder (I love Ghiradelli or Valhrona)
1 1/2 cups all-purpose flour
1 1/2 cups sugar
1 1/2 teaspoons baking soda
3/4 teaspoon baking powder
3/4 teaspoon salt
2 large eggs
3/4 cup strong brewed coffee (see note)
3/4 cup buttermilk
3 tablespoons canola oil
1 teaspoon pure vanilla extract
2/3 miniature semi-sweet chocolate chips (or regular chips, chopped fine)

For the chocolate flour frosting:

3 tablespoons flour
1 cup milk
4 tablespoons premium cocoa powder
Pinch of salt
1 cup (2 sticks) unsalted butter, at room temperature
1 1/3 cups confectioners' sugar
1 teaspoon pure vanilla extract
3 ounces unsweetened chocolate, melted and cooled

Preheat the oven to 350 degrees. Line standard muffin tins with paper liners. Spray the top of the muffin tin with cooking spray for extra non-stick insurance, as these cupcakes can have a serious rise and can puff over the edges of the tin's wells.

Sift together the cocoa powder, flour, sugar, baking soda, baking powder, and salt into a large bowl. Add the eggs, coffee, buttermilk, oil and vanilla. Beat until smooth with an electric mixer, about 3 minutes. Scrape down the sides and bottom of bowl to assure batter is well-mixed. Fold in the mini chocolate chips.

Divide batter evenly among muffin cups (an ice cream scoop works well here), filling each cup no more than 2/3 full. Bake until tops spring back when touched, about 20 minutes. Transfer to a wire rack; let cool completely before frosting.

For the frosting: In a medium saucepan over medium high heat, whisk together the flour, milk, cocoa powder and salt until the mixture comes together to form a thick paste. Press the mixture through a fine mesh sieve into a small bowl, and press a sheet of plastic wrap right on the surface of the mixture to prevent a skin from forming. Cool in the refrigerator it for about 15 minutes, or until it's cool to the touch.

In the bowl of an electric mixer, beat together the butter and confectioners' sugar until light and fluffy. Beat in the chocolate mixture until the frosting begins to lighten in color and texture, almost mousse-like. Beat in the melted unsweetened chocolate until the frosting is fluffy, smooth and well-blended. Frost cupcakes, and store any leftovers in an airtight container in the refrigerator.

Thursday, July 1, 2010

Tres Leches Cake: The Video!

Because my recent trip to visit family back in Illinois has rendered me unable to eat anything but comfort foods and because there's really nothing wrong with cake soaked in sweet, caramelized milk and covered in mounds of freshly whipped cream, I give you my favorite recipe for Tres Leches Cake. You can find more videos like this one on the POC Media page. Enjoy!


Mad video skillz courtesy of Curt Norris.

Monday, May 31, 2010

White Chocolate Cupcakes


Oh, White Chocolate. Poor, misunderstood, totally underestimated White Chocolate. Come here. I feel you. The awkward young teen in me (the one with the pointless "clear" braces and oddly shaped bangs, whose coltish gait made her fear all things athletic) pulls you to her AAA-cup breast to tell you it will be all right, that you have lots of wonderful qualities. And someday, even the most elite of the culinary community will come to embrace you and then wonder what took them so long. When that happens, don't forget that I was always here, loving you all along, even when everyone was dissing you and saying you were so 80s.


In fact, I love you so much that I buy you in bulk, and sadly shake my head when I notice that the bins of your dark and bittersweet competition are always visited more than yours. But then, maybe that's the problem right there. It's sort of true what your haters say--you're not really chocolate. You're cocoa butter, sugar and vanilla, no actual chocolate in you to speak of. But you know what, White Chocolate? That's not your fault. Your name is just a label. A label that some moron gave you as a way to categorize you for their own convenience. But one day you'll graduate from high school and head off to college and be able to start fresh, and--wait, what? Oh.


So I was saying. Cocoa butter and vanilla is a lovely thing to be--at your best, you're dreamy and creamy, a breath of sweet vanilla in every bite. I like to think of you as Vanilla Chips or Vanilla Bar, and use you in fabulous ways that break the monotony of having the dessert course be an endless cycle of chocolate and fruit-based desserts. And with recipes like White Chocolate Cupcakes with White Chocolate Cream Cheese Buttercream to show off everything that's great about you, well, you are a star.


Other than just being delicious, one of your most endearing qualities is your ability to play well with others. Like in this recipe, which satisfies my cupcake craving like none other. Coconut milk, of all things, is the secret, undetectable ingredient here that gives you even more sparkle in a cake that is so perfectly sweet, so moist, with a richness I've never experienced before in a white cake. Pairing you with cream cheese in a luscious buttercream is nothing short of White Chocolate Dynamite (which, coincidentally, would be an awesome moniker for me to use in a dance contest someday). I love you, White Chocolate. Thanks for being you.


White Chocolate Cupcakes
Adapted from The Craft of Baking

The original recipe says this recipe yields 14 cupcakes--I easily got 18, using a leveled 1/4 cup of batter in each cup (I used a standard ice cream scoop). I'm sure the white chocolate called for in the original recipe is meant to be chopped bar chocolate, but I had tons of high-quality white chocolate chips on hand, so I used them instead and everything turned out delicious. I also opted to add some confectioners' sugar to the frosting, to stiffen and sweeten it up a bit, but it's not necessary--add it only to your taste.

The cakes and the icing keep beautifully, tightly covered and refrigerated, for up to 3-4 days so these are great make-ahead cupcakes. Unsweetened coconut milk can be found in nearly every supermarket under a few brand names, usually in the Asian foods aisle.


If you can find them, white chocolate vermicelli (thinner, crunchier and much tastier than regular jimmies) make the perfect finishing touch for these cupcakes, adding crunch and extra white chocolate flavor.

Makes 18 cupcakes

For the cakes:

1 3/4 cups all-purpose flour
1 teaspoon baking powder
1/2 teaspoon kosher salt
12 tablespoons (1 1/2 sticks) unsalted butter, at room temperature
1 cup sugar
1 tablespoon pure vanilla extract
8 ounces high-quality white chocolate, chopped bar or chips
1/2 cup unsweetened coconut milk
5 large egg whites

For the frosting:

6 ounces cream cheese, at room temperature
6 tablespoons (3/4 stick) unsalted butter, at room temperature
1/2 teaspoon pure vanilla extract
1/4 teaspoon kosher salt
4 1/2 ounces high-quality white chocolate, chopped bar or chips
Up to 2/3 cup confectioners' sugar, to taste (see note)

Position an oven rack to the center of the oven and preheat it to 350 degrees. Line two 12-cup muffin tins with paper liners, 12 in one and 6 in the other.

Whisk together the flour, baking powder and salt. Set aside.

In the bowl of an electric mixer, cream together the butter, sugar and vanilla until very light and fluffy, about 3 minutes.

Melt the white chocolate in a double boiler. When it's just warm to the touch, stir it into the butter mixture on low speed, just until combined--it may separate a bit, but it will come back together. With the mixer on low, alternate adding the flour mixture and the coconut milk in three batches until well-blended. Transfer the batter to a medium bowl.

Clean and dry the bowl of the mixer. Whip the egg whites on medium high speed until they reach soft peaks, about 4 minutes. Gently fold the egg whites into the batter in three additions.

Fill the muffin cups no more than 3/4 of the way full with the batter. Bake one tin at a time until a toothpick just comes out clean and the tops spring back when lightly touched, about 20 minutes. Invert the cupcakes onto a cooling rack, then turn them right side up and let them cool completely.

To make the frosting, beat the cream cheese, butter, vanilla and salt together until light and smooth. Melt the white chocolate in a double boiler and cool until it is just warm to the touch. Scrape the white chocolate into the cream cheese mixture and beat to combine. Taste the icing and check the texture--if you like your icing sweeter and with a bit more body, add in some confectioners' sugar. If the frosting is too soft to spread, refrigerate it for about 20 minutes and then whip it for 30 seconds before using. Ice the cupcakes generously and decorate as you wish.

The iced cupcakes can be kept in an airtight container in the refrigerator for up to 4 days.

Thursday, May 20, 2010

On Peanut Butter Pound Cake and Oven Rack Placement


I love the idea of taking something awesome and making it�awesomer. Like a good old-fashioned pound cake, for example. When done right�golden, buttery, a slight crust with a tender crumb�it doesn�t get much better. Unless you add peanut butter. And wee chocolate chips, because it's a natural thing to do. All aboard! The awesomer train is leaving. Am I right? Well, you just hang on there a second.


Okay, so. Because we�re friends, I�ll start by saying that I really sort of messed up this recipe. The finished product didn�t really reach its full potential and I totally take responsibility for that. It all started with so much promise�lots of creamy peanut butter swirled into a billowy, silky batter? I mean, come on�but then, then!, I committed one of the Cardinal Sins of Baking. I didn�t read all the instructions carefully enough before I started. Was it due to a tiny person suddenly overturning something heavy onto herself in the other room? Did I suddenly realize I�d forgotten to put on deodorant AGAIN? I�ll never tell. Either way, it was a very straight-C student thing of me to do, glossing over the instructions like that. Thinks of high school, covers face, runs away.


I�d prepped my (properly-sized) pan with cooking spray and parchment, started with room temperature ingredients, and preheated my oven to the right temperature with my trusty oven thermometer inside to make sure the heat was on point. But! I was a crazy fool and didn�t place my oven rack to the right position within that perfectly heated oven. Wuh-wuuhhhh. So I�ll take one for the team here and be the example of why being a nitpicker about oven rack placement really does matter. I love you guys that much.


So you might be saying, �Really, Shauna? Does oven rack placement make THAT big of a difference, or are you just being all Type A on us again?� . Well. The answer is oh, yes (on both accounts, really), and it separates the just okay results from the stellar ones. Most baking recipes will indicate where you should place the oven rack, and most often this will be in the center of the oven, where the heat will hit both the top and bottom of the baking pans with the same intensity and give even browning and baking. I�ve found that in most recipes where oven rack placement isn�t indicated, it�s safe to assume that the center position will give good results (or for things like cookies when you can bake more than one sheet at a time, go for the upper and lower thirds of the oven).


But other recipes, like those for thick, dense cakes like Bundts, loaf cakes, and ahem, peanut butter pound cakes, call for the oven rack to be placed in the lower part of the oven. With more heat hitting the cake from the bottom of the oven, the center will bake thoroughly without the top getting overly browned or burnt during the long bake (usually an hour or more) that these sort of cakes require.


So if you�ve got a perfectly browned peanut butter pound cake that�s still crazy raw in the middle after an hour, making your total baking time ridiculously longer than what the recipes suggests (and rendering the finished product edible, but undeniably overbaked) then you, too, might be a victim of Oven Rack Placement Issues. Just like me. Sitting here, eating a hunk of peanut butter pound cake with so much potential and great flavor, but an overbrowned crust and �meh� texture due to overbaking. Thinking about how I�ve got to add Oven Rack Placement Issues to all my other issues. I-yi-yi.

And now that I�ve broadcast the error of my ways, I�m still going to pass this recipe on to you with great faith that you�ll do it the right way. And then report back with your success in the comments section to rub it in. Please and thank you.


Peanut Butter Pound Cake

Adapted from Flo Braker�s recipe in The San Francisco Chronicle Cookbook

Now, the original recipe didn�t include chocolate chips, but I literally could not hold myself back from adding them. It was a moral issue of sorts. You do what you like.

Room temperature ingredients are one of the pillars of great baking, but are seriously important here. With no leavening, all the lift in this cake with come from air incorporated into the batter�you�ll get the most air into the mix with truly room temperature butter and eggs.


Serves 8-10

1 cup (2 sticks) unsalted butter, at room temperature
1 1/2 cups sugar
1/2 cup creamy peanut butter (the commercial stuff, not natural)
5 large eggs, at room temperature
2 cups unsifted all-purpose flour
2/3 mini semisweet chocolate chips

Place an oven rack IN THE LOWER THIRD OF THE OVEN and preheat it to 350 degrees. Lightly spray a 9x5-inch loaf pan with cooking spray and line it with a a strip of parchment paper to create a sling with a bit of overhang on the long sides of the pan.

In the bowl of an electric mixer on medium speed, cream together the butter and sugar until very light and fluffy, about two minutes. Add the peanut butter and beat until well-combined. Scrape down the bottom and sides of the bowl. Beat in the eggs one at a time, beating well after each addition. Reduce the speed to low and blend in the flour in two additions. When just a few streaks of flour remain, pull the bowl from the mixer and fold in the chocolate chips by hand.

Spread the batter into the prepared pan and bake until a toothpick inserted in the center comes out clean, about 60-70 minutes. Let cool in the pan before slicing and serving.

Wednesday, May 12, 2010

Liverpool Cake - Yana


Blackforest Cake with Liverpool Logo Deco (Size 8 inch)

Last min. order dari Yana, request kek dengan liverpool theme. Disebabkan order last min, hanya sempat buat draw deco logo je, x sempat nak order edible image.

Thanks Yana n thanks to Effa dari sedapnyakek.blogspot.com juga sbb recommend :)

Friday, May 7, 2010

On Motherhood and Raspberry-Pistachio Brown Butter Cake


When one gets the crazy idea to become a mother, people come out of the woodwork with tales of joy and woe and generally way, way too much information. Everyone has an opinion, everyone seems to give unsolicited advice. I definitely found this to be the case while expecting Little C, and it made me all stabby on more than one occasion. But on the plus side, a few of those nuggets of wisdom did manage to cling to my already deteriorating memory, and by the time the tiny being who had set up camp in my body for the better part of a year became an outside baby, I felt pretty ready for this motherhood thing. After all, millions had gone into it before me and millions more have chosen to do it multiple times, God bless 'em. It couldn't be altogether impossible, right? Right?


Well, it's true--it's certainly not impossible, though some days, especially early on, it absolutely felt that way. Never before had I ever had such an odd sensation, like laboriously wading through space, as though underwater, for weeks (months) on end. The long hours that my husband was at work and I was home alone with a strange newborn creature who was colicky, nursing on demand every 45 minutes and who refused to sleep at all, trying to keep her fed and clean and content on very little sleep myself were some of the most trying moments of my life. And I was more than a little depressed about the whole thing. Not. Awesome.

I've heard it said that you're given the sort of child that you need in order to learn something from the experience. True. Even the very wee infant Baby C, so tiny and fragile, and yet so generally relentless, knocked my self-centered, poor time-managing behind so far down my personal totem pole, it took the better part of two years to even consider what I might like to do with the remainder of my life, outside of being a mother. This is something I've just started to mull in the past couple of months. And guys, it's freaking me out.


Arriving at this point after so much time completely consumed with the day-to-day tasks of raising my baby has been sort of mind-blowing. I think about the next steps to move forward with personal goals and making long-held dreams come true and returning to projects I started before Little C, and I shake with anticipation, the thrill of doing something just for myself, and an incredible amount of fear. Because what if it's too much? What if I drop the ball at home? Can I manage to shift focus without changing my priorities? And I feel such intense guilt, just thinking about focusing on something other than my family, before I've even done anything at all. I am convinced this is some kind of biological thing, because it's a weight so heavy that it's enough to hold a mother down in her nest, so that she'll never go anywhere or see anything that might take her focus away from her brood. It's a weight that is equal parts welcomed and wonderful, crazymaking and suffocating. The random well-wishers with all their fancy advice in the grocery checkout line never threw that one out at me while I was expecting. Would've been nice, randoms. Thanks.


But I keep returning to these ideas that I have brewing, these new opportunities I can create for myself, and think that maybe in the end, it would be about more than just me. If I can accomplish certain things on my Bucket List, even if they take me away from home here and there, I'm able to cross off the first thing on that list, which is to Be the Best Mother I Can Be. And I'm pretty sure part of that job description is to live by example. To show my little girl that anything worth having is worth working for, and that following dreams should be a lifelong journey. That the journey to realizing those dreams might slow down or get interrupted sometimes, but it should never stop altogether, no matter what circumstances come up. Even if those circumstances involve raising a beautiful, smart, funny, perfect baby girl who brings me more joy, more fulfillment on a level that I just can't explain. The grocery store randoms did tell me about this bit, but I never could have imagined the depth of this love.


It's a big deal, being a mother. I try to play it down sometimes to childless friends or other people I meet or even to my own mother, maybe to make it seem like I've Got This or to hide my own insecurities, but it's a big, Biden-expletive deal. It's why strangers feel like they can share war stories with pregnant people in grocery stores, why there's a million blogs and books on motherhood, why we have our very own holiday and why you should make a beautiful, rustic, flavorful Raspberry-Pistachio Brown Butter Cake for every mother you know, and then invite them for tea this Mothers' Day. It's so good, I made one for myself.


Raspberry-Pistachio Brown Butter Cake
Adapted from The Craft of Baking

To make 1 cup of pistachio flour, grind 1 cup unsalted pistachios with 1 tablespoon all-purpose flour in a food processor or clean coffee grinder until fine. Note that this recipe uses kosher salt, so for regular salt, halve the amount. The Demerara sugar is for sprinkling over the batter, and makes for the most delicious, slightly caramelized, crunchy layer that really makes this cake--so don't skip it.

Serves 8-10

8 ounces (2 sticks) unsalted butter, cut into small pieces, plus more for the pan
2 3/4 cups confectioners' sugar
1 cup pistachio flour (see note)
3/4 cup cake flour
1 teaspoon kosher salt
7 large egg whites
1 cup fresh raspberries
2 tablespoons Demerara sugar

In a small, heavy-bottomed saucepan, melt and cook the butter over medium heat until it is browned and smells nutty, about 6 minutes. Remove from the heat and strain through a fine-mesh sieve. Set aside.

In a large bowl, whisk together the confectioners' sugar, pistachio flour, cake flour, and salt. Whisk in the egg whites to combine. In a slow and steady stream, gradually whisk in the browned butter. Cover and chill the batter until thickened, about 1 hour (or up to 1 week ahead).

When you're ready to bake, position an oven rack to the center of the oven and preheat it to 350 degrees. Butter a 9-inch tart pan with a removable bottom.

Pour the batter into the prepared pan. Sprinkle the berries evenly over the top, leaving a 1/2 inch border around the edge. Sprinkle the Demerara sugar generously and evenly over the batter. Bake until the edges of the cake are golden and the cake springs back slightly when touched, about 35-40 minutes (I needed more time here, about 45 minutes).

Transfer the cake to a wire rack to cool for a few minutes before removing the ring from the tart pan and letting it cool completely, or serve slightly warm. This cake is best eaten the day it is made, but can be wrapped tightly and stored for up to 2 days.

Sunday, May 2, 2010

Ultraman Cake - Mathew


Ultraman Theme Cake with 3d Figurine
Chocolate Cake with Fresh Cream Frosting (1.5kg, Size 9 inch)

Order dari Vuilin untuk majlis farewell Mathew.

Thanks to Vuilin, hope Mathew like it :)

Sunday, April 25, 2010

Whoopie Pies!


The time has come. Completely ridiculous words have begun to take over our household. And I'm not just talking about Little C's streaming toddler babble ("Hi! Hello? Apple? Mamadadababy! Toes! No?"). I'm talking about the random words that her parents haphazardly stick into sentences in place of more, shall we say, inflammatory terms, in the hopes of avoiding crass truck driver-parroting by said toddler. Like the day I informed my husband that I'd "scrubbed the--pajamas outta the shower". A new low of parental dorkery, friends.

The day is fast approaching when I won't be able to say that I really hate something because it's basically stupid, and instead I'll say that I "don't like it very much" and it's "silly". If I ever get to using the word "whoopee" in The Newlywed Game sense, someone please send me out to pasture. Unless, of course, we're talking about these totally kick-ass Whoopie Pies, in which case no language will be barred, I don't care what sweet, impressionable, jeans-clinging tiny person is in my midst.


After meeting the greatness that is Rose Levy Beranbaum a couple weeks ago and getting a shiny new copy of her Heavenly Cakes book (just announced as IACP's Cookbook of the Year, hooray!) signed and in my hot little hands, I started flipping and bookmarking that very night. And the recipes are, of course, at an insane level of creative genius. Most of them are, in a word, complex. So until Little C starts preschool, I'm probably going to stick to a few of the simpler recipes in this book, like these Whoopie Pies--rich, dense, deeply chocolatey cakey cookies sandwiching the most silky, perfect vanilla buttercream I've ever had. To die for, basically.


But because we're friends, I'll tell you that as far as Whoopie Pies go, the process to make them isn't the simplest of all the recipes out there. This is RLB we're talking about, after all. However, I will also say that they are totally, completely worth it, thank God. The cake part of the recipe actually comes together fairly quickly, and the double hit of dark chocolate makes for the kind of fudgy batter that you'll want to spoon right from the bowl.

And the buttercream filling? Oh mah gah. This filling is one of Rose's signature "mousseline" buttercreams, and it does not disappoint. And in her new book, she's made the process a bit simpler for those of us who don't have eight hands. Hooray!


The combination is nothing short of heavenly. With a tall, cold glass of milk, you're really going to need to watch your language.


Whoopie Pies
Adapted from Rose Levy Beranbaum's Rose's Heavenly Cakes

The original recipe stated that it would create 6 filled pies, but I easily got 8 out of my batches of batter and filling. The recipe also called for bringing the sugar syrup all the way to firm ball stage (248-250 degrees) before removing it from the heat, and the first time I followed this instruction, the syrup had cooled and mostly soldered itself to the measuring cup before I could get it into the meringue. I found that bringing it to a warm soft ball stage instead (238) worked much better and the end result was still great.

There are a lot of steps here, which I've condensed quite a bit from the original recipe. Read it carefully before you begin and try to choreograph the process in your head in the way that will work best for you before you begin.

If you don't own smaller ice cream scoops, this recipe would be the perfect excuse to go buy a 2 tablespoon scoop--it makes portioning out the batter and filling evenly a breeze.


Makes 8 whoopie pies

For the cakes:

1 1/2 ounces dark chocolate, chopped (60-62% cacao--I used Ghiradelli bittersweet chips and it was fine)
1/2 cup dark brown sugar
1 large egg, at room temperature
2 tablespoons canola oil
2 tablespoons unsalted butter, cool room temperature
1 cup plus 1 1/2 tablespoons sifted all-purpose flour (sift first, then measure)
3 tablespoons plus 2 teaspoons sifted unsweetened cocoa powder
1/2 teaspoon baking powder
1/2 teaspoon baking soda
1/2 teaspoon salt
1/2 cup low-fat buttermilk

For the filling:

1/4 cup sugar
2 tablespoons corn syrup
1 tablespoon water
1 large egg white, at room temperature
1/8 teaspoons cream of tartar
9 tablespoons unsalted butter, at cool room temperature, divided
1/2 teaspoon pure vanilla extract or vanilla bean paste
1/4 cup plus 2 tablespoons sifted confectioners' sugar

Position a rack to the center of the oven and preheat it to 400 degrees. Line two unrimmed baking sheets (or invert two rimmed half-sheet pans) with parchment paper or silicone baking mats, or spray lightly with nonstick cooking spray.

Melt the chocolate in a double boiler over simmering water or in a microwave at 50% power, stirring every 30 seconds. Let cool until the chocolate is no longer warm to the touch, but still fluid.

While the chocolate is cooling, place the brown sugar, egg, oil and butter in the bowl of an eletrci mixer fitted with the paddle attachment. Beat at medium speed for about 5 minutes--the mixture will become smooth and paler in color. Reduce the speed to low and stir in the melted chocolate.

Whisk together the flour, cocoa powder, baking powder, baking soda and salt in a medium bowl. Add the dry ingredients to the egg mixture in three additions on low speed, alternating with the buttermilk, beating just until each addition begins to disappear into the batter, scraping down the sides of the bowl as needed. With a 1-ounce (2 tablespoons) ice cream scoop, portion the batter onto the sheets, 8 evenly spaced mounds per sheet.

Bake one sheet at a time, rotating halfway through baking, until the centers spring back when lightly touched, about 8 to 10 minutes. Let cool on the sheet on a wire rack for 5-10 minutes before transferring the cakes to the rack to cool completely. Store in an airtight container until ready to fill.

To make the filling, begin by making the sugar syrup. Combine the sugar, corn syrup and water in a small saucepan. Over medium heat, cook until the sugar dissolves and the syrup is bubbling. Reduce the heat to low and move on to making the meringue (if you're using an electric range, remove the pan from the heat completely).

In a mixing bowl with a handheld mixer, beat the egg white on high speed until foamy with tiny, relatively uniform bubbles. Add the cream of tartar and beat until stiff peaks form when the beaters are lifted.

Return to the sugar syrup and increase the heat to high. Boil until the syrup reaches 238-240 degrees. To make pouring easier, transfer the syrup to a heatproof measuring cup if you wish.

Beat the syrup into the meringue in a thin, steady stream, aiming away from the beaters so that the syrup doesn't just spin onto the sides of the bowl. Beat until the outside of the bowl no longer feels hot, about 3 minutes. Beat in 1 tablespoon of the butter and the vanilla extract or paste. Refrigerate for 10 minutes while you make the finishing cream for the filling.

In the bowl of an electric mixer, beat together the remaining 8 tablespoons of butter and confectioners' sugar. Beat on high for 2 minutes or until the mixture is very light in texture and color, almost white. Lower the speed to medium and beat in all the meringue until the buttercream is smooth, about 10 seconds or so.

To assemble, sandwich generous 2-tablespoon mounds of the filling between the cakes, and press down lightly so that the cream reaches the edges of the pies. Serve at room temperature and store any leftovers refrigerated in an airtight container, allowing them to come to room temperature again before serving.