Showing posts with label Candy. Show all posts

Wednesday, February 23, 2011

Blonde Rocky Road


Before we go any further here, I should warn you about Blonde Rocky Road.

Blonde Rocky Road is going to be one of the most addictively delicious things you put in your face all year. It is also a Real Problem.

Blonde Rocky Road is so quick and simple to assemble, you can even throw it together after a highly celebratory Ladies' Night out, more than a little tipsy, before you've even removed your high heels. Just try not to pull down all the baking pans in a crash at 12:30 in the morning. Or whatever. I'm just saying that when the craving strikes, you will do crazy things to make it happen. Trust me. I know things.

Blonde Rocky Road comes together so fast that you'll be three pieces deep before you even realize that you made it in the first place.

Blonde Rocky Road takes no prisoners. You have been warned.


Butterscotch chips, peanut butter, butter, salted peanuts, marshmallows. A touch of vanilla and a dash of salt added for balance and crave-worthy edge. I don't see how this could not go well.


And! You don't have to bake it, or even turn on the stove, for cry-yi. One bowl, a microwave, and a love story, people. That's what's happening here.

Now, before you come after me because you're waking in the night to eat this stuff, let me tell you where the inspiration came from. Have you seen Sweetapolita? Well, if you're ever feeling too confident about your website, photography skills or general personal style, you can go over to Rosie's blog and get yourself knocked down a few pegs. It's a beautiful site with dreamy recipes and it's an endless source of inspiration. She made Butterscotch Peanut Butter Marshmallow Hearts for Valentine's Day, and after making a batch in short order, I was craving more, more, more...MORE. Gah.


The second go around I added salted peanuts for crunch and more marshmallows. So basically, more calories. Obvi. But I also added a nice dose of vanilla and an extra hit of salt and oh-ho-hooo...friends. Next level stuff. Blonde Rocky Road stuff.

Now go forth and ruin your diets for the rest of the year. Loveyatoo.


Blonde Rocky Road
Inspired by a recipe from Rosie Alyea of Sweetapolita

This is definitely not the place for natural peanut butter. You need the smooth texture of commercial peanut butter, and with all these other crazy ingredients, there really is no point of anything natural, right?

Microwaves vary, so watch the butterscotch mixture carefully while melting.

Makes 25 pieces

1 12-ounce bag butterscotch chips
1/2 cup creamy peanut butter (I like Skippy)
1/2 cup (1 stick) unsalted butter, cut into tablespoon-size pieces
1/2 teaspoon pure vanilla extract
1/8 teaspoon salt (fine sea salt or table salt)
2 1/2 cups mini marshmallows, divided
3/4 cup salted peanuts, divided (do not chop)

Line an 8x8-inch square baking pan with a large sheet of aluminum foil, being sure to get it neatly into the corners of the pan.

In a large, microwave-safe bowl, combine the butterscotch chips, peanut butter and butter. Microwave on 50% power for about 3 minutes. Stop to stir well. Place back in the microwave for 1 minute and 30 seconds on 50% power and stop to stir again--it should be smooth after a bit more stirring. If not, give it a couple more 30 second bursts of high power and stirring until smooth.

Stir in the vanilla and salt. Stir in 2 cups of the marshmallows and 1/2 cup of the peanuts until well-blended. Turn the mixture into the prepared pan and smooth with a spatula. Sprinkle the remaining marshmallows and peanuts evenly over the surface, and press lightly into the candy with your palms. Chill until set--15 minutes in the freezer or about an hour in the refrigerator.

Remove the candy slab from the pan and cut into 25 squares. Store in an airtight container in the refrigerator for up to 1 week.

Tuesday, January 25, 2011

Peanut Butter Crunch Truffles


Born of the Midwest, I have a penchant for kitschy recipes. Give me a casserole made with cream of mushroom soup and topped with potato chips, and I could pass out from the hilarious joy of it all. There's just something so great about recipes that are simple and sinfully delicious and contain ingredients that can never be found in nature. Take Haystacks, for example. Melted butterscotch chips, peanut butter and chow mein noodles, for Pete's sake. Wad the mixture up in little mounds, put it in your face, AMAZING.

Now say you take something already perfect like Haystacks, up the fabulous by adding butter and a nice hit of salt, and then dip it in bittersweet chocolate. Hubba, hubba. Not that you need any help (did I tell you that you look terrific today?), but I'd say we're gonna get you a whole bunch of pining Valentines with this one.


When it comes to the ultimate in flavor and textural dreams, these little babies will just about blow your mind. I mean, you've got a chocolate shell, so, awesome already, obviously. But inside that chocolate casing, you've got a creamy, buttery, peanutty filling, studded with two kinds of crunch--a sturdy one from peanuts, and a more delicate, crispy crunch from those crazy chow mein noodles. I-yi-yi.


And the best part? These are so insanely easy, guys. You'll have instant Valentine's Day gifts that will make you an absolute hero. And plenty of leftovers so you can be your own Valentine and savor them slowly while watching trashy reality programming. Perfection!


Peanut Butter Crunch Truffles

Normally, you want commercial peanut butters for baking, but here, the texture and huge peanutty flavor of unsweetened natural peanut butter is the best choice.

Melt the butterscotch chips slowly and gently--they can have a tendency to burn and seize up. 50% power for 30 second increments, stirring well after each interval works well. You can also use a double boiler.

Chow mein noodles can be found in cans or cellophane bags in the Asian foods aisle of your supermarket.

Makes about 30

1 cup well-stirred crunchy natural peanut butter
5 tablespoons unsalted butter, at room temperature
2 ounces butterscotch chips, melted
2 tablespoons sugar
1 teaspoon kosher salt (or about 1/2 teaspoon table salt)
1 1/2 cups chow mein noodles (see note)
8 ounces bittersweet chocolate, chopped

In the bowl of an electric mixer, combine the peanut butter and butter. Beat on medium speed until smooth and creamy. Beat in the melted butterscotch chips, sugar and salt. Reduce the speed to low and stir in the chow mein noodles, until the mixture is well-blended and the noodles have broken up a bit, about 30 seconds or so.

Line a sheet pan with parchment paper, waxed paper or a silicone baking mat. Using a small ice cream scoop or two spoons, scoop out portions of the mixture, about 2 teaspoonsful for each truffle. Roll each portion into a rough ball using your hands. Work quickly when you roll the balls--the mixture will melt a bit with the warmth of your hands and get a bit messy, but no worries, perfection isn't the goal here. Place the truffle centers back on the baking sheet and freeze until very firm--at least 30 minutes.

When you're ready to dip the truffles, place half the chopped chocolate in a double boiler (a glass or heatproof bowl set over a pan of simmering water). Melt the chocolate until it is smooth and fluid. Remove the bowl from the pan and add the second half of the chocolate, stirring again until smooth (this is a quick tempering method that helps to ensure you'll get a nice, shiny chocolate coating). Place the bowl back on the pot of hot water to help keep it warm while you coat the truffles.

Dip each truffle quickly in the chocolate using a fork or a candy dipping tool. Place the dipped truffles back on the lined baking sheet. When all the truffles are dipped, chill in the refrigerator to set the chocolate. Finished truffles can be stored in the refrigerator in an airtight container for up to a week.

Monday, January 10, 2011

Bubble Gum Marshmallows


With the New Year upon us, lately I've been asking myself lots of deep, Oprah-esque life questions. For instance, should I give in to the urge to get a practical haircut? How can I watch Real Housewives of Beverly Hills without my husband knowing? How many toddler-hidden raisins will I find in my sofa cushions this week? And most importantly, do Bubble Gum Marshmallows actually count as food if one is over the age of twelve?


I may never truly discover the answers to any of the above questions, and as far as the last one goes about the Bubble Gum Marshmallows, I may not really want to know. I suppose that with their delightful candy-pink coloring and less-than-natural flavoring, these happy little confections might be considered more of an edible craft than actual food. But they're so divine in their whimsical deliciousness, who the heck cares if I might be judged for whipping up such insanity? Add to their decidedly "pink" flavor the high that comes from doing some serious mad scientist work in the kitchen, and you've got yourself some good times in my book.


Speaking of playing mad scientist, have you ever picked up any candy oils? They're like super-powered extracts that come in teeny tiny little bottles. There's some pretty insane flavors out there--definitely the kind of thing that gets your wacky culinary wheels turning. I don't do a whole lot with flavorings like these, but I have a handful of them in my bag of baking tricks that are fun to play with every once in a while when I feel like upping the crazy around here. Like say, creating a confection that gives you the sense that you've just put a fresh piece of bubble gum in your mouth, but instead of merely chewing it for a while until the flavor disappears, you get the awesome experience of actually eating the flavor at its height without it petering out on you.

And if that last sentence makes any sense to you at all, let me know, because we could probably be best friends. And like all good BFFs, I would totally share my stash of bubble gum marshmallows with you, and maybe even my Hello Kitty pencils and Justin Bieber poster collection.


Bubble Gum Marshmallows

The color and flavor of these marshmallows will be completely dependent upon your personal taste and the brands of food coloring and flavoring you use. I tested this recipe using Americolor Soft Pink gel food coloring and LorAnn Bubble Gum flavored candy oil.

Normally, I make this amount of marshmallow in an 8x8-inch pan for nice chunky blocks suitable for hot cocoa. But since these are more of a confection to be eaten straight up, I made them thinner by using a rimmed quarter sheet pan that measured 8x12 inches.


Makes about 2 dozen marshmallows (depending on how you cut them)

2 tablespoons unflavored powdered gelatin (a little over 2 packets)
1/3 cup cold water
1 cup sugar
1/2 cup light corn syrup
1/4 cup water
Pinch of kosher salt
3/4 teaspoon pure vanilla extract
6-7 drops bubble gum flavoring
2-3 drops soft pink gel food coloring
1/3 cup confectioners' sugar, sifted, plus more for dusting

Grease a quarter-sheet pan (or similar baking pan that measures about 8x12 inches) with a small amount of shortening, using a paper towel to rub it lightly and evenly onto the bottom, sides and edges of the pan. Set aside.

Combine the gelatin and 1/3 cup cold water in a small bowl and let the gelatin soften for 5 minutes.

Place the sugar, 1/4 cup corn syrup, 1/4 cup water and pinch of salt in a medium saucepan and stir gently. Clip a candy thermometer onto the pan, and place it over medium-high heat. Bring it to a boil, checking it occasionally--you are looking for it to eventually hit a temperature of 235-240 degrees (soft ball stage).

Meanwhile, pour the remaining 1/4 cup corn syrup into the bowl of an electric mixer fitted with the whisk attachment. Microwave the gelatin on high until it is completely melted, about 30 seconds. Turn the mixer on low, and very slowly pour the melted gelatin into the corn syrup. Keep the mixer running while you check the sugar syrup.

Once the syrup reaches 235-240 degrees, pull it from the heat. Carefully transfer the syrup to a large, heatproof measuring cup or a similar vessel with a spout for easy pouring. Turn the mixer up to medium speed and slowly pour the sugar syrup into the gelatin mixture. When all the syrup has been added, crank the speed up to medium-high and let it go for about 6 to 7 minutes--the candy will turn white and fluffy during this time. Beat in the vanilla. Beat in the bubble gum flavoring, just a couple drops at a time, stopping the mixer to taste the marshmallow, adding more drops until you reach the desired intensity of bubble gum flavor. Beat in the food coloring, drop by drop, until you get the color you're looking for.

Pour the marshmallow into the prepared pan and use an offset spatula spritzed with a bit of cooking spray to nudge it into the corners and smooth the top. Sift confectioners' sugar evenly and generously over the top. Let sit for about 6 hours.

Use a knife to loosen the marshmallow from the edges of the pan and invert it onto a confectioners' sugar-dusted work surface. Dust the marshmallow slab with more confectioners' sugar and cut into whatever size pieces you wish (a pizza cutter works great here for squares). Dip the sticky edges of the marshmallows in more confectioners' sugar, patting off the excess. Store in an airtight container for up to 1 week.

Thursday, December 16, 2010

Chocolate Malt Marshmallows


If you haven't noticed, I've got the candymaking bug lately, people, and I've got it bad. And since its coincided with my insatiable need for all things malted, meet my latest love: the Chocolate Malt Marshmallow. These little gems positively scream, "Gift me! GIFT ME!" just in time for you to realize that you really ought to give a little something to the mailman this year.

Impromptu gifts aside, these chocolaty, malt-y, delightfully pillowy cubes are just the thing to fill out your holiday cookie tins and bob happily in your wintertime hot cocoa. Coated in bittersweet chocolate shavings rather than powdery cornstarch or confectioners' sugar, I sort of love the shaggy look of them, the way they leave little flecks all over the plate or the mug. Much more charming than the wreath we bought this year that has done nothing more than shed all over my mantle all dang day. I've been vaccuming my mantle, people. But that is neither here nor there.


At first glance, you might think you're just getting a plain old chocolate-flavored marshmallow here (not that there's anything wrong with that), but the toasty flavor of malt is such a nice surprise. The way I see it, malted milk powder is the most genius thing that you can have in your pantry for when those mad scientist moments hit. It pairs with vanilla as beautifully as chocolate, its perfect with nuts of all sorts, dairy products (naturally) and even a few fruits get along well with it. Malt powder's earthiness and soft, round flavor help to temper the sweetness of whatever it's paired with, making anything malted instantly addictive and craveworthy. It adds richness and fullness without being heavy. Its magical, basically.


You know what else I think is magical? Marshmallows. And obviously we all know chocolate is totally magical. So throw some malt into the mix and who knows what might happen. If you put some of these out with the milk and cookies for Santa...well. Let's just say we might all get those fancy new pairs of Spanx that we're hoping for.


Chocolate Malt Marshmallows

Malted milk powder can be found in most supermarkets either by the hot chocolate mixes, or near the ice cream fixings. That's right, I said fixings.

For the chocolate shavings, grate bar chocolate on the largest holes of a boxed grater.

The deeper and richer your cocoa powder, the more intense the color and flavor will be, so use the best one you can get your hands on (I like Valrhona).

Makes about 20

For the marshmallows:

2 tablespoons (about 2 packets) unflavored powdered gelatin
1/3 cup cold water
1 cup granulated sugar
1/2 cup corn syrup, divided
Pinch of salt
1/4 cup unsweetened cocoa powder
1/2 cup malted milk powder
6 tablespoons boiling water
1 teaspoon vanilla extract

For finishing the marshmallows:

1/2 cup confectioners' sugar
2 tablespoons cocoa powder
2 ounces bittersweet chocolate, finely grated

Grease an 8x8-inch pan with shortening, using a paper towel to rub it lightly and evenly onto the bottom, sides and edges of the pan. Set aside.

Sprinkle the gelatin over 1/3 cup cold water in a small bowl. Set aside to soften.

Place the sugar, 1/4 cup corn syrup and 1/4 cup water in a medium saucepan and stir gently. Clip a candy thermometer onto the pan, and place it over medium-high heat. Bring it to a boil, checking it occasionally--you are looking for it to eventually hit a temperature of 240-245 degrees.

Meanwhile, place the remaining 1/4 cup corn syrup in the bowl of an electric mixer fitted with the whip attachment. Heat the softened gelatin in the microwave to melt it, about 30 seconds or so on high. Start the mixer on low speed, and pour the gelatin into the corn syrup. Keep the mixer running on low speed.

Whisk together the cocoa, malt powder and boiling water in a small bowl until smooth. When the sugar syrup is up to temperature, whisk the cocoa mixture into it, followed by the vanilla. Carefully transfer the syrup to a large, heatproof measuring cup or a similar vessel with a spout for easy pouring. Turn the mixer up to medium speed and slowly pour the sugar syrup into the gelatin mixture. When all the syrup has been added, crank the speed up to medium-high and let it go for about 10 minutes--the candy will become fluffy and the color of a chocolate malt during this time.

Sift together 1/2 cup confectioners' sugar and 3 tablespoons cocoa powder. Set aside, and keep the sifter handy.

Pour the marshmallow into the prepared pan. Use an offset spatula spritzed with a bit of cooking spray to nudge it into the corners and smooth the top. Sift the cocoa-confectioners' sugar mixture evenly and generously over the top. Let sit for about 6 hours, or overnight.

Use a knife to loosen the marshmallow from the edges of the pan and invert it onto a cocoa-confectioners' sugar mixture-dusted work surface. Cut the marshmallow into squares (a pizza cutter works great here). Dip the sticky edges of the marshmallows in chocolate shavings, and dab more all over the marshmallows. Store in an airtight container for up to 1 week.

Saturday, December 11, 2010

Cranberry-Pistachio Torrone


All right, my December-loving comrades. Let's cut the crazy and get to some serious Christmas candy making. I'm talking about jade-green pistachios and ruby-red cranberries bound together by the dreamiest vanilla nougat this side of a Charleston Chew. It's called torrone (tore-OH-nay), it's an Italian holiday classic, and making it will bring you one step closer to Giada. I don't think there's anything wrong with any of that, do you?


In my quest to make this Italian tradition come alive in the Piece of Cake kitchen, some serious research was required. And because we're friends and it's the holidays, I couldn't be happier to drop the knowledge I've gained during this entire torrone-making experience. And believe me, it was quite the experience.


What I found was that the edible wafer paper that's called for in so many torrone recipes is absolutely, totally NOT optional, lest you enjoy spending precious time caressing sugar syrup and egg whites into candy only to find yourself unable it to get it out of the dang pan. Not to mention scraping strings of nougat from your hair and countertops hours later. Seek out this magical wafer paper, friends. It's seriously cheap and readily available online, but I found it at a baking supply shop near my house, no problem. And the surly lady at the counter even called me out and predicted I was making torrone! A baking psychic, that lady is.

Besides the wafer paper, you cannot get by without a candy thermometer for this one, guys. The syrup needs to be heated above 300 degrees, and the cold water tests you can do for lower temperatures required by other candy recipes won't really work here. Save yourself.

I also will say that this isn't the sort of recipe that you can do with an electric hand mixer. You really do need a heavy-duty stand mixer for this job, what with its 15 minutes or so of intense whipping at high speed and the final consistency of the nougat which resembles something like sticky caulk (albeit terribly delicious caulk). I really don't want you spending the holidays nursing muscle strains because I talked you into making torrone without mentioning this key element. So beg, borrow or steal a KitchenAid of you dont have one, because I'm telling you, this torrone is so, so worth it.


Beyond those few crucial tips, once you've got your equipment set and your torrone-making wits about you, the process here is really pretty easy and fun. Just heat up your syrup to the right temperature, whip up some egg whites, and then whip the two together in a great fury. When the candy is set and sliced into bars, the stained-glass effect is just so dang pretty, you'll think you've gone to candy church. Or something like that. But really, I can't think of a more festive little gift for all the randoms in your life that deserve a little something special. Or heck, just do it up like me and make it for yourself to devour it while watching Giada. It's the holidays, after all.


Cranberry-Pistachio Torrone
Adapted loosely from Martha Stewart

Edible wafer paper is widely available online, and in baking and kitchen supply stores, especially during the holidays.

The firmness of the finished candy is dependent on how hot you cook the syrup. Be sure you get it to the right temperature or the candy will be still be edible, but really soft, almost runny, and hard to eat.


You can find dessicated coconut at any health or natural foods store (like Whole Foods). I absolutely adore the surprise of the coconut here, but if you're not a coconut person, try a cup of sliced almonds instead.


Makes 8 2x4-inch bars

2 pieces edible wafer paper, cut to 8x8 inches
1 cup sugar
1/2 cup honey
3 tablespoons light corn syrup
1/2 cup water
Generous pinch of salt
2 large egg whites, room temperature
1 teaspoon pure vanilla extract
1/4 teaspoon almond extract
3/4 cup sweetened dried cranberries
1 1/2 cups shelled salted pistachios
1 1/3 cups dessicated (unsweetened, finely shredded) coconut

With a tiny bit of vegetable oil or cooking spray on a paper towel, very lightly oil only the sides of an 8-inch square baking pan. Fit 1 piece of wafer paper in the bottom of the pan.

Combine sugar, honey, corn syrup, 1/2 cup water and salt in a medium saucepan over medium heat. Cook, stirring occasionally, until mixture just begins to simmer and sugar has dissolved, about 6 minutes. Attach a candy thermometer to the side of the pan. Continue to cook, without stirring, until mixture reaches 315 degrees.

Meanwhile, put egg whites into the bowl of an electric mixer fitted with the whisk attachment. Beat on medium-high speed until stiff (but not dry) peaks form. Raise speed to high. When the syrup is up to temperature, pour it into the whipping egg whites in a slow, steady stream. Beat until mixture has thickened significantly and the bowl is cool to the touch, 10-15 minutres. Reduce speed to medium-low and beat in the vanilla and almond extract. Stop the mixer and scrape down the bowl well with a hard plastic spatula. Remove the whip attachment and scrape it down as well. Switch to the paddle attachment and on low speed, stir in the cranberries, pistachios and coconut.

Working quickly, scrape the mixture into the prepared pan. Lightly oil your hand with cooking spray or vegetable oil and press the candy into an even layer, making sure to get it all the way into the corners of the pan. Place the second sheet of wafer paper (smooth side up) on the surface of the candy, and press firmly, making the the entire surface of the candy is covered. Let cool and set on a wire rack for several hours or overnight.

With a thin, sharp knife, cut around edges of torrone to loosen. Invert the pan onto a work surface, giving it a few good smacks to get the candy slab to fall out of the pan. Using a long, sharp knife, first trim off any ragged edges, then cut into 8 2x4-inch bars (dip the knife in hot water and wipe it off before each cut to make cutting cleaner and easier). Torrone can be stored between layers of parchment in an airtight container up to 2 weeks.

Thursday, December 2, 2010

Chocolate-Dipped Peppermint Meringues


Ooooh, you guys! I really hope I'm getting to you in time. Like before you get all set in your holiday baking plans. Because let me tell you what. These peppermint meringues? With their minty crunch, melting sweetness and slick of bittersweet chocolate? They need to be all up in your holiday cookie tins. I mean, just look at them in their jaunty striped suits. They will delight any recipient and call to you from the countertop. So says the person who's had meringue crumbs all down her shirt for three days straight.


I can't think of too many phrases more lovely than "Christmas confections", can you? Well, I suppose there's also "French meringue", which I also have a thing for. And "spatula", but that's neither here nor there. But about the French meringue. It's my favorite kind to make and eat. Oh, of course I love a pillowy, soft meringue atop a pie or the in-between kind that's baked crisp on the outside with a marshmallow-y interior, like with a heavenly pavlova. But I'm totally enamored with the kind of hard-throughout meringue cookie that has you cronch-cronch-ing while it simulatneously melts in your mouth. And I'll tell you what else--it's dang hard to find a good, reliable recipe for that sort of thing.


This recipe is a far cry from a hard-core, classic French meringue (granulated and confectioners' sugar? Flour? Mon dieu!), but the technique is every bit as simple. The little trick that makes these baked meringues so featherweight and addictively melt-in-your-mouth is the folding in of the confectioners' sugar and a touch of flour, after the bulk of the superfine granulated sugar has been whipped into the egg whites. And can I just say that when I grind granulated sugar in my coffee grinder to make superfine sugar and then pour it into a plastic bag to store it, I always get the biggest laugh out of how questionable the whole thing looks?

If you wondered if I was a square before, well, I guess I cleared that one up for you.


But in addition to being a total square, I am also quite crafty, and after deciding to make these meringues peppermint, opted to dress them up even more by painting long stripes of red food coloring up the sides of a piping bag before filling it. As you pipe out the meringue, you'll get a sweet little pattern on each cookie. Super stylish and cute! Unlike me with all these crazy meringue crumbs on my shirt.


Chocolate-Dipped Peppermint Meringues

To make superfine sugar, take regular granulated sugar for a spin in a clean coffee grinder or food processor fitted with the steel blade.

When you add the peppermint extract, the minty fragrance and flavor may seem a bit overpowering, but it will be tempered by adding the remaining sugar mixture, and some of its minty power will bake off during the long baking time, too.


Gel food coloring is available at any good baking supply store and many craft stores. It's much thicker and much more intense in color than the liquid food coloring sold in supermarkets.
You can forgo the jazzy striping altogether and just beat in a touch of festive food coloring with the extracts if you prefer.

Makes about 4-5 dozen, depending on size

4 large egg whites (about 4 ounces), at room temperature
1/4 teaspoon cream of tartar
Pinch of salt
3/4 cup superfine sugar (see note)
1/2 teaspoon pure vanilla extract
1/4 teaspoon peppermint extract
1 cup confectioners' sugar
1 tablespoon all-purpose flour
Red gel food coloring
8 ounces bittersweet chocolate chips (I like Ghiradelli)

Position the oven rack to the upper and lower thirds of the oven and preheat it to 250 degrees. Line two baking sheets with parchment paper or silicone baking mats.

Sift together 2 tablespoons of the superfine sugar, the confectioners' sugar, and the flour into a medium bowl. Set aside.

In the bowl of an electric mixer fitter with the whip attachment, combine the egg whites, cream of tartar and salt. Whip first on medium speed, gradually increasing the speed to high, until the egg whites reach soft peaks. Gradually rain in the remaining superfine sugar. Continue to whip until the meringue is glossy and holds a very stiff peak. Beat in the vanilla and peppermint extracts.

Remove the bowl from the mixer. With a large spatula, gently and carefully fold in the remaining sugar mixture by hand in three additions, taking care not to deflate the egg whites.

On the inside of a piping bag fitted with a large star tip, use a long, thin paint brush to paint four or five long stripes of food coloring up the sides of the bag. Carefully transfer the meringue to the piping bag, aiming for the center of the bag as much as possible to avoid smudging the stripes. Pipe out the meringue into cookies about 1 1/2 inches in diameter onto the prepared baking sheets.

Place both sheets into the oven at once, and immediately turn the oven temperature down to 200 degrees. Bake until the cookies are completely firm and dry, about 1 hour and 45 minutes. Remove from the oven and allow the cookies to cool completely.

Melt the chocolate chips on a double boiler or in the microwave on high power in 30 second intervals until smooth, stirring after each interval. Dip the bottoms of the cookies in the melted chocolate and place them on parchment-lined baking sheets. when the chocolate has cooled and set (the refrigerator can speed up this process considerably), remove the cookies from the sheets and store in airtight containers at cool room temperature for up to 2 weeks.

Monday, October 18, 2010

Apple Cider Jelly Candy


Ingredients:
1.75 oz powdered fruit pectin
1 cup sugar
1 cup light corn syrup*
3/4 cup apple cider
1/4 teaspoon baking soda

extra sugar for dredging

Directions:
Warning: this is a two day project. Oil a flat sided loaf pan. Whisk together pectin, apple cider and baking soda in small pan. Cook on high heat. At the same time, bring the sugar and corn syrup to a rolling boil, stirring occasionally. When it reaches boiling, add the pectin/cider mixture. Cook for about 1 additional minute stirring constantly. Pour into the prepared pan and allow to cool, loosely covered with plastic wrap, overnight. The next day invert the pan on to a plate full of sugar. If you have trouble unmolding the candy, use a knife to loosen it from the perimeter of the pan and carefully slide your fingers underneath the candy to gently peel the candy out of the pan. Press both sides of the candy into the sugar. Use a pizza cutter to cut the candy into 1/4 inch slices, then cut each slice into cubes. Roll each cube in sugar.

*I use HFCS-free corn syrup.

My thoughts:
Last winter I had this dessert plate at Woodberry Kitchen which had a variety of miniature sweets including one that seemed to be a homemade apple cider jelly candy. Every since then it has been on my "to make" list. I had to wait until I could buy apple cider at the farmers market but it was worth it. This might be my new favorite fall candy, it tastes just like cider in solid form.

Friday, June 18, 2010

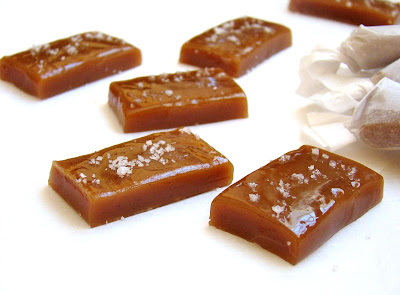
Sea Salt Caramels in the Raw


Is there such a thing as caramel season? Can the seasonal eating experts weigh in here, please? Because I just don't know. I suppose fall would most likely be caramel season because of its toasty, warm flavor and apple-friendly demeanor, but I can't be sure. In the meantime, I'll just keep eating my way through early summer, subsisting mainly on these awesome sea salt caramels. Rustle of paper, chew, chew, sigh, chew.


So I know salted caramel has been all up in our area for the better part of three years now and I'm a little late in sharing a recipe in this category with you. But that doesn't mean I haven't been eating as much of it as humanly possible before now. In fact, and I will sort of shield my eyes as I say this, I hold caramel in a higher regard than chocolate. Especially the buttery, salted variety. When done right, it's just smack-the-table good.

Plus, besides the epically awesome flavor here, I think I have something new and pretty flippin' exciting to offer you in the salted caramel candy department. These caramels are made with no corn syrup or white sugar whatsoever. And it was all a happy accident. Kind of like the whole penicillin thing. Except delicious. And not creepy. Come along.


I was all set to make a batch of traditional sea salt caramels, largely due to a very loud, specific and insistent craving for them. But as I started to pull ingredients from the pantry, I realized I was way short on corn syrup, mostly due to a so-crazy-I-had-to-try-it brownie recipe that I'll share with you in the near future. Also, on that particular day I was so spacy I forgot one of the pillars upon which I build my personal character, also known as mise en place, and, duh, I already had a stick of butter for the recipe melting on the stovetop. Seriously, duh. I know better.

But I stood up straight, flicked my head back like Blanche Deveraux (God rest her soul, don't even get me started) and plowed ahead, boldly replacing the corn syrup with agave nectar and while I was at it, swapping out the white sugar for raw, toasty turbinado (also known by the brand name Sugar in the Raw). And then I tried not to think about how it really might not work.


Except it did, people. The caramel bubbled up beautifully (I took it a few degrees hotter just to account for the extra water that agave nectar has that corn syrup doesn't) and it took on an even deeper, richer color and flavor thanks to the raw sugar. It set up firm enough to cut, but still luxuriously soft and pleasantly chewy in the mouth. Buttery, salty, sweet--everything that a great caramel should be. The extra sprinkling of sea salt is the killer here. Dang.


And in the very background, if you really pay attention, you'll taste something else, a sort of quiet earthiness from the natural sweeteners in this recipe, rounded out by a touch of rum that keeps the sweetness from being too one-note. I think these are really something special. And if you're looking for a last-minute Father's Day gift, I seriously can't think of anything better. Unless your dad has had a lot of dental work. Or is diabetic. Then maybe you should just go for a tie in that case.


Sea Salt Caramels in the Raw

If you'd like to make this recipe using white sugar and corn syrup instead, increase the syrup to 1/2 cup. Regular brown sugar has more moisture than white or turbinado sugars and is not recommended.

Try to use the best coarse salt you can get your hands on here--avoid table salt at all costs (in addition to subpar flavor, it doesn't measure the same as coarse salt). In a pinch, you can use kosher, but I really recommend a nice crunchy, crumbly fleur de sel, particulary for sprinkling.


Also, I really like vanilla bean paste here because it does double duty of vanilla extract flavor and gives a nice visual of bean flecks in the caramel, but you can just use 1 1/2 teaspoons of vanilla extract instead.


Makes about 4 dozen caramels, depending on size

1/2 cup (1 stick) unsalted butter
1 1/4 cups turbinado sugar
1/2 cup heavy cream
1/3 cup light agave nectar
1 1/2 teaspoons coarse sea salt, plus more for sprinkling (see note)
2 teaspoons dark rum (optional)
1 1/2 teaspoons vanilla bean paste or extract (see note)

Line an 8x8 inch baking pan with aluminum foil and spray it generously with nonstick cooking spray.

In a heavy medium saucepan over medium high heat, melt together the butter, sugar, cream and agave nectar. Bring it to a boil, stirring until the sugar is dissolved. Clip a candy thermometer to the pot and reduce the heat to low, stirring occassionally, until the caramel reaches 248 degrees (this can take anywhere from 20 to 40 minutes or maybe longer--don't rush it). As you see the temperature creeping towards 248, stir in the salt and the rum. When the caramel hits 248, pull the pot from the heat and stir in the vanilla.

Pour the caramel into the prepared pan set over a wire rack and let it cool, undisturbed, at room temperature overnight, or if you're in a rush, 30 minutes at room temperature and another 30 minutes or so in the refrigerator until the caramel is very firm.

Line a cutting surface with a sheet of parchment paper and turn the caramel slab out onto it. Use a large sharp knife to cut the caramel into neat, even pieces (I like mine to be about 1 x 1 1/2 inches). Lightly sprinkle the caramels with more sea salt and wrap them in squares of parchment or waxed paper. Store at room temperature.

Sunday, May 16, 2010

Candy Lovers Cookies


Ingredients:
6 oz cut up miniature candy bars (20 Hershey miniatures, cut into eighths)
1 1/3 cup flour
1/2 cup butter, at room temperature
1/2 cup dark brown sugar
1/2 cup sugar
1 egg at room temperature
1 teaspoon vanilla
1 teaspoon baking powder
1/2 teaspoon salt

Directions:
Preheat the oven to 350. Line 2 cookie sheets with parchment paper. Chop the candy bars into small pieces.


In a large bowl, cream the butter and sugars until light and fluffy. Add the egg and vanilla; combine thoroughly. Gradually add the dry ingredients and mix until a very thick dough forms. Fold in the chocolate chunks. Form cookies by dropping tablespoons of dough on the sheet two inches apart. Flatten slightly then bake until light brown, 12 minutes. Cool on wire racks.

Yield: about 2 dozen
My thoughts:
Baltimore is not terribly far from Hershey, PA aka the Sweetest Place on Earth. Hershey Park has long been my family's favorite amusement park and my parents still go to Hershey several times a year, even if for just a visit to Chocolate World where you learn about Milton Hershey and his vision (did you know that to this day a percent of the profits from Hershey products goes to fund the Milton S. Hershey School?) and go on a virtual chocolate factory tour. I think I know all of the words to that tour and am still a little puzzled why they edited out the "each Kiss is untouched by human hands" line during the demo of Hershey Kiss packaging during a recent update. As a bit of a germaphobe, I always found that reassuring. Anyway, I don't eat candy terribly often so when I came in possession of a bag of Hershey miniatures, I tried to think of something fun to do with them. Looking at the tiny bars I realized that they could easily be cut into chip-like chunks and baked into something. Cookies was the obvious choice and it was a good one, the different candy bars (I used a mix of Special Dark, Mr. Goodbar and Krackle) ensured that each bite was different. I used a disproportionate amount of Special Darks so the cookie wouldn't be tooth-achingly sweet but any combination would do. They really are fun cookies, chewy and chocolate-y and no more difficult than a regular chocolate chip cookie. The only drawback, now The Candy Man is stuck in my head.


Thursday, December 24, 2009

One. More. Bite.

Chocolate and peppermint is the Brangelina of the holidays. Fact.


Just in time for the Christmas cutoff, I'm finally sharing a recipe with this celebrated holiday combination, while simultaneously packing like a madwoman for our trip to Colorado, being careful not to forget the essentials, like several pairs of stretchy yoga pants.

If you're looking for an extra little something to add to the cookie plate this year, something with true holiday pizazz--this Layered Peppermint Crunch Bark is it, guys. And I'm happy to report that this peppermint bark has more personality than any other I've tried. Sure, you've got the usual suspects--white chocolate and a generous sprinkling of crushed peppermint candies--but with a layer of bittersweet chocolate and a smattering of candy bits tucked within, you get a particularly awesome flavor and texture that keeps you going back for just. One. More. Bite.


Beyond the fabulous texture (spectacularly crunchy at the outset, melting into a silky sea of white and dark chocolates on the tongue), and blast of refreshing mint flavor (so nice after a hearty winter meal), you just can't beat the pretty factor with this treat. And you and your oven will enjoy a much-needed rest from the holiday baking frenzy--whipping up a batch of this bark feels delightfully more like a creative, crafty project than anything cooking-related.


Now, between you and me, there would really be nothing wrong with making a batch of this stuff solely for the purposes of self-indulgence while doing some last-minute online shopping. We're totally worth it. But the sparkly, elegant look of the finished candy is just begging to be wrapped up in pretty glass jars with holiday ribbon and gifted to the people you really like. Consider it an amendment to the POC Treats for Gifting Guide! Happy, happy holidays, guys. Enjoy!


Layered Peppermint Crunch Bark

Adapted from Bon Appetit

For the chocolates, you can use either bar chocolate or chocolate chips, but keep in mind that the results with bar chocolate will be a little bit finer textured and more luxurious than if you use chocolate chips (which have stablizers in them). For the dark chocolate, I like to use a half-and-half blend of bittersweet and semi-sweet chocolates, but use whichever you have on hand. Crush the peppermint candies by placing them in a large ziptop bag, having at them with a rolling pin and release that holiday stress!

Makes about 36 pieces

17 ounces good-quality white chocolate (I like Ghiradelli, see note)
6 ounces coarsely crushed peppermint candies (about 30 round striped ones or 12 regular candy canes)
7 ounces bittersweet or semisweet chocolate (see note)
6 tablespoons whipping cream
3/4 teaspoon peppermint extract

Line a baking sheet with a silicone baking mat or a sheet of heavy-duty aluminum foil.

Place the white chocolate in a metal bowl set over saucepan of barely simmering water (being careful not to allow the bottom of the bowl to touch the water), and stir occasionally until the chocolate is melted and smooth and a candy thermometer registers 110�F. Pour 2/3 cup of the melted white chocolate onto the baking sheet, and using an offset spatula, spread it into about a 9x12-inch rectangle. Sprinkle with 1/4 cup crushed peppermints. Refrigerate until set, about 15 minutes.

Meanwhile, stir together the bittersweet chocolate, cream and peppermint extract in a heavy medium saucepan over medium-low heat until just melted and smooth. Cool to barely lukewarm, about 5 minutes. Pour the dark chocolate mixture in long lines over the white chocolate rectangle (pouring it in a puddle will start to melt and smear the white chocolate layer) and using a clean spatula, spread the chocolate in even layer. Refrigerate until very cold and firm, at least 25 minutes.

Rewarm the bowl of white chocolate over barely simmering water again, to 110�F. Working quickly, pour the white chocolate over the firm bittersweet chocolate layer and spread evenly to cover. Immediately sprinkle the remaining crushed peppermints over the surface of the candy. Chill just until firm, about 20 minutes.

If using a silicone mat, slide a thin spatula under the slab of bark and remove it to a cutting board. (If using foil, remove the entire sheet of foil with the bark to a cutting board and trim the bark on the foil, removing the pieces once they're cut.) Trim the edges of the slab of candy, and then cut the bark into 36 pieces. Let stand 15 minutes at room temperature before serving. Can be made 2 weeks ahead and kept in an airtight container in the refrigerator.

Thursday, December 17, 2009

Chocolate Candy Cane Sandwich Cookies


Ingredients:

for the cookies:
1 egg, at room temperature
1 cup flour
1 cup light brown sugar
1/2 cup butter, at room temperature
3/4 cup cocoa
1 1/2 teaspoons baking powder
1/4 teaspoon salt

for the cream filling:
1/2 cup milk
1/2 cup confectioners sugar
1/2 cup cold butter
1/4 cup crushed candy canes
2 1/2 tablespoons flour
1/4 teaspoon peppermint extract
1/4 teaspoon salt


Directions:
For the cookies:
Line 3 cookie sheets with parchment paper. Preheat oven to 350. Cream together the butter and sugar in a large bowl. Add the egg. Mix thoroughly. Whisk together the dry ingredients. Turn the mixer to low and slowly add the dry ingredients. Mix until a thick dough forms. Sprinkle a clean, flat surface with flour*. Roll the dough out until 1/8 inch thick, taking care to roll only in one direction. Cut with cookie cutters. Place 2 inches apart on the cookie sheets. Bake for 8 minutes. Carefully remove from the pan to cool on wire racks.

For the filling:
In a small pan, mix flour with milk and boil until thick. Cool. Beat until fluffy and add other ingredients (except for the candy cane bits) one at a time, beating well after each addition. Fold in the candy cane bits. Refrigerate 1 hour.

Spread the filling on the underside of half of the cookies. Top with the remaining cookies.


*Or roll the dough out between 2 sheets of parchment paper.

Tip: Crush candy canes by placing them in a resealable bag and beat them with a rolling pin against a hard surface.


Yield: about 1 dozen cookies

My thoughts:
I know I am in the minority here but I really don't like Trader Joe's. I've just never had a positive experience there so I stopped going. That said, this time of year, I am almost tempted to go back to try the Peppermint JoJo's everyone is raving about. Almost tempted. Luckily I know how to bake and can make a cookie that is much better than any packaged cookie could hope to be. I made a simple chocolate wafer that wasn't too sweet and a sweet, creamy, no shortening allowed minty filling with crushed candy canes folded in. The perfect holiday treat!

Note: If you live in a very warm climate (indoor temperature over 85) and do not plan to eat the cookies the same day you make them, you may need refrigerate them overnight. Otherwise, store in an air tight container at room temperature.

Thursday, October 29, 2009

Gumdrop Cupcakes


Ingredients:
2 cups flour
2/3 cup sugar
1 cup buttermilk, at room temperature
1/2 cup butter, at room temperature
2 eggs, at room temperature
2 teaspoons vanilla
2 teaspoons baking powder
1/4 teaspoon salt
1/3 cup diced gumdrops
frosting

Directions:
Preheat the oven to 350. Grease and flour or line 12 wells in a cupcake pan. In a large bowl, cream together butter and sugar until light and fluffy. Add egg, vanilla, and buttermilk. Beat well. Add the flour, baking powder and salt. Beat until the batter is light and fluffy. Fold in the gumdrops bits. Fill each well 3/4 of the way. Bake 15-18 minutes or until a toothpick inserted in the middle of the middle cupcake comes out clean.

Note: Most of my cupcakes took only 15 minutes but for some reason one took about 22 minutes. I had to keep sticking it back in the oven. No idea why, but do take care to make sure each cupcake is fully baked even if they look done when you take them out of the oven.


Cool on a wire rack. Frost with desired frosting. I used cream cheese frosting that I tinted green.

Tip: Cut up gumdrops are really, really sticky. Take a second and feed them into the bowl (while the mixer is running) slowly and possibly piece by piece so they don't from one big sugar clump.

My thoughts:
Years ago (I might have even been still in high school) my mom bought some really yummy jelly pumpkins that were coated in sugar that we just loved. They had a great texture and were very pretty, the sun would hit them and they would just glow. I've been looking for them ever since so I was overjoyed to come across a pack of these during a routine trip to the grocery store. They are a little denser than the ones I remember-more gumdrop than gummy-but the zesty orange flavor is right on. I just had to use them to decorate cupcakes and while I was at it, I threw some into the batter as well. The cake itself is very moist and light and I love the little bits of flavor that the gumdrops provide in every bite. I don't think you can go wrong incorporating candy into a Halloween dessert!


Thursday, October 22, 2009

Dark Chocolate Peanut Butter Cup Cupcakes


Ingredients:
for the cupcakes
12 miniature dark chocolate peanut butter cups
1 cup flour
1 cup light brown sugar
1 cup milk
1/2 cup cocoa
6 tablespoons butter, at room temperature
2 teaspoons baking powder
1 teaspoon vanilla
1 teaspoon instant espresso powder
1/4 teaspoon salt
2 eggs, at room temperature


for the frosting
1 cup confectioners' sugar
1/2 cup peanut butter
4 oz cream cheese

6 miniature peanut butter cups, halved


Directions:
Preheat oven to 350. Line or grease and flour 12 wells in a cupcake pan. In a large bowl, cream the butter and sugar. Add the egg and vanilla, mix thoroughly. Meanwhile, mix together the cocoa powder, espresso powder and milk in a small bowl or measuring cup and set aside. Add flour, baking powder and salt to the butter mixture. Add the milk mixture to the rest of the batter and beat until well combined. Fill each well 1/3 of the way full.


Place the peanut butter cup in the center and cover with batter. Bake 15 minutes or until a toothpick inserted the center of a cupcake comes out clean or with just one or two dry crumbs. Cool briefly in the pan, then remove cupcakes to wire racks to cool completely before icing.

for the frosting
Beat all ingredients until fully incorporated. Spread on cooled cupcakes or cake. Top each with 1/2 of a miniature peanut butter cup.

My thoughts:
Years ago when Reese's first came out with limited edition dark chocolate peanut butter cup miniatures not being a fan of milk chocolate, I hoarded them. I am not much of a candy person (save our holiday boxes of Rheb's, the occasional candy bar or Haribo binge) but the miniatures were cheap, tasty and had a good chocolate to peanut butter ratio. I had hoped they would make them a permanent addition to their line up and it looks like they finally must have because I am seeing them everywhere, not just at Chocolate World or in limited edition bags. Anyway, my husband also loves the dark chocolate cups and may or may not have decimated nearly an entire bag all to himself. Luckily I was able to save a few and make these cupcakes.

The recipe is easy, the trick to the chocolate-y taste in the cupcakes without having to melt chocolate is to rehydrate the cocoa powder in a bit of milk and add a bit of espresso powder to deepen the flavor. They also pack quite a peanuty punch. Perfect for any chocolate-peanut butter lover!


Thursday, April 9, 2009

Coconut Cubes


Ingredients:
4 cups confectioners sugar
2 cups unsweetened (dessicated) coconut
14 oz sweetened condensed milk
1 teaspoon vanilla
food coloring


Directions:
Line a 8x8 inch baking pan with parchment paper or lightly spray with cooking spray. Using a mixer, mix all ingredients except the food coloring together until the coconut is evenly distributed. The mixture will be very thick. Divide the mixture in half, press one half into the bottom of the pan. Add food coloring to the remaining coconut and stir to evenly distribute. Press firmly on top of the uncolored coconut in the pan. Refrigerate about 2 hours or until firm before cutting into one inch squares.

My thoughts:

Despite the amount of sugar in the cubes, they don't taste quite as sweet as you would think, the coconut keeps it from being too over the top. They are sort of a cross between a coconut cream candy and fudge-dense but chewy. A perfect candy for Easter or Passover.

Two tips:
First, please do not use sweetened coconut in this recipe. Secondly, do not reduce the amount of sugar or they will not set up properly.


Tuesday, February 10, 2009

Luscious Homemade Caramels


Ingredients:
1 cup heavy cream
5 tablespoons butter, cut into pieces
1 teaspoon sea salt
1 1/2 cups sugar
1/4 cup light corn syrup
1/4 cup dark rum

additional sea salt for sprinkling (optional)

Directions:
Thoroughly grease 2 loaf pans or one 8x8 inch baking dish. Bring cream, butter, and salt to a boil in a small saucepan, whisking occasionally to dissolve the salt, then remove from heat and set aside. Cook the rum, corn syrup, and sugar in a heavy saucepan, stirring to dissolve the sugar. Bring to a boil and cook until mixture is a light golden caramel. Carefully add the cream mixture and simmer, stirring frequently, until candy reaches 245 degrees(soft-ball stage). If you were to drop a bit of the mixture into a cup of cold water it should form a soft but obvious ball at this stage. The ball should be about the texture you'd want the final caramel to be. Pour into prepared pan(s) and allow to cool. Slice into 1x1 inch squares. Sprinkle with additional salt if desired.


My thoughts:
These are particularly decadent, creamy and flavorful caramels. Caramels are impressive to give but fairly easy to make, the trick is not to over cook the caramel so it becomes hard. Of course, if you do overcook it, you can just say you meant to make toffee and dip it in chocolate.