Showing posts with label Frostings and Fillings. Show all posts

Monday, August 16, 2010

My Ultimate Chocolate Cupcake


I know this confession is a risky one, but I think our relationship can withstand such brutal honesty: Despite the chocolate-on-chocolate celebration of my latest posts, I can sort of take or leave chocolate. True story. I mean, I like chocolate, really I do--love working with it and putting it in my face on occasion. Because really, when a chocolate craving hits at certain, ahem, personal times, nothing but chocolate will do (holler if you hear me, ladies). However, I'd never be called a "chocoholic" or be gifted a mug that says something like "Ack! Don't talk to me before I've had my morning chocolate!", or whatever.

But even so, this here chocolate cupcake was so smack-the-counter good that they've become a Real Problem. Which is to say that my typical day of three meals and one dessert has basically inverted for the lifespan of these cupcakes. You can't say I didn't warn you.


I've shared the recipe for the chocolate cake with you before--it truly is my go-to recipe that I've tweaked and amped up a bit from Martha's original recipe over the years. Love, love, love it. But the frosting is a new thing entirely, a result of my newfound love and fascination with flour frostings. I needed a chocolate version of this frosting, and I needed it to be a very specific frosting situation. For this part-time chocolate lover, it basically needed to blow my mind with chocolaty perfection, but not be cloyingly rich or overtly decadent like so many other chocolate frostings.


I wanted a cloud of chocolate atop the rich cake and some deranged combination between the flavor of melted chocolate ice cream, chocolate mousse and the center of a 3 Musketeers bar. It took a few attempts to get there. But judging by the ferocity and stealth with which I hid the leftovers of this frosting in the depths of my refrigerator, I'd say it was a total success. And the marriage of the cake and the frosting--mmm, mmm! I'd consider converting to Chocoholism for a cupcake like this.
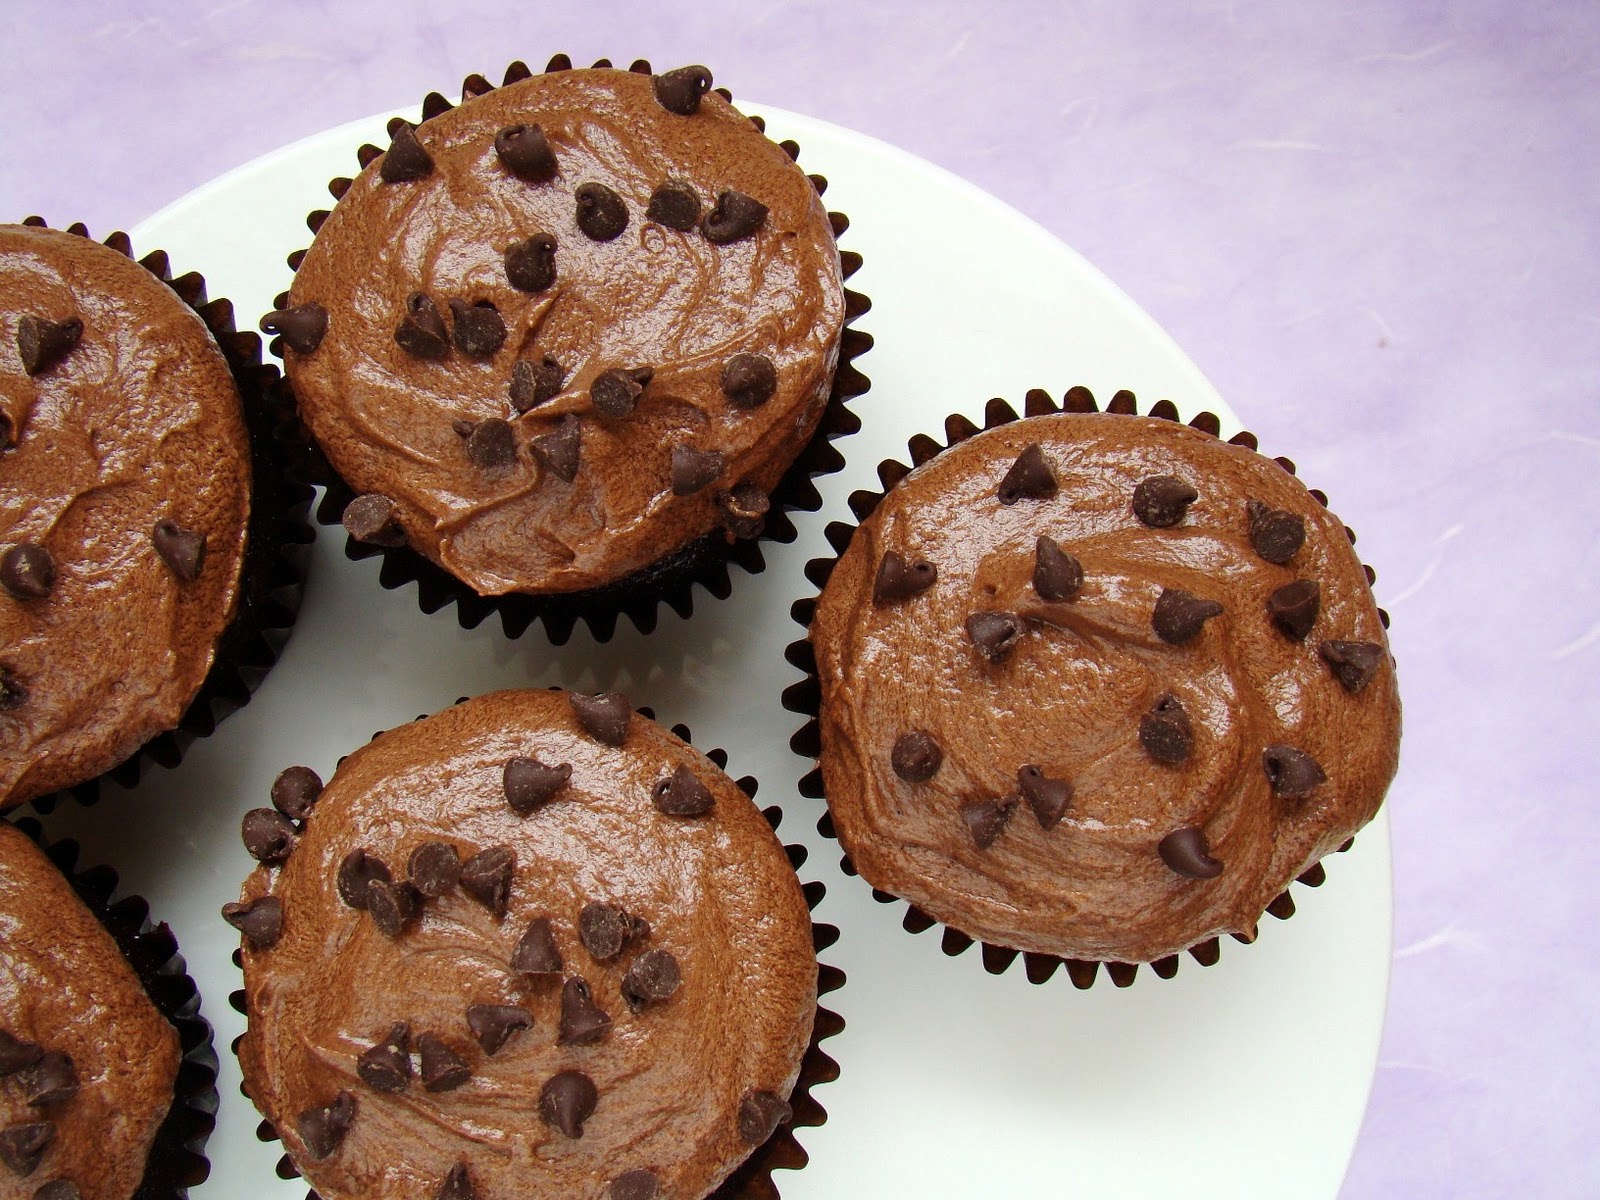


Ultimate Chocolate Cupcakes

I get about 18 cupcakes out of this recipe, but you can stretch it to a full 2 dozen if need be. It also makes two great 9-inch cake layers. Using brewed coffee instead of just water makes the chocolate taste more...chocolatey. You can dissolve 1 teaspoon instant espresso in 3/4 cup hot water instead. Mini chocolate chips melt into the cake to make it extra rich and decadent.

Makes 18-24 cupcakes

For the cake:

3/4 cup unsweetened cocoa powder (I love Ghiradelli or Valhrona)
1 1/2 cups all-purpose flour
1 1/2 cups sugar
1 1/2 teaspoons baking soda
3/4 teaspoon baking powder
3/4 teaspoon salt
2 large eggs
3/4 cup strong brewed coffee (see note)
3/4 cup buttermilk
3 tablespoons canola oil
1 teaspoon pure vanilla extract
2/3 miniature semi-sweet chocolate chips (or regular chips, chopped fine)

For the chocolate flour frosting:

3 tablespoons flour
1 cup milk
4 tablespoons premium cocoa powder
Pinch of salt
1 cup (2 sticks) unsalted butter, at room temperature
1 1/3 cups confectioners' sugar
1 teaspoon pure vanilla extract
3 ounces unsweetened chocolate, melted and cooled

Preheat the oven to 350 degrees. Line standard muffin tins with paper liners. Spray the top of the muffin tin with cooking spray for extra non-stick insurance, as these cupcakes can have a serious rise and can puff over the edges of the tin's wells.

Sift together the cocoa powder, flour, sugar, baking soda, baking powder, and salt into a large bowl. Add the eggs, coffee, buttermilk, oil and vanilla. Beat until smooth with an electric mixer, about 3 minutes. Scrape down the sides and bottom of bowl to assure batter is well-mixed. Fold in the mini chocolate chips.

Divide batter evenly among muffin cups (an ice cream scoop works well here), filling each cup no more than 2/3 full. Bake until tops spring back when touched, about 20 minutes. Transfer to a wire rack; let cool completely before frosting.

For the frosting: In a medium saucepan over medium high heat, whisk together the flour, milk, cocoa powder and salt until the mixture comes together to form a thick paste. Press the mixture through a fine mesh sieve into a small bowl, and press a sheet of plastic wrap right on the surface of the mixture to prevent a skin from forming. Cool in the refrigerator it for about 15 minutes, or until it's cool to the touch.

In the bowl of an electric mixer, beat together the butter and confectioners' sugar until light and fluffy. Beat in the chocolate mixture until the frosting begins to lighten in color and texture, almost mousse-like. Beat in the melted unsweetened chocolate until the frosting is fluffy, smooth and well-blended. Frost cupcakes, and store any leftovers in an airtight container in the refrigerator.

Saturday, July 24, 2010

Pinkalicious


With just one month left until Little C's second birthday (I know! Don't even get me started!), living with her is a lot like being roommates with Sybil. One second, she's suddenly reaching critical mass in the produce section, the next she's ceasing her dramatic wailing to sweetly chirp "Hello!" and frantically wave her tiny arm to a passerby near the bananas.

At any given moment of the day I can be found either rubbing my temples while witnessing another Little C tantrum while dangerously close to throwing my own, or cuddled under the covers with the sweetest baby girl in the world, reading book after book, all fuzzy on the inside as she squeezes in tighter to my side and makes a little game out of giving me little kisses after each page turn. It's moments like the latter that make me come up with all sorts of ambitious ideas, like being inspired to bake pink cupcakes together after reading her favorite book for the 57th time this week.


Do you have little girls? Because if you do, you really should pick up this book, and be prepared to read it aloud. A lot. Pinkalicious is so super cute, about a little girl who turns pink, and then red, from eating too many pink cupcakes and can only return to normal after eating lots of green food. A great message about eating in moderation and the power of a healthy diet. And probably a lot of other noble things that I can't be bothered to think about because after reading that book on repeat OH MY GOD I WOULD KILL FOR A CUPCAKE.


So like any savvy, creativity-fostering mother with a fever for which the only cure was more cowbell pink cupcakes, I declared we would make our own, together. Our cupcake baking activity was totally fun and great--a wonderful bonding experience. That is, when my child wasn't reaching over to crank the mixer directly from 0 to 10 while I was putting the flour in or demonstrating an Exorcist-level flip out because I kept her from shoveling sprinkles into her mouth. Tender moments, I tell you. Tender. Moments.


So the cake recipe itself was my very favorite vanilla cake which I've told you all about before, but the most amazing outcome of this whole mother-daughter baking bonding experience was a frosting so out of this world, I'd eat it pink, white or dolloped on a rubber tire. This frosting is, quite simply, divine. And believe it or not, this revelation of a buttercream is made with flour. Seriously! Little C couldn't believe it either.


Originally the topping for my Great Aunt Agnes's beloved Red Velvet Cake, this frosting recipe was one of the first I copied while leafing through my Gramma's recipes back in Illinois a few weeks ago. I'd been waiting for an excuse to try it ever since--it was all so crazy I couldn't not give it a go, know what I mean? Basically it starts with a cooked flour and milk mixture, which is cooled and then beaten together with butter and an amount of confectioners' sugar so tiny in relation to other buttercream recipes, you'll think that there's no way this could end well.


Except it totally does, people. The flour mixture helps to give the frosting the sort of body that you would normally get from cups upon cups of confectioner's sugar (especially great if you're serving it to kids), and when you whip it with the butter, it becomes almost the consistency of whipped cream--remarkably light and so fluffy you'll want to dive right in with a spoon. Ethereal, just sweet enough and basically the frosting of dreams. Pinkalicious, if you will.


Fantastic Flour Frosting

Makes enough to generously frost about 18 cupcakes

3 tablespoons all-purpose flour
1 cup milk
1 cup (2 sticks) unsalted butter, at room temperature
1 cup confectioners' sugar
1 teaspoon pure vanilla extract

In a medium saucepan over medium heat, cook the flour and milk together, stirring with a wooden spoon, until the mixture begins to bubble and thickens significantly. When it reaches the consistency of a paste, remove the pan from the heat and let the mixture cool.

In the bowl of an electric mixer, beat together the butter, confectioners' sugar and vanilla until very light and fluffy, about 2 minutes. Beat in the cooled flour mixture and let the mixer run until the frosting becomes very fluffy and noticably lighter in color. It will be nearly the consistency of whipped cream.

Use the frosting immediately, and refrigerate any leftovers covered tightly with plastic wrap. Bring any leftover frosting to room temperature and whip again for a minute before using.

Monday, May 31, 2010

White Chocolate Cupcakes


Oh, White Chocolate. Poor, misunderstood, totally underestimated White Chocolate. Come here. I feel you. The awkward young teen in me (the one with the pointless "clear" braces and oddly shaped bangs, whose coltish gait made her fear all things athletic) pulls you to her AAA-cup breast to tell you it will be all right, that you have lots of wonderful qualities. And someday, even the most elite of the culinary community will come to embrace you and then wonder what took them so long. When that happens, don't forget that I was always here, loving you all along, even when everyone was dissing you and saying you were so 80s.


In fact, I love you so much that I buy you in bulk, and sadly shake my head when I notice that the bins of your dark and bittersweet competition are always visited more than yours. But then, maybe that's the problem right there. It's sort of true what your haters say--you're not really chocolate. You're cocoa butter, sugar and vanilla, no actual chocolate in you to speak of. But you know what, White Chocolate? That's not your fault. Your name is just a label. A label that some moron gave you as a way to categorize you for their own convenience. But one day you'll graduate from high school and head off to college and be able to start fresh, and--wait, what? Oh.


So I was saying. Cocoa butter and vanilla is a lovely thing to be--at your best, you're dreamy and creamy, a breath of sweet vanilla in every bite. I like to think of you as Vanilla Chips or Vanilla Bar, and use you in fabulous ways that break the monotony of having the dessert course be an endless cycle of chocolate and fruit-based desserts. And with recipes like White Chocolate Cupcakes with White Chocolate Cream Cheese Buttercream to show off everything that's great about you, well, you are a star.


Other than just being delicious, one of your most endearing qualities is your ability to play well with others. Like in this recipe, which satisfies my cupcake craving like none other. Coconut milk, of all things, is the secret, undetectable ingredient here that gives you even more sparkle in a cake that is so perfectly sweet, so moist, with a richness I've never experienced before in a white cake. Pairing you with cream cheese in a luscious buttercream is nothing short of White Chocolate Dynamite (which, coincidentally, would be an awesome moniker for me to use in a dance contest someday). I love you, White Chocolate. Thanks for being you.


White Chocolate Cupcakes
Adapted from The Craft of Baking

The original recipe says this recipe yields 14 cupcakes--I easily got 18, using a leveled 1/4 cup of batter in each cup (I used a standard ice cream scoop). I'm sure the white chocolate called for in the original recipe is meant to be chopped bar chocolate, but I had tons of high-quality white chocolate chips on hand, so I used them instead and everything turned out delicious. I also opted to add some confectioners' sugar to the frosting, to stiffen and sweeten it up a bit, but it's not necessary--add it only to your taste.

The cakes and the icing keep beautifully, tightly covered and refrigerated, for up to 3-4 days so these are great make-ahead cupcakes. Unsweetened coconut milk can be found in nearly every supermarket under a few brand names, usually in the Asian foods aisle.


If you can find them, white chocolate vermicelli (thinner, crunchier and much tastier than regular jimmies) make the perfect finishing touch for these cupcakes, adding crunch and extra white chocolate flavor.

Makes 18 cupcakes

For the cakes:

1 3/4 cups all-purpose flour
1 teaspoon baking powder
1/2 teaspoon kosher salt
12 tablespoons (1 1/2 sticks) unsalted butter, at room temperature
1 cup sugar
1 tablespoon pure vanilla extract
8 ounces high-quality white chocolate, chopped bar or chips
1/2 cup unsweetened coconut milk
5 large egg whites

For the frosting:

6 ounces cream cheese, at room temperature
6 tablespoons (3/4 stick) unsalted butter, at room temperature
1/2 teaspoon pure vanilla extract
1/4 teaspoon kosher salt
4 1/2 ounces high-quality white chocolate, chopped bar or chips
Up to 2/3 cup confectioners' sugar, to taste (see note)

Position an oven rack to the center of the oven and preheat it to 350 degrees. Line two 12-cup muffin tins with paper liners, 12 in one and 6 in the other.

Whisk together the flour, baking powder and salt. Set aside.

In the bowl of an electric mixer, cream together the butter, sugar and vanilla until very light and fluffy, about 3 minutes.

Melt the white chocolate in a double boiler. When it's just warm to the touch, stir it into the butter mixture on low speed, just until combined--it may separate a bit, but it will come back together. With the mixer on low, alternate adding the flour mixture and the coconut milk in three batches until well-blended. Transfer the batter to a medium bowl.

Clean and dry the bowl of the mixer. Whip the egg whites on medium high speed until they reach soft peaks, about 4 minutes. Gently fold the egg whites into the batter in three additions.

Fill the muffin cups no more than 3/4 of the way full with the batter. Bake one tin at a time until a toothpick just comes out clean and the tops spring back when lightly touched, about 20 minutes. Invert the cupcakes onto a cooling rack, then turn them right side up and let them cool completely.

To make the frosting, beat the cream cheese, butter, vanilla and salt together until light and smooth. Melt the white chocolate in a double boiler and cool until it is just warm to the touch. Scrape the white chocolate into the cream cheese mixture and beat to combine. Taste the icing and check the texture--if you like your icing sweeter and with a bit more body, add in some confectioners' sugar. If the frosting is too soft to spread, refrigerate it for about 20 minutes and then whip it for 30 seconds before using. Ice the cupcakes generously and decorate as you wish.

The iced cupcakes can be kept in an airtight container in the refrigerator for up to 4 days.

Thursday, May 13, 2010

Apple-Frangipane Galette


Quick, guys! Make this galette before all the lovely warm-weather fruits really start parading into the markets, inspiring you and making apples seem a lot like my Mom Wardrobe, which is to say sad, hapless and completely boring. (It's a problem, people. I don't know what happened, really. But I can tell you that you will wrestle this pilly old cardigan from my cold, dead torso. I may dress in a manner that is as insipid as apples in May, but I am sort of in denial about the whole thing. I try to think of my clothes as the sort of shiny, happy green apples that still seem relevant, even as strawberries and rhubarb seem to be the order of the day. Lie to me.)


The good news about this Apple Frangipane Galette (because there's really no good news side to the wardrobe thing, naturally) is that the apples really are just a jumping off point. Any fruity pie filling that you love and would normally put in a pie or tart (except strawberries, too much water) will probably work here. The magic, my friends, is in the frangipane.


I love me some frangipane, always have. It's the irresistibly dreamy almond pastry cream that's made with almond paste, the filling of so many decadent pastries and cakes. But until now, I'd never turned one out in my own kitchen. And now that I know I can make it in mass quantities in just minutes in the food processor, I may keep a jar on my bathroom vanity. Eating it will make you feel that pretty, I promise.


The frangipane is the secret weapon that turns something familiar into a next-level thing. When hidden beneath some fanned-out sweet-tart apples, it sort of bakes into the crust and melds with the fruit and adds a stealth layer of flavor that you just don't expect when you're faced with something as rustic and familiar as apples enveloped in pastry. I flippin' love stuff like that. It makes new recipes worth trying, even those that seem like something you've had before.


And that brings me to the source of this recipe. It's from the Great Lebovitz's latest recipe collection Ready for Dessert. I was so excited when my copy finally reached my doorstep, and my family was sort of relieved, too--perhaps I would then stop suctioning myself to the front window, practically licking the glass, in hot anticipation of the delivery. I started flipping and bookmarking as soon as I opened the box and this galette was in the oven less than two hours later. I may look a little out of touch in this pilly old cardigan, but I'm sure that's got to be a new baking record.


Apple-Frangipane Galette
Adapted from David Lebovitz's Ready for Dessert

Lebovitz's headnotes indicate that you shouldn't need to sugar the apples at all unless they are extremely tart; in that case you should sweeten to taste. I used Granny Smiths that definitely weren't the most tart I'd ever had, so I skipped the sugar, but in the end wished I'd sweetened them just a bit. I might also add just a dash of cinnamon next time too--it was delicious without it, but I missed the flavor combination. Also, I used Demerara sugar for sprinkling and loved the toasty flavor and crunch, so I'm recommending it here, but you can use granulated or other coarse sugar that you like. As always with pastry-making, make sure your ingredients are as cold as possible before using.

Serves 8

For the crust:

1 1/2 cups all-purpose flour
1 tablespoon sugar
1/2 teaspoon salt
1/2 cup (1 stick) unsalted butter, cut into 1-inch cubes and chilled
6 tablespoons ice water

For the frangipane:

4 ounces almond paste, crumbled
1 1/2 teaspoons sugar
1 1/2 teaspoons all-purpose flour
1/8 teaspoon almond extract
6 tablespoons unsalted butter, at room temperature
1 large egg, at room temperature
1 teaspoon rum, kirsch or Calvados (optional)

For assembly:

6 medium apples (3 pounds), peeled, cored and cut into 1/2-inch slices
2 tablespoons unsalted butter, melted
4 tablespoons granulated, Demerara or other coarse-crystal sugar


First, make the crust. In the bowl of a food processor (or in a mixing bowl with a pastry blender, or in the bowl of a stand mixer fitted with the paddle attachment), mix together the flour, sugar and salt. Add the butter pieces and mix until the butter is the size of peas. Add the ice water all at once and mix just until the dough begins to come together. Shape the dough into a disc, wrap it tightly in plastic wrap, and refrigerate for at least 30 minutes.

To make the frangipane, place the almond paste, sugar, flour and almond extract in the bowl of a food processor or electric mixer. Mix until the almond paste is in fine, uniform pieces. Add the butter and mix until very well-blended, then add the egg and the liqueur, if using. Mix until the frangipane is smooth (there may be a few tiny unmixed pieces of almond paste, and that's fine--they'll disappear during baking).

When you're ready to bake the galette, position an oven rack to the center of the oven and preheat it to 375 degrees. Line baking sheet with parchment paper.

To assemble the galette, lightly flour a work surface and roll the dough out into a circle about 14 inches in diameter. Transfer the dough to the prepared baking sheet. Spread the frangipane in an even layer over the dough, leaving a 2-inch border. Arrange the apples over the frangipane, either scattering them in an even layer, or arranging them in concentric circles. Fold the un-frangipaned edge of the dough over the apples. Brush the crust and filling with the melted butter. Scatter half the sugar over the crust and the remainder over the apples. Bake until the apples are tender and the crust has browned, about 1 hour. Slide the galette (still on the parchment) onto a wire rack to cool a bit. Serve warm or at room temperature, ideally the day it's baked.

Monday, May 10, 2010

Chocolate Mint Squares


I really hope all y'all had a fabulous Mother's Day. For me, it began with sleeping in until the heavenly hour of 8:30 a.m. and then waking up to a lovely gift of a seriously great cookbook and a pop-up card from Little C that was scrawled about with crayon and played a weepy version of "You Are My Sunshine" when opened. And because girlfriend can't even let a commercial jingle pass without shaking a tail feather, I was also gifted an impromptu, twirling, giggly interpretive dance to the musical card and in no time was all what--there's something in my eye, OKAY? Too much.


Since I was in a teary, slobbering pile before I'd even gotten half my coffee down, the husband (who deems a gift a true success when it makes the recipient tear up with sentimentality) obviously did an awesome job with the Mothers' Day planning this year. Well played, indeed. Good thing I'd already made a pan of Chocolate Mint Squares that I was pretty sure he would inhale and declare awesome (I was correct).


You may remember me saying something recently about being in my Maida period. And if you try this recipe, I am sure I won't be alone in this obsession. The base for these fudgy, minty, all around heavenly bars is similar to Maida's legendary brownie recipe, the cellophane-wrapped ones she is known for toting around in her purse at all times and giving to whomever she happens to see. If that doesn't make you fall in love with this woman, then you are an iceberg. The end.


But then you take her amazing brownies, spread them with a thin, but powerful, intensely minty buttercream frosting and a slick of bitter chocolate and the whole thing will blow you away. It's like a brownie meeting a York Peppermint Pattie. Bliss, I tell you. The balance here is so strikingly delicious. At first, I thought it might all be too much--and make no mistake, these are indeed rich--but the ratio of fudgy brownie to creamy mint layer is so spot on, and with a shiny capping of crackly bitter chocolate (totally unsweetened, mind you, not bittersweet), they're a taste and textural dream.


And even better, since the husband basically lost his ever-loving mind over these things, I'm feeling pretty confident that I now have a golden ticket the next time I lose my scruples or somesuch. Actually, with this recipe in my repertoire, I may have insured really excellent Mother's Day gifts for my entire future. Boo-ya!


Chocolate Mint Squares
Adapted from Maida Heatter's Great Book of Cookies

Don't chill the brownies for too long after the mint layer is added--five minutes is all you need, just so the frosting isn't totally soft. If it's too cold, the bitter chocolate glaze will set before you can get it all spread evenly. These brownies are at their most awesome served chilled, or even frozen.

Makes 20

For the brownie layer:

2 ounces unsweetened chocolate
1/4 pound (1 stick) butter
2 eggs
1/8 teaspoon salt
1/2 teaspoon pure vanilla extract
1 cup sugar
1/2 cup sifted all-purpose flour (I stirred the flour well, then spooned into the cup and leveled)

For the mint layer:

2 tablespoons butter, at room temperature
1 cup sifted confectioners' sugar
1-2 tablespoons heavy cream
1/2 teaspoon peppermint extract

For the bitter chocolate glaze:

1 ounce unsweetened chocolate
1 tablespoon butter

Position a rack to the center of the oven and preheat it to 350 degrees. Lightly spray an 8 or 9 inch square baking pan with nonstick spray, and line it with two perpendicular strips of parchment paper (leave a bit of overhang on all sides), then lightly spray the parchment, too.

Being by making the brownie layer. Melt the chocolate and butter together in the microwave, about 45 seconds on high. Stir until smooth and set aside to cool slightly.

In the bowl of an electric mixer, beat the eggs on medium speed until light and foamy. Beat in the sugar, salt and vanilla. Add the chocolate mixture and beat on low just to combine. Stir in the flour by hand just until smooth. Scrape the batter into the prepared pan and bake until a toothpick comes out clean, about 28 minutes. Cool completely on a wire rack before icing with the mint frosting.

To make the mint frosting, beat together the butter, confectioners' sugar, 1 tablespoon of heavy cream and the peppermint extract. Add more cream, a few drops at a time, until the frosting is thick but easily spreadable. Spread the icing evenly in a thin layer over the brownies. Chill in the refrigerator for just five minutes, until the very surface is set.

Prepare the glaze by melting together the unsweetened chocolate and butter in a small bowl in the microwave, just about 30 seconds on high. Stir until smooth and pour the hot glaze over the mint layer, tilting the pan to coax it into place, and using an offset spatula if necessary. It will be a very, very thin layer.

Refrigerate until the glaze is set, at least 30 minutes. Use the parchment handles to lift the brownie slab from the pan to a cutting board, and cut into squares. Chill the cut squares for a few hours until the glaze sets completely. Keep any leftovers in the fridge, tightly covered.

Sunday, April 25, 2010

Whoopie Pies!


The time has come. Completely ridiculous words have begun to take over our household. And I'm not just talking about Little C's streaming toddler babble ("Hi! Hello? Apple? Mamadadababy! Toes! No?"). I'm talking about the random words that her parents haphazardly stick into sentences in place of more, shall we say, inflammatory terms, in the hopes of avoiding crass truck driver-parroting by said toddler. Like the day I informed my husband that I'd "scrubbed the--pajamas outta the shower". A new low of parental dorkery, friends.

The day is fast approaching when I won't be able to say that I really hate something because it's basically stupid, and instead I'll say that I "don't like it very much" and it's "silly". If I ever get to using the word "whoopee" in The Newlywed Game sense, someone please send me out to pasture. Unless, of course, we're talking about these totally kick-ass Whoopie Pies, in which case no language will be barred, I don't care what sweet, impressionable, jeans-clinging tiny person is in my midst.


After meeting the greatness that is Rose Levy Beranbaum a couple weeks ago and getting a shiny new copy of her Heavenly Cakes book (just announced as IACP's Cookbook of the Year, hooray!) signed and in my hot little hands, I started flipping and bookmarking that very night. And the recipes are, of course, at an insane level of creative genius. Most of them are, in a word, complex. So until Little C starts preschool, I'm probably going to stick to a few of the simpler recipes in this book, like these Whoopie Pies--rich, dense, deeply chocolatey cakey cookies sandwiching the most silky, perfect vanilla buttercream I've ever had. To die for, basically.


But because we're friends, I'll tell you that as far as Whoopie Pies go, the process to make them isn't the simplest of all the recipes out there. This is RLB we're talking about, after all. However, I will also say that they are totally, completely worth it, thank God. The cake part of the recipe actually comes together fairly quickly, and the double hit of dark chocolate makes for the kind of fudgy batter that you'll want to spoon right from the bowl.

And the buttercream filling? Oh mah gah. This filling is one of Rose's signature "mousseline" buttercreams, and it does not disappoint. And in her new book, she's made the process a bit simpler for those of us who don't have eight hands. Hooray!


The combination is nothing short of heavenly. With a tall, cold glass of milk, you're really going to need to watch your language.


Whoopie Pies
Adapted from Rose Levy Beranbaum's Rose's Heavenly Cakes

The original recipe stated that it would create 6 filled pies, but I easily got 8 out of my batches of batter and filling. The recipe also called for bringing the sugar syrup all the way to firm ball stage (248-250 degrees) before removing it from the heat, and the first time I followed this instruction, the syrup had cooled and mostly soldered itself to the measuring cup before I could get it into the meringue. I found that bringing it to a warm soft ball stage instead (238) worked much better and the end result was still great.

There are a lot of steps here, which I've condensed quite a bit from the original recipe. Read it carefully before you begin and try to choreograph the process in your head in the way that will work best for you before you begin.

If you don't own smaller ice cream scoops, this recipe would be the perfect excuse to go buy a 2 tablespoon scoop--it makes portioning out the batter and filling evenly a breeze.


Makes 8 whoopie pies

For the cakes:

1 1/2 ounces dark chocolate, chopped (60-62% cacao--I used Ghiradelli bittersweet chips and it was fine)
1/2 cup dark brown sugar
1 large egg, at room temperature
2 tablespoons canola oil
2 tablespoons unsalted butter, cool room temperature
1 cup plus 1 1/2 tablespoons sifted all-purpose flour (sift first, then measure)
3 tablespoons plus 2 teaspoons sifted unsweetened cocoa powder
1/2 teaspoon baking powder
1/2 teaspoon baking soda
1/2 teaspoon salt
1/2 cup low-fat buttermilk

For the filling:

1/4 cup sugar
2 tablespoons corn syrup
1 tablespoon water
1 large egg white, at room temperature
1/8 teaspoons cream of tartar
9 tablespoons unsalted butter, at cool room temperature, divided
1/2 teaspoon pure vanilla extract or vanilla bean paste
1/4 cup plus 2 tablespoons sifted confectioners' sugar

Position a rack to the center of the oven and preheat it to 400 degrees. Line two unrimmed baking sheets (or invert two rimmed half-sheet pans) with parchment paper or silicone baking mats, or spray lightly with nonstick cooking spray.

Melt the chocolate in a double boiler over simmering water or in a microwave at 50% power, stirring every 30 seconds. Let cool until the chocolate is no longer warm to the touch, but still fluid.

While the chocolate is cooling, place the brown sugar, egg, oil and butter in the bowl of an eletrci mixer fitted with the paddle attachment. Beat at medium speed for about 5 minutes--the mixture will become smooth and paler in color. Reduce the speed to low and stir in the melted chocolate.

Whisk together the flour, cocoa powder, baking powder, baking soda and salt in a medium bowl. Add the dry ingredients to the egg mixture in three additions on low speed, alternating with the buttermilk, beating just until each addition begins to disappear into the batter, scraping down the sides of the bowl as needed. With a 1-ounce (2 tablespoons) ice cream scoop, portion the batter onto the sheets, 8 evenly spaced mounds per sheet.

Bake one sheet at a time, rotating halfway through baking, until the centers spring back when lightly touched, about 8 to 10 minutes. Let cool on the sheet on a wire rack for 5-10 minutes before transferring the cakes to the rack to cool completely. Store in an airtight container until ready to fill.

To make the filling, begin by making the sugar syrup. Combine the sugar, corn syrup and water in a small saucepan. Over medium heat, cook until the sugar dissolves and the syrup is bubbling. Reduce the heat to low and move on to making the meringue (if you're using an electric range, remove the pan from the heat completely).

In a mixing bowl with a handheld mixer, beat the egg white on high speed until foamy with tiny, relatively uniform bubbles. Add the cream of tartar and beat until stiff peaks form when the beaters are lifted.

Return to the sugar syrup and increase the heat to high. Boil until the syrup reaches 238-240 degrees. To make pouring easier, transfer the syrup to a heatproof measuring cup if you wish.

Beat the syrup into the meringue in a thin, steady stream, aiming away from the beaters so that the syrup doesn't just spin onto the sides of the bowl. Beat until the outside of the bowl no longer feels hot, about 3 minutes. Beat in 1 tablespoon of the butter and the vanilla extract or paste. Refrigerate for 10 minutes while you make the finishing cream for the filling.

In the bowl of an electric mixer, beat together the remaining 8 tablespoons of butter and confectioners' sugar. Beat on high for 2 minutes or until the mixture is very light in texture and color, almost white. Lower the speed to medium and beat in all the meringue until the buttercream is smooth, about 10 seconds or so.

To assemble, sandwich generous 2-tablespoon mounds of the filling between the cakes, and press down lightly so that the cream reaches the edges of the pies. Serve at room temperature and store any leftovers refrigerated in an airtight container, allowing them to come to room temperature again before serving.

Tuesday, February 9, 2010

Caramel Cupcakes


Woo-hoo! Thanks for all the well wishes and shout-outs about that half marathon business I told you about the other day. The race itself was a success. I had wanted to finish in under 2:15, and made it in 2:05, so I'm really happy with that. For once, I didn't hurt anything, and I only cried three times (from joy, not misery)--at the start, crossing the finishing line, at the halfway point when I saw my friends, mom and husband cheering like crazy people as I passed, with my Little Coach C perched high up on her daddy's shoulders. Waaahhhhh. It was a great experience all around. I highly recommend running more miles than is really necessary with several thousand other insane people before lunchtime.

And then shoving caramel cupcakes into your face when you're done.


This combination is nothing short of dynamite, people. Now, I like a chocolate something as much as the next guy--when the chocolate craving hits, don't get in my way because I will cut you. But at any other time, whether my sweet tooth is already awake or not, I am a sucker for all things vanilla and/or caramel. At a cupcakery, I will always go for the vanilla cake/vanilla frosting combination first. I feel like you can always tell how good a bakery really is by their vanilla cake and icing--with such a pure, uncomplicated flavoring, the quality of the ingredients and technique can't hide. I've been forever searching for the magical recipe that would become my go-to vanilla cake in the Piece of Cake kitchen. And guys, my epiphany has arrived in the form of this completely perfect Vanilla Buttermilk Cake.


It's just so lovely and balanced, all things considered. Perfectly tender. Moist but not sticky. Light but not preciously so. A velvety, tight crumb, but not at all dense. And thanks to the buttermilk, the level of sweetness is so right on and the notes of the vanilla are heightened.


The not-too-sweet cake also creates the perfect canvas for toppings of all sorts, from traditional buttercreams to more sugar-heavy icings that might cause your molars to ache on a sweeter cake, like my great grandmother Ruth Enzenbacher's other-worldly caramel icing. All hail the dark brown sugar gods, this whole thing just got real.


Now, my memories of my great grandmother, who passed away when I was about 7, are fuzzy at best. I do remember her halo of silver white hair, soft cheeks and totally impressive salt and pepper shaker collection. But if this icing recipe of hers is any indication of who she really was, then I can also add to the list of character traits no-nonsense and the ability to turn out something showstopping out of the most humble ingredients. This icing comes together in less than five minutes on the stove top with a wooden spoon, just butter, sugar and a touch of milk and salt--it's a beautiful thing.


But don't let the easy prep fool you here--this caramel icing waits for no one (I am not sure if this was also true of my great grandmother). It may come together in minutes, but you have seconds to work with it before it sets up. Which is why I have no photo of the icing technique for you, which involved forgoing a spatula and instead dipping the tops of the cakes in the hot icing with a quick swirl before flipping them upright. I sort of felt like I was rescuing children from a burning building while icing these cupcakes--"Go, go, go!"--but the faster you can work, the more evenly glossy and gorgeous the icing sets up.


However, the fury of icing the cupcakes was totally worth it in the end. I cannot tell you how delicious the results were. Just like the madness of working up to the half marathon and then rocking it so hard. And can I just say how much I love it when I'm writing and a dorky metaphor just sort of falls in my lap like that?


Caramel Cupcakes
(Vanilla Buttermilk Cake with Caramel Icing)
Cake recipe adapted from Sky High

Make sure the cupcakes are completely cooled, cold even, before icing them. If they are the slightest bit warm, they will tear when you turn them over to dip them in the hot icing. If the icing begins to harden while you are working with it, just set it over a medium flame and stir it for 30 seconds or so until it loosens up again.

Makes about 18 iced cupcakes

For the cupcakes:

2 whole eggs
1 egg yolk
1 teaspoon pure vanilla extract
1/2 cup plus 2 tablespoons buttermilk, at room temperature
1 1/2 cups cake flour
1 cup sugar
2 1/4 teaspoons baking powder
1/4 teaspoon salt
1/2 cup (1 stick) unsalted butter, cut into 1/2 inch cubes, at room temperature

For the caramel icing:

1 cup dark brown sugar, firmly packed
5 tablespoons unsalted butter, cut into a few chunks
Generous 1/4 teaspoon salt
1/4 cup milk
1/2 teaspoon pure vanilla extract
1 cup confectioners' sugar

Place an oven rack to the center position and preheat the it to 350 degrees. Line 18 cups of 2 muffin tins with paper liners.

In a large measuring cup, whisk together, the eggs, egg yolk, vanilla, and buttermilk and set aside.

In the bowl of an electric mixer, whisk together the flour, sugar, baking powder and salt. Fit the mixer with the paddle attachment and turn the mixer on low. With the mixer running, gradually drop in the butter pieces and mix until the texture is uniform and the bits of butter aren't discernable, about 2 minutes. With the mixer still on low, begin slowly pouring in the wet ingredients. When all the wet ingredients have been added, crank the speed up to medium and mix until the batter is light and fluffy, about 1 1/2 minutes.

Portion the batter into the muffin tins and bake until a toothpick comes out clean and the tops spring back when lightly touched, 20-25 minutes. Let cool in the pans for about 10 minutes, then transfer them to a a wire rack to cool completely.

When the cupcakes have cooled, make the icing. Put the dark brown sugar, butter and salt in a medium saucepan, and melt them together over medium heat, stirring often. Bring the mixture to a boil and add the milk and vanilla. Boil for 3 minutes, stirring occasionally. Dump in the confectioners' sugar all at once and beat with a wooden spoon until the icing is thickened and smooth. Quickly ice the cupcakes by holding each by the base and dipping the tops in the hot icing, rolling them slightly to coat evenly. Turn them quickly upright so the icing will even out while it's still warm and will set smoothly. Store any leftovers in an airtight container for up to 4 days.