Showing posts with label tea. Show all posts

Saturday, August 21, 2010

Pears in Sweet Tea Syrup


Ingredients:
10 Bartlett pears
5 cups water
2 cups sugar
3 Tazo Vanilla Rooibos tea bags


Directions:
Prep 3 quart jars. Peel, core and halve the pears. If you'd like, float them in water mixed with Fruit Fresh or lemon juice, to help retain their color. Pack them into the jars. Meanwhile, bring the sugar, tea bags and water to a rolling boil. Do not let it reduce. Pour the hot syrup into the jars, leaving 1/2 inch headspace. Run a knife or a jar scraper to dislodge any bubbles while turning the jar slightly. Seal. Process in a hot water bath for 25 minutes.

Note: This recipe yields a bit more syrup than you will probably need. I scaled it this way because while my 10 pears fit into 3 quart jars, you might have some leftover. There should be enough syrup leftover to can a pint of extra pears if need be.

Tip: I highly recommend the Blue Book Guide to Preserving for learning how to can.


My thoughts:
This week's Tazo secret ingredient was pears. I was trying to think of something that wasn't too autumnal to make. Pears are just coming into season but I am more into peach-berry-tomato mode than pears and apples right now. So I was turning that around in my head for a while and decided I would pair them with the quintessential summer drink, sweet tea. I thought about making some sort of granita or some other frozen dessert but the sort of grainy texture of Bartlett pears made me think it might not be as smooth as I'd like. So I decided to can them in a light sweet tea syrup. Most recipes I found for canning pears use the hot pack method where you heat the pears through in the syrup but I think that makes the pears a little mushy. Instead I decided to process the pears more like peaches so they would hopefully retain the shape and texture better after the long processing time.


Sunday, August 15, 2010

Red Quinoa Peach Porridge with White Tea Syrup


Ingredients:
2 peaches, peeled and diced
1 1/2 cup water
1 cup Tazo White Cucumber tea (white tea with cucumber)
1/2 cup milk
1/4 cup sugar
1/4 cup red quinoa
1/4 cup old fashioned rolled oats


Directions:
Place the quinoa, peaches and water in a small saucepan. Cook for 30 minutes then add the oatmeal and milk. Cook until the oats are tender, about 10 minutes, stirring occasionally. Meanwhile, bring the sugar and tea to a boil in a very small pan. Boil until it reduces to a syrup (about 30 minutes). Stir the quinoa mixture. Drizzle with syrup.


My thoughts:
Recently I was approached by Tazo to develop some new recipes using their tea. I received a big box of various teas to play around with and once a week for three weeks I will be sent a mystery ingredient to use in the recipe as well. Last week the ingredient was lavender and I made some yummy Oolong Cupcakes with Lavender Frosting. This week the ingredient is red quinoa. Might I admit something? I am not the biggest quinoa fan. I like the texture and the idea of quinoa but I don't love the flavor. Maybe I got burned out on it last year when I was developing recipes for the cookbook but I was a little disappointed that it was the mystery ingredient. But I rallied and decided to pair it with a seasonal ingredient: peaches. Cooked together the quinoa took on a pleasant peachy flavor and the oatmeal made it creamy. When topped with the tasty cucumber white tea syrup, it became a fresh tasting breakfast that had the texture benefits of quinoa but the flavor wasn't overpowering.

Saturday, August 7, 2010

Oolong Cupcakes with Lavender Frosting


Ingredients:
for the cupcake:
1 cup flour
1/2 cup light brown sugar
2/3 cup milk
1/4 cup canola oil
1 teaspoon baking powder
1/2 teaspoon vanilla
1/4 teaspoon salt
1 egg, at room temperature
2 bags Tazo Ti Kwan Yin (oolong) tea


for the frosting:
1 cup sugar
1/4 cup water
2 egg whites
1 1/2 to 2 tablespoons culinary grade lavender
pinch salt
food dye (optional)

Directions:
For the cupcakes:
Bring the milk and tea to a boil. Remove from heat and allow to cool to room temperature. Discard the tea bags after thoroughly squeezing out all the milk back into the pan. Preheat oven to 350. Line or grease and flour 6 wells in a cupcake pan. Place all of the ingredients in a large bowl and mix until well combined. The batter will be rather thin, so don't be alarmed. Fill each well 2/3 of the way full. Bake about 15 minutes or until a toothpick inserted the center of a cupcake comes out clean or with just one or two dry crumbs. Cool briefly in the pan, then remove cupcakes to wire racks to cool completely before icing.


For the frosting:
Beat the egg whites and salt to soft peaks using an electric mixer. Meanwhile, in a medium saucepan, bring sugar, lavender and water to a boil, stirring occasionally. Continue to boil until it reaches soft ball stage (when a drop of the syrup forms a soft ball when dropped in cool water) while continuing to stir occasionally. Whisk the mixture through a fine sieve into a heat safe measuring cup and discard the lavender. Keep the mixer running (to be safe use a stand mixer or a friend to complete this next step) and pour a continuous stream of molten syrup into the egg whites. Continue to beat for about 5 minutes or until the frosting is fluffy, glossy and cool. Frost cooled cupcakes.


My thoughts:
Recently I was approached by Tazo to develop some new recipes using their tea. It is actually quite fun, I got a big box of various teas to play around with and once a week for three weeks I will be sent a mystery ingredient to use in the recipe as well. I was excited for the challenge, after 6 plus years and nearly 1,100 original recipes, sometimes a culinary puzzle is welcome. This week it was culinary lavender. I haven't made anything with lavender before so that was an interesting twist.

I had lots of ideas but I decided to go classic and make some cupcakes. Who doesn't love cupcakes? No one I would like to know. These cupcakes are more for grown ups than the little ones I think, they are subtly flavored and not overly sweet. The cupcakes themselves taste like milky tea and are quite light textured. I love how the fluffy lavender frosting turned out, that is one of my favorite types of frosting to make and as I hoped, the lavender flavor was strong but not overpowering. I did add a little dye to the icing, something I don't always do but I was worried the icing might look grey or a little "off" left unadulterated. I also made a bit too much frosting so if you double the cupcake recipe, I think you could use this same frosting recipe without alteration and have enough to frost all of the cupcakes, it is just a tricky recipe to scale down any further than I did.

Wednesday, September 2, 2009

I Am Destroyer


Prelude:

I just wanted a cup of tea.  How could I have known that this simple desire would lead to such utter chaos and destruction?

I was staying with a friend's parents while traveling in Oregon.  They were kind enough to feed me dinner AND dessert.  They cheerfully complied with all of my food-allergy demands.  They let me sleep on their vintage leather sofa without a protective bed-sheet underneath my filthy, drooling head.  And I destroyed their home.

I knew that I had to leave very early the next morning.  I would need caffeine.  I should have just gone to a gas station, but I didn't.   That night, I asked my hosts if I could brew some tea before I left in the morning.  My friend's mother showed me how to work the immaculately crafted and expensive-looking marble stove.  There was a teapot sitting inconspicuously on the counter.  I assumed that it was the vessel in which I was to heat my water.   Seeing no further need for clarification, I bid my warm and friendly hosts goodnight.

Chaos:

4:00 AM:  My cell phone heralded that fateful day with a salsa-inspired ringtone.  I groggily shuffled into the kitchen, turned on the stove and placed the teapot upon the right rear burner.   I didn't turn on a light because I wanted to be as unobtrusive as possible.  I sat down at the kitchen table, waiting for the telltale whistle of my boiling water.

It was about 4:07 when I first noticed the smell.

My sleepy brain slowly began to realize that there was something wrong.  "Burning plastic is not a normal household smell..." it thought to itself.

I got up to investigate the source of this noxious odor, thinking that maybe the oven had just been cleaned and I accidentally turned it on instead of the stove.  Oven cleaner can sometimes smell like burning plastic.

When I got closer to the stove, my theory about the oven cleaner was thoroughly debunked based purely upon the raw strength of the smell.  This was no ordinary scent.  Something epic had occurred to produce this vile trespass upon my nasal passages.

I probably should have turned on a light, but I didn't want to alert my hosts to the presently unidentified disaster in their kitchen.  I figured that I would identify the disaster, act quickly to control the problem and clean up any evidence before I went merrily on my way with no one the wiser.

Except that's not how it happened.  Because I didn't turn on the light, I had to rely on my sense of smell to locate the source of the problem.  Unsurprisingly, it turned out to be the teapot.

"Oh," I thought, "it must be a new teapot.   Maybe they didn't take off the price sticker and now it is burning."

If only that were the case.

I went to grab the teapot off the stove.   When I lifted it up, a plume of chemical vapors erupted into the air.  At this point, I was thoroughly confused.   What the hell?  Why was this happening?  I was starting to panic.

I turned off the stove and poured water on the chemical-spewing teapot because I figured that the problem was most likely burning-related and water fixes burning.  I thought I had the problem solved.

When the cloud of toxic fumes responded by growing in magnitude, I began to grasp the severity of the situation.

The adrenaline coursing through my veins finally succeeded in waking up my brain.  I opened the microwave to cast some unobtrusive light upon my predicament.

Destruction:

Holy sh*t.  Nothing could have prepared me for what I saw.

The teapot had been reduced to a smoldering lump which was presently oozing outward in all directions, destroying everything in its path.

I picked up what used to be the teapot by its cord and threw it in the sink.  If you were paying attention, you may have noticed that I said "cord."  The teapot was not meant for stovetop use.  It was a plastic plug-in teapot.  "Was" being the operant word.

I don't know what this f**king demon of a teapot was made out of, but whatever it was, it had a remarkable capacity to keep burning despite my best efforts to put it out.  Also, adding water seemed to simply exacerbate the gaseous cloud that was beginning to form in the kitchen.

I took the object formerly recognized as a teapot outside.

By the day's first light, I could finally see the consequences of my actions clearly.   The charred relic of a teapot dangled limply by its mangled cord, winding in and winding out on itself as if it was shaking its head disapprovingly, saying "look what you did!"

I set it in the grass and hurried back inside.   I opened all the doors and windows.  I turned on the fan.   I quietly closed the door to my hosts' bedroom.

I could then turn on the light (why hadn't I done this earlier??)

I died a little inside when I saw that the previously immaculate stove was covered in a tarry, bubbling layer of super-plastic.  I stood, eyes transfixed on the spectacle before me, contemplating my escape options.

Action:

I could leave right then and let them try to figure out what happened.

I could tie myself to a chair and pretend that marauding anti-teapot extremists had ravaged the now-defunct piece of kitchenware as I watched helplessly.

I began frantically searching the kitchen for an answer.  I found a spatula.  I used the spatula to scrape off the worst of the mess.  It didn't really work.   I just destroyed the spatula too.

Applying my knowledge of chemistry, I began rifling through the bathroom drawers, looking for something that would dissolve plastic.  nail-polish remover!  Acetone will dissolve plastic, or at least loosen its grip on other substances.

I took the nail-polish remover into the kitchen and applied abundant amounts of it to the charred remains of the teapot.  (I don't even want to know what kind of damage my lungs were suffering form all these noxious vapors.)

It actually worked fairly well.  The stovetop was devoid of any stuck-on plastic.  If I tilted my head just right, I couldn't even tell that it was irreparably damaged.

I cleaned up the rest of my mess, and packed my things.

Atonement:

It was a Saturday, so I felt even less keen about waking up the proprietors of the household I had so nearly destroyed.

I opted to leave a note:

"Dear J_____ and J_______:


First of all, thank you for opening your home to me.  I truly appreciate your hospitality.  I am sure you are wondering what that smell is.  I regret to inform you that your teapot has perished at my hand.   I didn't realize it was an electric teapot and I put it on the stove.  I googled "burning plastic fumes" and, luckily, you guys should be okay as long as you don't get a really bad headache or start throwing up.   If you do, go to the doctor immediately.  I tried to clean up the stove.  I had to use nail-polish remover to get the plastic off, so that is why your entire house smells like acetone.  Don't worry, it'll burn right off when you turn on the stove again.  The remains of the teapot are out back, airing out.  I checked to make sure it hadn't set  your yard on fire before I left.  Enclosed, please find $20.  I know that the damage I have caused to your stove is far more costly than this meager amount could ever hope to atone for, but it is all I have.  It should at least be enough to buy another teapot.  I have some stuff that I could sell, so I should be able to pay you back in full at some point.  Once again, thank you for your hospitality and I am sorry that I destroyed your teapot and stove.  Please forgive me.  


Sincerely,


Allie"

Epilogue:

My friend's parents are wonderful people with a good sense of humor.  They said that they understood, and his mother actually blamed herself for not telling me where the real teapot was.  She said she was impressed with my ingenuity in regard to cleaning up after myself.  Sadly, all the ingenuity in the world cannot make up for a total lack of foresight.

Thursday, June 25, 2009

Tea-Chile Smoked Grilled Chicken with Korean Spices


Ingredients:
2 1/2 lb chicken thighs and legs

for the marinade:
2 cloves garlic, grated
1 shallot, grated
1 inch ginger, grated
1/2 cup soy sauce
2 tablespoons Korean malt syrup
1 tablespoon coarse-ground Korean red pepper (kochukaru)
1 tablespoon sugar


for the tea-chile packet:
3 tablespoons loose white tea
8 dried red chiles
1/2 teaspoon water

Directions:
Place the chicken in a nonreactive container. In a small bowl, whisk together the marinade directions. Pour over the chicken. Seal and refrigerate for 1-2 hours.

Place the chiles and tea in the middle of a medium-sized rectangle of foil. Sprinkle with the water. Fold the sides up to form a packet. Poke holes in the packet with a fork. Place on the hot coals. Arrange the chicken on a greased grill. Cook covered and vented until the chicken is thoroughly cooked through, turning halfway through the cooking time.


My thoughts:
my grill friday
This is some flavorful chicken. It isn't terribly spicy but the spices permeate the chicken pieces making every bite as tasty as the last. The tea-chile packet adds a subtle smoky-spice flavor to the meat that really sets it apart from other grilled chickens. The best part? Despite the intense flavor, it really isn't any more difficult to make than any other method of grilling chicken.


Tuesday, February 19, 2008

Matcha Marshmallows


Ingredients:
1/2 oz. unflavored powdered gelatin*
1/2 cup cold water
2 cups granulated sugar
2/3 cup corn syrup**
1/4 cup water
1/4 teaspoon salt
1 tablespoon matcha powder
Confectioners' sugar for dredging

Directions:

In a large bowl, sprinkle gelatin over 1/2 cup cold water. Allow to seep for 10 minutes. In a medium saucepan, combine sugar, corn syrup, and 1/4 cup water. Bring to a vigorous boil and boil for 1 minute. Pour boiling syrup into gelatin and mix at high speed for 1 minute. Add the salt and matcha and beat for 12 minutes. Oil your hands and a spatula and scrape into a 11" x 7" pan*** lined with oiled plastic wrap or sprayed with cooking spray and spread evenly. After pouring marshmallow mixture into the pan, take another piece of oiled plastic wrap and press firmly on the top, oil side down, to smooth the marshmallow. Allow to rest 3 hours. Invert the pan into plate full of confectioners� sugar and dredge the marshmallow through. Remove and cut into pieces with kitchen sheers or a knife. Dredge each piece of marshmallow in confectioners' sugar. Store in an air tight container.

Note: Instead of dredging in plain confectioners' sugar, dredge in a 20/80 mixture of matcha and confectioners' sugar.

*1/2 oz. gelatin is equal to 2 packets Knox unflavored gelatin

**I like to use corn syrup made without high-fructose syrup. Oddly, I find it most frequently at Asian markets. Also make sure that the corn syrup does not have vanilla added.

***Depending on how thick you want your marshmallows, you might want to keep a second, smaller pan (like a loaf pan) handy for overflow.

My thoughts:
Okay, I already thought marshmallow making was magic-you can't beat molten sugar turning in to a fluffy treat in just a few minutes for pure cooking alchemy- but these matcha marshmallows are a revelation. They have a wonderful green tea flavor without being overwhelming or medicinal. I didn't add food dye so they are just the faintest of green, but if you wanted a more verdant green, a couple of drops of food dye would do the trick. They are great to eat out of hand, melted on cupcakes (instead of icing!) in dark chocolate s'mores and in hot chocolate.

Matcha is now readily available from many online merchants including Amazon .

Tuesday, October 23, 2007

Green Tea & Tangerine Tapioca Pudding


Ingredients:
2 cups whole milk
1/2 cup sugar
1/4 cup small pearl tapioca (not instant)
1 teaspoon matcha powder*
zest and juice from 1/2 tangerine
1 egg

Directions:
Set the slow cooker on low. Pour the milk, tapioca, matcha and sugar in, whisk until the sugar dissolves. Cook for 1 1/2 hours, or until the tapioca is soft and translucent. Stir in the egg, zests and juice. Cook an additional 1/2 hour. Serve warm.

*If you don't have matcha powder, seep 2 green tea bags in the milk for 1/2 hour before cooking, discarding the bags.

Yield: about 4 servings


Note: for more traditional tapioca pudding made in the slow cooker, eliminate the green tea/matcha and juice/zest and sub about a tablespoon of vanilla.

My thoughts:
I've always wanted to come up with a dessert recipe to make in the slow cooker (if for no other reason than to say I did) and long cooking tapioca pudding seemed like the perfect choice. It isn't a faster method, but it eliminates all that carpal tunnel inducing stirring that even so-called "instant" tapioca requires. Plain, ordinary tapioca pudding sounded sort of boring though. I was stuck thinking of a good twist when I spied a bag of jumbo sized pearls for making boba tea and since the only real difference between the pearls in tapioca pudding and in boba tea is the size, I thought I'd make a boba-inspired pudding. I was nervous about doing it in the slow cooker but I shouldn't have been. The end result was the best tapioca pudding ever. Creamy and cooked to perfection. I am never making tapioca pudding any other way ever again.

Sunday, June 17, 2007

Baked Doughnuts Three Ways: Vanilla Bean, Green Tea & Chocolate


Ingredients:
5 cups flour, plus more for kneading
1 2/3 cup warm milk
3/4 cup sugar plus more for dipping
1/4 oz instant yeast
2 tablespoons butter, melted and cooled PLUS 3 additional tablespoons (set aside)
2 eggs
2 teaspoons vanilla

CHOOSE ONE:

3 tablespoons matcha (green tea powder)
5 tablespoons dutch process cocoa
2 tablespoons vanilla paste

Directions:
Whisk together the egg, milk, and vanilla and vanilla paste (if making vanilla bean doughnuts). In a separate bowl, whisk together the flour, yeast and either the cocoa or the matcha (if making chocolate or matcha doughnuts). Slowly stir the milk mixture into the dry ingredients until a dough forms. Flour a counter top and knead, adding more flour a tablespoon at a time as needed, until a very slightly sticky, elastic ball of dough forms. Place in a buttered bowl, cover with a towel and allow to rise, about 1 hour or until it has doubled in bulk. Punch down, and roll it out on a floured surface until it is about 1/2 to 2/3 of an inch thick. If you have a doughnut cutter, use that to cut out the doughnuts. If not, use a small cutter to make doughnut "holes" or improvise using a drinking glass or large cookie cutters and smaller cutters to make the holes. You could also make round, biscuit sized doughnuts with no holes. Place the doughnuts on 2 greased cookie sheets, cover with a towel and allow to rise an additional hour. Preheat the oven to 375. Melt the additional 3 tablespoons of butter. Pour some (granulated) sugar on a plate. Bake the doughnuts exactly 6 minutes, then remove to a wire rack. Brush each doughnut with melted butter and dip in sugar. Serve hot, although they are still pretty good at room temperature. Store up to 1 day (but eating them immediately is preferred) in a air tight container.
My thoughts:
I've seen various recipes for baked doughnuts and was wanted to give it a shot. I am sure doughnut purists would sneer at the mere thought of a baked doughnut but I honestly didn't think I'd miss the frying. Doughnuts, while typically fried, are not like fried chicken or onion rings where the crisp crust you can only get from frying is the star, and the best doughnuts don't have a trace of grease. I did some experimentation and came up with this master recipe, with three variations. It is incredibly easy, it basically just a sweet bread dough, very low in fat, light and tender. The addition of the various favors (why don't bakeries flavor their dough? I've thought for years that would the next logical step in doughnut making) give you a very flavorful sweet that only needs a roll in sugar.

Tuesday, May 8, 2007

Matcha (Green Tea) Angel Food Cake


Ingredients:
12 cold egg whites
1 cup cake or super fine flour*
1 1/2 cups super fine sugar*
2 tablespoons matcha (green tea powder)
1 tablespoon warm water
1 teaspoon cream of tarter
1/2 teaspoon salt

Directions:

Preheat oven to 350. Whisk together all of the flour, 3/4 cup of sugar and the matcha powder, set aside. Using a stand mixer with a whisk attachment or a hand mixer and some stamina, beat the egg whites, water, salt and cream of tarter until the soft peak stage, about 3-4 minutes) in a clean metal bowl. Continue beating and stream in the remaining 3/4 cup sugar. Beat until the the egg white are stiff and glossy, but not dried looking. Using a spatula, fold in a small batch of the flour at time, in about 5 parts. Transfer to a ungreased tube or bundt pan and backe 35 minutes or until the top is browned and it bounces back when touched. Invert the pan on its legs or over a large bottle to cool, one hour. Use a knife or spatula to loosen the cake from the sides. Slice and serve. Store leftovers in an air tight container, up to one day.


*I don't generally keep super fine sugar or flour on hand. I just pulse regular sugar or flour in the food processor for a "homemade" version. For an accurate measurement, measure after pulsing.


My thoughts:
Despite using copious amounts of egg whites, this cake came together in 15 minutes. It is also virtually fat free and is full of natural antioxidants thanks to the matcha. It is so high, so fluffy and each bite has an almost flowery taste of tea-so tasty, it is easy to forget that is one of the healthiest cakes you can make.

Friday, April 20, 2007

Green Tea & Black Pearl Cake


Ingredients:
1 1/3 cup flour
2/3 cup sugar
1/3 cup milk
1/3 cup vegetable oil
1 tablespoon green tea powder
1 teaspoon baking powder
1 egg, at room temperature
4 oz Vosges Black Pearl chips*

Directions:
Preheat oven to 350. Grease and flour or spray one loaf pan. In a small bowl, whisk togher the egg, oil, and milk. In a large bowl, whisk together the flour, baking powder, sugar and green tea powder. Pour in the wet ingredients and mix to combine> Fold in chips. Pour into prepared pan and bake 40-50 minutes or until a toothpick inserted in the middle comes out clean. Cool briefly in pan, then remove to wire rack and cool completely.


*These are dark chocolate chips that contain black sesame seeds, wasabi and ginger. You can sub 4 oz semi sweet chips, 1/4 teaspoon ginger, 1/4 teaspoon black sesame seeds and wasabi to taste for a similar effect.
My thoughts:
I recently came in possession of both Japanese-inspired Black Pearl chips and matcha powder and I have been trying to think of a way to combine the two. The Black Pearl chips, while divine, only come in tiny 4 oz bags, which eliminated many old standbys like cookies and fudge. I finally arrived at the perfect solution: a simple loaf cake. Sweet and moist, it doesn't need icing and the flavors of the delightful chips and the green tea shine through. I love the lurid green cake and the slightly gooey chips. It couldn't have been a better choice.

Sunday, December 3, 2006

Chai Hot Chocolate


Recently the editor of Four Weeks Magazine contacted me and asked if I'd be interested in contributing an original recipe for hot chocolate for this month's issue. Of course I was! Who doesn't love hot chocolate? I took it as a an opportunity to try something new and created a yummy recipe for chai hot chocolate. Check it here, along with 3 other delicious sounding recipes from other food bloggers.

Friday, November 10, 2006

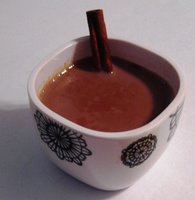
Chai


Ingredients:
2 cups milk
2 cups water
2 tablespoons cardamom, crushed
4 teaspoons black leaf tea*
2 teaspoons granular black tea**
2 cinnamon sticks
2 cloves
10 black peppercorns
1 inch clove of ginger, smashed with a knife
sugar to taste

*green label tea (ask for it at your local Indian grocery)
** red label tea (ask for it at your local Indian grocery)

Directions:
In a large saucepan, bring the milk, water, both teas and all of the spices to boil. Reduce heat and simmer 15 minutes or until the it coats the back of a spoon. Add sugar (traditionally chai is served rather sweet) and stir. Strain into 4 large mugs.


My thoughts:
While I am not a tea fan, my husband and the rest of his family is. We are up in NYC this weekend visiting his parents and sister and he made this for them. His sister is back for a 2 month visit from India, where she has been living the last couple of years. This is as authentic as he can make it- he learned from some Indian coworkers years ago and has been making it ever since! Try and find red and green label tea at your local Indian grocery.
This is also for Ivonne's Dishes of Comfort-it may not be my top comfort food, but it certainly is one of my sister-in-law's favorites.

Thursday, March 23, 2006

Irish Breakfast Tea Ice Cream


Irish Breakfast Tea Ice Cream
Ingredients:
2 cup cream
1 cup whole milk
1 cup sugar
4 tablespoons Irish Breakfast Tea
6 egg yolks

Directions:

In a medium saucepan, combine milk, cream and tea leaves. Bring to a full boil then remove from heat. Allow tea to seep in the milk/cream mixture for 15 minutes. Meanwhile, using a mixer, beat the eggs and the sugar together until it forms a ribbon (if you drip a line of the batter from the beater over the rest of the batter, it leaves a "ribbon" and then disappears). Strain the tea leaves out of the cream mixture and discard them. Return the cream mixture to low heat and bring to a slow simmer. Add a tiny bit of the cream mixture to the egg, whisking briskly, to temper the eggs. The cream mustn't be too hot or it will curdle the egg mixture. If this happens, you must start again. Slowly whisk together the remaining cream mixture with the egg mixture. Pour the egg/cream mixture into a clean pot and gently bring to a slow simmer. This will cook the eggs and prevent possible bacteria from forming. Strain into a clean bowl and discard any solids remaining. Place the mixture in the refrigerator and allow to cool, about 3 hours (or over night), until chilled. Pour into ice cream maker and continue according to the manufacturer's directions.

My thoughts:
This my submission for this month's TeaChef competition. I was excited they picked me to participate and it was fun to create a recipe using tea. I really enjoy green tea ice cream (which is usually made with matcha- green tea powder- not loose tea) and thought that Irish breakfast would make good ice cream as well. I was right- it's kind of malty which complements the creaminess of ice cream. Plus I am looking forward to warmer weather and what goes better with warm weather than ice cream?